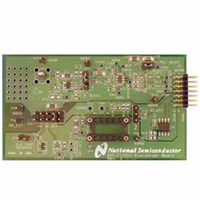
ADC121C02XEB/NOPB National Semiconductor, ADC121C02XEB/NOPB Datasheet - Page 9

ADC121C02XEB/NOPB
Manufacturer Part Number
ADC121C02XEB/NOPB
Description
BOARD EVAL FOR ADC121C-21
Manufacturer
National Semiconductor
Series
PowerWise®r
Specifications of ADC121C02XEB/NOPB
Number Of Adc's
1
Number Of Bits
12
Sampling Rate (per Second)
188.9k
Data Interface
Serial
Inputs Per Adc
1 Single Ended
Input Range
0 ~ 5.5 V
Power (typ) @ Conditions
3.67mw @ 188.9kSPS
Voltage Supply Source
Single Supply
Operating Temperature
-40°C ~ 105°C
Utilized Ic / Part
ADC121C021,ADC121C027
Silicon Manufacturer
National
Silicon Core Number
ADC121C021, ADC121C027
Kit Application Type
Data Converter
Application Sub Type
ADC
Kit Contents
Board
Lead Free Status / RoHS Status
Lead free / RoHS Compliant
Other names
ADC121C02XEB
3. Apply power as specified in Section 4.4, click
4. Click on the "Close" button to close the
5. Navigate to the ADC121C021 Eval Board
6. Select the desired I
9
on the "Reset" button and await the firmware
to download.
System Settings window.
Window.
device (Figure 10).
down menu (Figure 11).
Figure 10: ADC121C021 Control Panel
Figure 11: ADC121C021 Control Panel
This is the Control Panel for the
2
C Speed from the pull-
7. Set the I
8. Press the “Read Registers” button. All of the
9. Configure the ADC’s internal registers. The
10. To capture a dataset from the ADC, navigate
11. After the steps outlined in Section 3.2 are
5.2 Data Analysis
WaveVision main menu will display an output plot.
Make sure there is no clipping of data samples.
Click on the software histogram tab and ensure
data does not exceed the limits of the device. The
samples may be further analyzed by clicking on
the magnifying glass icon, then clicking and
dragging across a specific area of the plot for
better data inspection (Figure 12).
WaveVision 4 Board User's Guide for more
details.
address will default to the correct address for
the ADC121C021 (54hex). If evaluating the
ADC121C027, the I
changed to reflect the state of the address
selection pin (ADDR).
register fields will update (Figure 10).
Alert function and Automatic Conversion
Mode are setup through the Configuration
register. After making changes to a register
value, press the Enter key to write the register
(Figure 10).
back to the main WaveVision window.
completed, click on ‘Acquire’ then ‘Samples’
from the Main Menu (you can also press the
F1 shortcut key). If a dialog box opens, select
‘Discard’ or press the Escape (Esc) key to
start collecting new samples.
Figure 12: Software Histogram: Sine Wave Input
2
C Slave Address (Figure 10). The
2
C address must be
http://www.national.com
See the


