EMPCR ETERNA, EMPCR Datasheet - Page 2
EMPCR
Manufacturer Part Number
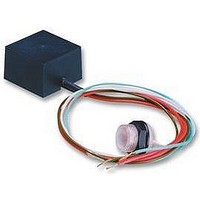
EMPCR
Description
PHOTOCELL, MINIATURE, REMOTE FIXING
Manufacturer
ETERNA
Datasheet
1.EMPCR.pdf
(2 pages)
Specifications of EMPCR
Svhc
No SVHC (15-Dec-2010)
Ip/nema Rating
IP20


Safety markings:
Read this first:
>
>
>
>
>
>
>
>
>
>
>
Installation:
1)
2)
3)
4)
5)
6)
7)
8)
9)
This fitting must be installed in accordance with the Building Regulations. These may be
obtained from HMSO or viewed and downloaded from www.odpm.gov.uk following the link for
Building Regulations.
If in any doubt, consult a qualified electrician.
Switch off the mains before commencing installation and remove the appropriate circuit fuse.
Suitable for outdoor use when installed correctly in a light fitting.
Before making fixing hole(s), check that there are no obstructions hidden beneath the mounting
surface such as pipes or cables.
The chosen location of your new fitting should allow for the product to be securely mounted and
safely connected to the mains supply ( lighting circuit ).
If the location of your new fitting requires the provision of a new electrical supply, the supply must
conform with the requirements of the Building Regulations.
This product is designed for permanent connection to fixed wiring: this should be either a suitable
lighting circuit ( protected with a 5 or 6 Amp MCB or fuse ) or a fused spur ( with a 3 Amp fuse ) via
a fused connection unit. We recommend that the supply incorporates a switch for ease of
operation.
Make connections to the electrical supply in accordance with the following code:
This fitting is double insulated, do not connect any part to earth.
You are advised at every stage of your installation to double-check any electrical connections you
have made. After you have completed your installation there are electrical tests that should be
carried out: these tests are specified in the Wiring Regulations ( BS7671 ) referred to in the
Building Regulations. If in doubt, consult a qualified electrician.
Select a suitable “open” mounting position so that artificial light (especially the switched load)
cannot fall on the photocell.
Make a 20 mm diameter hole in the mounting surface ensuring that the hole is free from “burrs” or
rough edges.
Remove the black nut by unscrewing anti-clockwise and lift off the top rubber washer.
Install the photocell in the prepared hole from the interior ensuring that the bottom rubber washer
is in place.
Fit the top rubber washer to the protruding photocell and secure in place with the black nut by
turning it clockwise.
Connect the supply as detailed above.
Connect the light to be switched to the Red and Blue wires.
Ensure that all connections are secure and no “whiskers” or bare wires are left free of the
terminals.
Restore the power and test the installation by covering the photocell unit (the product box is
suitable), waiting one minute, removing the box and checking that the unit has switched off.
Live - Brown or Red
Neutral - Blue or Black
Related parts for EMPCR
Image
Part Number
Description
Manufacturer
Datasheet
Request
R

Part Number:
Description:
PHOTOCELL, MINIATURE
Manufacturer:
ETERNA
Datasheet:

Part Number:
Description:
LIGHT FITTING, CEILING, SLIM, 16W
Manufacturer:
ETERNA
Datasheet:

Part Number:
Description:
TRANSFORMER, 12V, 105VA, 5WAY
Manufacturer:
ETERNA
Datasheet:

Part Number:
Description:
PHOTOCELL, NEMA, SOCKET
Manufacturer:
ETERNA
Datasheet:

Part Number:
Description:
PHOTOCELL, NEMA SOCKET KIT
Manufacturer:
ETERNA
Datasheet:

Part Number:
Description:
PHOTOCELL, WITH TIMER
Manufacturer:
ETERNA
Datasheet:

Part Number:
Description:
SWITCH, LIGHTING, AUTO
Manufacturer:
ETERNA
Datasheet:


Part Number:
Description:
BRICK LIGHT, FRAMED
Manufacturer:
ETERNA
Datasheet:


Part Number:
Description:
BULKHEAD, GREY
Manufacturer:
ETERNA
Datasheet:

Part Number:
Description:
BULKHEAD, CORNER, BLK
Manufacturer:
ETERNA
Datasheet:
Part Number:
Description:
TRANSFORMER, 12V, 105VA, 5WAY
Manufacturer:
ETERNA
Datasheet:

Part Number:
Description:
Standalone Linear Li-Ion Battery Charger
Manufacturer:
EMP
Datasheet: