FT20-RLH-PSM4 SENSOPART, FT20-RLH-PSM4 Datasheet
FT20-RLH-PSM4
Manufacturer Part Number
FT20-RLH-PSM4
Description
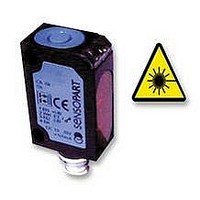
PHOTOSWITCH, PNP, NO/NC
Manufacturer
SENSOPART
Datasheet
1.FT20-RLH-PSM4.pdf
(2 pages)
Specifications of FT20-RLH-PSM4
Frequency Response Max
1kHz
Sensing Range Max
60mm
Sensor Input
Optical
Supply Voltage Dc Max
30VDC
Connector Type
4 Pin M8 Plug
External Depth
12mm
External Length / Height
32mm
External Width
20mm
Output Type
PNP NO
Ip/nema Rating
IP67
Operating Frequency
1kHz


FT 20 RL
Laser-Kontrasttaster / laser contrast switch
Grenzreichweite (mm)
max. distance (mm)
Anschluß
connection
Ausgang (voreingestellt)
output (preset)
Anschlußbild (s. Rückseite)
wiring diagram (see reverse)
Typ / Bestellbezeichnung
type / order ref.
Änderungen vorbehalten / All rights for alterations reserved
SensoPart Industriesensorik GmbH, D-79695 Wieden, Tel. 07673-821-0 Fax 07673-821-30
Schaltpunkt einstellen statisch
1.) Sensor auf Objekt ausrichten. LED gelb und LED grün leuchten.
2.) Taste ca. 3 s drücken bis beide LED´s gleichzeitig blinken.
3.) Objekt aus dem Erfassungsbereich entfernen.
4.) Taste ca. 1 s drücken (Hintergrund wird eingelernt).
Schaltpunkt nur mit einem Objekt einstellen
1.) Sensor auf Objekt ausrichten. LED gelb und LED grün leuchten.
2.) Taste ca. 3 s drücken bis beide LED´s gleichzeitig blinken.
3.) Objekt im Erfassungsbereich lassen und Taste nochmals 1 s drücken.
Empfindlichkeit einstellen bei laufendem Prozess
1.) Sensor auf Objekt ausrichten. LED grün an, LED gelb undefiniert.
2.) Im Lichtweg befindet sich nur der laufende Prozess; Taste ca. 3 s
3.) Taste erneut drücken, bis mindestens 1 Prozesszyklus im Lichtweg
Ausgangsfunktion einstellen (Hell- / Dunkelschaltend)
1.) Taste ca. 13 s drücken.
2.) Taste loslassen, grüne LED blinkt.
3.) Während die grüne LED blinkt wird bei jedem Tastendruck die Aus-
Originalzustand / Maximale Empfindlichkeit (default)
1.) Ohne Objekt im Erfassungsbereich Taste ca. 3 s drücken bis beide
2.) Ohne Objekt im Erfassungsbereich Taste ca. 1 s drücken.
Steuerleitung (ET)
Sobald beide LED´s gleichzeitig blinken ist der Schaltpunkt erfasst.
Die grüne LED blinkt kurz und beginnt zu leuchten, die Schalt-
punkte werden gespeichert, der Sensor ist betriebsbereit.
Sobald beide LED´s gleichzeitig blinken ist der Schaltpunkt erfasst.
Die grüne LED blinkt kurz und beginnt zu leuchten, der Schaltpunkt wird
gespeichert, das Gerät ist betriebsbereit.
drücken bis beide LED´s gleichzeitig blinken.
stattgefunden hat.
a:) Die grüne LED blinkt kurz und beginnt zu leuchten, die Schaltpunkte
b:) Beide LED´s blinken gleichzeitig: der Sensor kann das Objekt nicht
gangsfunktion invertiert.
Dies wird durch die gelbe LED angezeigt. Wenn die Taste während
10 s nicht betätigt wird, ist die aktuelle Ausgangsfunktion gespeichert.
Der Sensor ist betriebsbereit.
LED´s gleichzeitig blinken.
Sensor ist auf maximale Empfindlichkeit eingestellt.
10 ... 30 VDC - gleiche Funktion wie Taste
0 ... 2,5 VDC - Eingabesperre (Taste ohne Funktion)
offen
werden gespeichert, der Sensor ist betriebsbereit.
erfassen, es werden keine Schaltpunkte gespeichert.
- Präzise Erkennung von kleinen Druckmarken /
- Laser-Rotlicht 650 nm / laser red light 650 nm
- Tastweite 150 mm / scanning distance 150 mm
- Steuerleitung zur Einstellung oder Verriegelung /
- Laserschutzklasse 2 / laser protection class 2
- Kleine Bauform / compact housing
- Teach in
- Schließer - Öffner wählbar / N.O. - N.C. selectable
- Normalfunktion
accurate detection of small printing marks
external teach for setting and to disable the teach
button
1 Zyklus
13 s: LED´s blinken abwechselnd
3 s
FT 20 RL-
Stecker
PSM4
PNP
con.
N.O.
200
1
3 s
FT 20 RL-
Stecker
NSM4
NPN
N.O.
con.
200
2
1 s
Sensitivity setup
2.) Press the button 3 s until both LED´s are flashing synchronously.
3.) Leave the object in the scanning area, press the button for 1 s. The
Dynamic sensitivity setup at a running process
1.) Line up sensor to the object. Green LED on, yellow LED is
2.) The chosen running process must be the only thing in the scanning
3.) Press the button for a minimum of one process cycle is completed.
N.O./N.C. setup
1.) Press the button for 13 s.
2.) Release the button: the green LED is on.
3.) During the green LED is on, the output is inverted by pressing the
To return to factory setting (default)
1.) No object in sensing area.
2.) No object in sensing area. Press the button 1 s.
External Teach (ET)
FT 20 RL-
1.) Line up sensor to the object. Yellow LED and green LED are on.
3.) Put the object out of the scanning area.
2.) Press the button 3 s until both LED´s are flashing synchronously.
4.) Press the button 1 s (learning of backround).
Sensitivity setup only with object
1.) Line up sensor to the object. Yellow LED and green LED are on.
(The first threshold is teached).
green LED flashes and stays on, the second treshold is teached, the
sensor is ready to operate.
undefined.
area! Press the button 3 s until both LED´s are flashing synchronously.
a:) The green LED flashes and stays on: both thresholds have been
b:) Both LED´s are flashing synchronously: the sensor can not detect
alternately.
button.
If the button is not pressed during 10 s the present output function is
saved, the sensor is ready to operate.
Press the button 3 s until both LED´s are flashing synchronously.
10 ... 30 VDC - same function as button
0 ... 2,5 VDC - locked (disable teach button)
not connected - operating mode
Kabel
PSK4
cable
PNP
N.O.
200
1
(The first threshold is teached).
The green LED flashes and stays on: the second threshold is
teached, the sensor is ready to operate.
teached, the sensor is ready to operate.
the object, no thresholds are teached
3 s
1 cycle
3 s
1 s. The sensor is set to maximum sensitivity.
FT 20 RL-
Taste / button:
grüne LED / green LED: Funktionsreserve / function reserve
gelbe LED / yellow LED: Status Anzeige / status indicator
NSK4
Kabel
cable
NPN
N.O.
200
2
gelbe LED /
yellow LED
grüne LED /
green LED
Lichtaustritt /
light emitter and
receiver
13 s: Both LED´s are flashing
Teachfunktion / teach function
Printed in Germany
Taste /
button
Related parts for FT20-RLH-PSM4
Image
Part Number
Description
Manufacturer
Datasheet
Request
R

Part Number:
Description:
PHOTOSWITCH, B/GND SUPP, PNP
Manufacturer:
SENSOPART
Datasheet:

Part Number:
Description:
SENSOR, COLOUR/CONTRAST, 1X4MM, RS485
Manufacturer:
SENSOPART
Datasheet:
Part Number:
Description:
SENSOR, COLOUR/CONTRAST, 1X4MM, RS485
Manufacturer:
SENSOPART
Datasheet:
Part Number:
Description:
SENSOR, COLOUR/CONTRAST, 1X4MM
Manufacturer:
SENSOPART
Datasheet:
Part Number:
Description:
SENSOR, COLOUR/CONTRAST,2X2MM, RS485
Manufacturer:
SENSOPART
Datasheet:
Part Number:
Description:
SENSOR, COLOUR/CONTRAST,2X2MM, RS485
Manufacturer:
SENSOPART
Datasheet:
Part Number:
Description:
SENSOR, COLOUR/CONTRAST,2X2MM
Manufacturer:
SENSOPART
Datasheet:
Part Number:
Description:
SENSOR, COLOUR/CONTRAST,5X1MM, RS485
Manufacturer:
SENSOPART
Datasheet:
Part Number:
Description:
SENSOR, COLOUR/CONTRAST,5X1MM, RS485
Manufacturer:
SENSOPART
Datasheet:
Part Number:
Description:
SENSOR, COLOUR/CONTRAST,5X1MM
Manufacturer:
SENSOPART
Datasheet:
Part Number:
Description:
SENSOR, INFRARED, 0.5-10M, RS422, ANALOG
Manufacturer:
SENSOPART
Datasheet:
Part Number:
Description:
SENSOR, INFRARED, 0.5-6M, RS422, ANALOG
Manufacturer:
SENSOPART
Datasheet:
Part Number:
Description:
SENSOR, B/GROUND SUPP, 0.2-6M, IP67, NPN
Manufacturer:
SENSOPART
Datasheet:
Part Number:
Description:
SENSOR, B/GROUND SUPP, 0.2-6M, IP67, PNP
Manufacturer:
SENSOPART
Datasheet:
FT20-RLH-PSM4 Summary of contents
Page 1
... FT 20 RL- type / order ref. Änderungen vorbehalten / All rights for alterations reserved SensoPart Industriesensorik GmbH, D-79695 Wieden, Tel. 07673-821-0 Fax 07673-821-30 Sensitivity setup 1.) Line up sensor to the object. Yellow LED and green LED are on. 2.) Press the button 3 s until both LED´s are flashing synchronously. ...
Page 2
... Lichtfleck im Fokus: light spot (focus 500 V imp 2) = +40 ° +40 °C bei Änderungen vorbehalten / All rights for alterations reserved SensoPart Industriesensorik GmbH, D-79695 Wieden, Tel. 07673-821-0 Fax 07673-821- NPN Out Bild 2 / fig. 2 090-13358 Mechanische Daten / Mechanical data Gehäusematerial: casing material: Schutzart: protection standard: < ...