D109 ETERNA, D109 Datasheet - Page 2

D109
Manufacturer Part Number
D109
Description
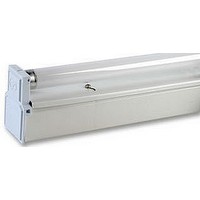
FLUORESCENT FITTING, 58W
Manufacturer
ETERNA
Datasheet
1.D108.pdf
(2 pages)
Specifications of D109
Supply Voltage
230V
Base Type
T8 Fluorescent 1500mm
Power Rating
58W
Length
1525mm
Svhc
No SVHC (15-Dec-2010)
Colour
White
External Length / Height
1525mm
External Width
55mm
Height
85mm
Lamp Base Type
T8 Fluorescent 1500mm
Depth
85mm
Available stocks
Company
Part Number
Manufacturer
Quantity
Price
Part Number:
D1090
Manufacturer:
TOSHIBA/东芝
Quantity:
20 000
Part Number:
D1091A
Manufacturer:
HOLTEK台湾合泰
Quantity:
20 000
Part Number:
D1093UK
Manufacturer:
SEMELAB
Quantity:
20 000
Company:
Part Number:
D1094DAG
Manufacturer:
DIALOG
Quantity:
169
Company:
Part Number:
D1094DB
Manufacturer:
PHI
Quantity:
13 890
Part Number:
D1094DB
Manufacturer:
DIALOG
Quantity:
20 000
Company:
Part Number:
D1094EC
Manufacturer:
DIALOG
Quantity:
50 000
Part Number:
D1094EC
Manufacturer:
DIALOG
Quantity:
20 000
Safety markings:
Read this first:
>
>
>
>
>
>
>
>
>
>
>
>
If in any doubt, consult a qualified electrician.
Switch off the mains before commencing installation and remove the
appropriate circuit fuse.
Suitable for indoor use only.
This product is only suitable for use in living areas ( not for areas
constantly subject to moisture ).
We do not recommend fitting this light in bathrooms.
This product is suitable for installation on surfaces with normal
flammability ( indicated by the "F" in a triangle )
plasterboard, masonry. It is not suitable for use on highly flammable
surfaces ( e.g. polystyrene, textiles ).
Before making fixing hole(s), check that there are no obstructions
hidden beneath the mounting surface such as pipes or cables.
The chosen location of your new fitting should allow for the product to
be securely mounted ( e.g. to a ceiling joist ) and safely connected to
the mains supply ( lighting circuit ).
Do not attach to surfaces which are damp, freshly painted or otherwise
electrically conductive (e.g. metallic surfaces).
If the location of your new fitting requires the provision of a new
electrical supply, the supply must conform with the requirements of the
latest edition of the IEE wiring regulations.
This product is designed for permanent connection to fixed wiring: this
should be either a suitable lighting circuit ( protected with a 5 or 6 Amp
MCB or fuse ) or a fused spur ( with a 3 Amp fuse ) via a fused
connection unit. We recommend that the supply incorporates a switch
for ease of operation.
Make connections to the electrical supply in accordance with the
following code:
Additional red wires may be present in your ceiling that are connected to
the ring live circuit. Do not connect your fitting to these wires. If these
wires are not terminated in a ceiling rose, join them together in a
separate terminal block ( not supplied ), ensure that there are no
strands of wire protruding from the terminals and wrap well with
insulating tape.
Live - Brown or Red
Neutral - Blue or Black
Earth - Green and Yellow
e.g. wood,
>
>
Installation:
1)
2)
3)
4)
5)
6)
7)
8)
9)
10) If you have a diffuser, clip it back onto the fitting, replace the end cheek
11) Restore the power and switch on.
This product must be connected to Earth.
This fitting will not work without a starter or starters fitted. See
installation instructions and back page for details of fitting and replacing
starters.
Remove the diffuser, if fitted, by removing the screw from one end
cheek, lifting off the end cheek and lifting the diffuser off the fitting.
Remove the tube(s) by gently turning through 90° ( ¼ turn ) and lifting
out of the lampholders.
There are two methods used to retain the reflector plate on the top of
the fitting, depending which method is used on your fitting you will need
to rotate the plastic clips or loosen but not remove the screws and lift off
the reflector plate. Important: note which way up the plate is fitted.
Remove the starter(s) packed inside the fitting and fit into the starter
sockets. Put the starter(s) into the socket(s) ensuring that the pins
engage in the slots and turn gently clockwise until they stop.
Thread the supply cable through the large grommetted hole in the back
of the fitting.
Secure the fitting using suitable fixings ( not supplied ). Slots are
provided in the back of the fitting through which to insert screws. Ensure
that cables are not trapped behind or inside the fitting.
Make the connections of the supply cable to the terminals inside the
fitting following the colour coding above.
Replace the reflector plate and tighten the screws ( if fitted ). Ensure
that the reflector plate is the right way up or the diffuser ( if supplied )
will not fit.
Re-fit the tubes by sliding the pins into the slots in the lampholders and
gently rotating through 90° ( ¼ turn ).
and tighten the screw.


