30010 Parallax Inc, 30010 Datasheet - Page 4
30010
Manufacturer Part Number
30010
Description
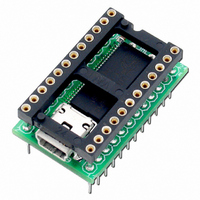
BASIC STAMP LOGIC ANALYZER
Manufacturer
Parallax Inc
Datasheet
1.30010.pdf
(11 pages)
Specifications of 30010
Accessory Type
Logic Analyzer
Product
Microcontroller Accessories
Interface Type
USB
Flash
128 Bytes
Operating Supply Voltage
0.8 V
Board Size
32.15 mm x 20 mm x 17 mm
For Use With/related Products
BASIC Stamp®
Lead Free Status / RoHS Status
Lead free / RoHS Compliant
Other names
Q2119020A
Available stocks
Company
Part Number
Manufacturer
Quantity
Price
Company:

Part Number:
30010117001
Manufacturer:
VISHAY
Quantity:
2 500


Acquisition Controls
To acquire a signal, press the “Acquire” button. Use the pull-down menu to select the number of samples
you would like to acquire, between one million and the maximum shown. The maximum sample buffer
size will depend on the amount of available RAM in your PC. These samples will be stored in your PC’s
RAM as they are captured.
Parallax, Inc. • BASIC Stamp Logic Analyzer (#30010) • 02/2005
In the BSLA default state, it will start capturing data as soon as the “Acquire” button is
pressed. However, sometimes it is desirable to wait until a certain event on a signal line
occurs before the sampling begins. This can be done using the Trigger settings, which are
just to the right of the signal names as shown below.
You can trigger on any level combination on any of the 20 signals. For example, if you
want to trigger on the first time where P0 is sampled low, set the first position low
following the P0 label by clicking the high label until it looks low (see graphic examples
below). When you press “Acquire”, the BSLA will wait until the P0 signal is low. Once it is
low, it will trigger and store an entire buffer of samples. The buffer will display the Trigger
cursor (red marked with a “T”) showing the position that the trigger occurred. If you would
like to trigger on a falling edge, not just the next low sample, then use the combination of
high and low. If you would like to trigger on the next rising edge, select a low followed by
a high level.
The “Trigger Position” scrollbar lets you choose the relative location of the trigger within
the sample buffer. To see what happens before the trigger, put the trigger position over to
the right. Most of the captured samples will then be samples before the trigger occurs. To
view samples that occur after the trigger position, place the Trigger Position at the left side
(at the beginning of the buffer) and most of the samples will be samples taken after the
trigger occurs.
No trigger
Low symbol
High and low combination triggers on a falling edge
Page 4
Related parts for 30010
Image
Part Number
Description
Manufacturer
Datasheet
Request
R


Part Number:
Description:
Microcontroller Modules & Accessories DISCONTINUED BY PARALLAX
Manufacturer:
Parallax Inc

Part Number:
Description:
BOOK UNDERSTANDING SIGNALS
Manufacturer:
Parallax Inc
Datasheet:


Part Number:
Description:
COMPETITION RING FOR SUMOBOT
Manufacturer:
Parallax Inc
Datasheet:


Part Number:
Description:
TEXT INFRARED REMOTE FOR BOE-BOT
Manufacturer:
Parallax Inc
Datasheet:
Part Number:
Description:
BOARD EXPERIMENT+LCD NX-1000
Manufacturer:
Parallax Inc
Datasheet:

Part Number:
Description:
CONTROLLER 16SERVO MOTOR CONTROL
Manufacturer:
Parallax Inc
Datasheet:

Part Number:
Description:
IC MCU 2K FLASH 50MHZ SO-18
Manufacturer:
Parallax Inc
Datasheet:
Part Number:
Description:
IC MCU 2K FLASH 50MHZ 28SSOP
Manufacturer:
Parallax Inc
Datasheet: