GM-2058EV-101 DeLorme, GM-2058EV-101 Datasheet - Page 7
GM-2058EV-101
Manufacturer Part Number
GM-2058EV-101
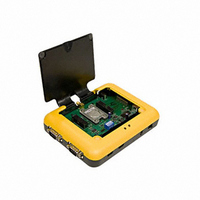
Description
KIT EVAL GPS RCVR GPS2058-10
Manufacturer
DeLorme
Type
GPSr
Datasheet
1.GM-2058EV-101.pdf
(11 pages)
Specifications of GM-2058EV-101
Simulator Included
Yes
License Type
Free Download
Software Accessories Included
Demo Programs
Royalty? (y/n)
NO
Source Code Available? (y/n)
NO
Operating Voltage
6 V
Operating Current
500 mA
Frequency Range
1575.42 MHz
Interface Type
RS-232, USB
For Use With/related Products
GPS2058-10
Lead Free Status / RoHS Status
Lead free / RoHS Compliant


Procedure for establishing RS-232 serial connections
NMEA Port
DeBug Port
Serial Connections - Sending NMEA commands with Hyperterminal
The best way to send NMEA commands with HyperTerminal is to create a text file with the NMEA commands on
separate lines (be sure to hit <return> at the end of each line, which is equivalent to <cr><lf>). Once the test file is
created open HyperTerminal and establish the connection, to send the command choose ‘Transfer – Send Text
File…’ and browse to find the command file.
1) Disconnect the USB connection (the NMEA and USB share UART0 and may conflict with each other).
2) Connect External AC Adapter as power source.
3) Connect the antenna.
4) Power on the kit.
5) Connect the RS-232 serial cable to the NMEA port (at the back of the EVK).
6) Ensure the NMEA DTC/DTE switch on the left is in the correct position for the cable. Left position for
7) Ensure all 5 dip switches on SW5 are OFF.
8) Ensure no jumpers are in place on J11 or J12.
9) Open ‘HyperTerminal’ on your PC or Laptop.
10) You should now see streaming NMEA messages!
11) You may also open the DeLorme GPS Module Eval Kit Software:
12) You should now also see streaming NMEA Messages in the “Receiving Data” window, and be able to view
1) The USB connection may be left intact (the Debug port uses UART1 and will not conflict with USB)
2) Connect External AC Adapter as power source, or use USB power.
3) Connect the antenna
4) Power on the kit
5) Connect the RS-232 serial cable to the Debug port (towards the front of the EVK)
6) Ensure the Debug DTC/DTE switch on the right is in the correct position for the cable. Left position for
7) Ensure all 5 dip switches on SW5 are OFF
8) Ensure no jumpers are in place on J11 or J12
9) Open ‘HyperTerminal’ on your PC or Laptop
10) You should now see streaming debug messages!
straight-thru cable, right position for a switch-cable.
other tabs such as the satellite status.
straight-thru cable, right position for a switch-cable.
Rev. 1.3
a. Enter a new connection name, e.g.; “GPS2058_NMEA”.
b. In the “Connect To” dialog box, open the drop-down for “connect using:” and select the appropriate
c. Set the port settings to 4800-8-N-1, no flow control, click OK
a. Click on “Initialize GPS” button, (3
b. Choose “generic NMEA” device
c. Select the appropriate COM port
d. Settings 4800,8,N,1
e. Click Finish
a. Enter a new connection name, e.g.; “GPS2058_Debug”
b. In the “Connect To” dialog box, open the drop-down for “connect using:” and select the appropriate
c. Set the port settings to 38400-8-N-1, no flow control, click OK
COM port for your connection.
COM port for your connection.
http://www.delorme.com/gpsmodules
rd
Page 7 of 8
down on the right, looks like earth with 4 satellites around it)
4/25/2008
Related parts for GM-2058EV-101
Image
Part Number
Description
Manufacturer
Datasheet
Request
R

Part Number:
Description:
FAN 5VDC 20X10MM 1.1W 1.9CFM
Manufacturer:
Sunon Fans
Datasheet:

Part Number:
Description:
KIT EVAL GPS RCVR GPS2056-10
Manufacturer:
DeLorme
Datasheet:

Part Number:
Description:
MODULE GPS RCVR GPS2058
Manufacturer:
DeLorme
Datasheet:

Part Number:
Description:
MODULE GPS RCVR GPS2056-10
Manufacturer:
DeLorme
Datasheet: