CN4490-1000-SP Laird Technologies, CN4490-1000-SP Datasheet - Page 20
CN4490-1000-SP
Manufacturer Part Number
CN4490-1000-SP
Description
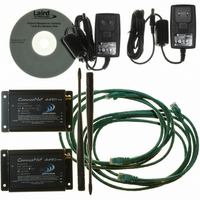
TXRX ETH BRIDGE 900MHZ 1W ANT&PS
Manufacturer
Laird Technologies
Series
AeroCommr
Specifications of CN4490-1000-SP
Function
2 Transceivers
Modulation Or Protocol
FHSS, FSK
Frequency
902MHz ~ 928MHz
Applications
General Purpose
Interface
RJ-45
Sensitivity
-99dBm
Power - Output
1000mW
Data Rate - Maximum
115.2kbps
Features
2 ConnexNet Transceivers in Ethernet Bridge Mode
Voltage - Supply
7 V ~ 18 V
Package / Case
Module
Lead Free Status / RoHS Status
Contains lead / RoHS non-compliant


D
The ConnexNet can be setup several different ways; depending on network configuration and specific application
needs. Each ConnexNet has an embedded device server which can be configured as a TCP socket or Virtual COM
Port. By default, the ConnexNet is configured to as a TCP socket.
T C P S O C K E T
In this mode, the Host can communicate with the ConnexNet through a TCP Socket. To connect to the ConnexNet,
the Host simply needs to establish a TCP/IP connection using port 2101 and the IP address of the ConnexNet device.
C o n n e c t i n g v i a T C P s o c k e t
C h a n g i n g I P s e t t i n g s
The device’s IP settings (IP address, DHCP, subnet Mask, default gateway, etc) can all be configured using the
Aerocomm Configuration utility.
EVICE
1
2
3
4
5
6
7
8
9
10
1
2
3
4
5
6
7
8
S
Connect the ConnexNet device to your network Router, hub, switch, etc.
Open the Aerocomm Configuration utility.
Go to the PC settings page and select Product Type as “Connex4490.”
Change Port Type to “TCP/IP Port.”
Press the “Find Ports” button and wait for the software to find the device.
Once a device has been discovered, select it from the Port selection dropdown.
Type “2101” in the Port field. This is the default TCP port used to connect to the ConnexNet.
Press the “Connect” button to open the selected Port. The Port Status should now change to
“Connected.”
Go to the Configure page and press the “Read Radio” button.
Configure the radio as necessary and press the “Write Radio” button.
Connect the ConnexNet device to your network Router, hub, switch, etc.
Open the Aerocomm Configuration utility.
Go to the PC settings page and select Product Type as “Connex4490.”
Change Port Type to “TCP/IP Port.”
Press the “Find Ports” button and wait for the software to find the device.
Once a device has been discovered, select it from the Port selection dropdown.
Type “2101” in the Port field. This is the default TCP port used to connect to the ConnexNet.
Press the “Connect” button to open the selected Port. The Port Status should now change to
“Connected.”
ETUP
www.aerocomm.com
5
Related parts for CN4490-1000-SP
Image
Part Number
Description
Manufacturer
Datasheet
Request
R

Part Number:
Description:
TXRX ETH-RS232 900MHZ 1W ANT&PS
Manufacturer:
Laird Technologies
Datasheet:

Part Number:
Description:
TXRX ETH PRO 900MHZ 1W START PAK
Manufacturer:
Laird Technologies
Datasheet:

Part Number:
Description:
TXRX ETH 900MHZ 1W W/ANT & PS
Manufacturer:
Laird Technologies
Datasheet:
Part Number:
Description:
Bluetooth Serial Module Development Kit
Manufacturer:
Laird Technologies
Part Number:
Description:
BLUETOOTH MODULE DEVELOPMENT KIT
Manufacturer:
Laird Technologies
Part Number:
Description:
Bluetooth 2.0 AT Data Module, Internal Antenna Development Kit
Manufacturer:
Laird Technologies

Part Number:
Description:
BLUETOOTH EVAL BOARD BTM511
Manufacturer:
Laird Technologies
Datasheet:

Part Number:
Description:
Bluetooth / 802.15.1 Modules & Development Tools BLUETTH Multimed MODLE, No ANT DEVKIT
Manufacturer:
Laird Technologies
Datasheet:

Part Number:
Description:
DEV KIT PRM122
Manufacturer:
Laird Technologies
Datasheet:
Part Number:
Description:
DEV KIT PRM123
Manufacturer:
Laird Technologies
Datasheet:

Part Number:
Description:
CHOKE COMMON MODE 110 OHMS SMD
Manufacturer:
Laird Technologies
Datasheet: