20-101-1221 Rabbit Semiconductor, 20-101-1221 Datasheet - Page 18
20-101-1221
Manufacturer Part Number
20-101-1221
Description
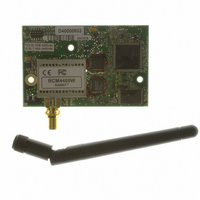
RCM4400W (JAPAN TELEC CERTIFIED)
Manufacturer
Rabbit Semiconductor
Series
RabbitCore®r
Datasheet
1.20-101-1202.pdf
(126 pages)
Specifications of 20-101-1221
Frequency
2.4GHz
Modulation Or Protocol
802.11 b
Power - Output
16dBm
Voltage - Supply
3.3V
Current - Receiving
450mA
Current - Transmitting
450mA
Data Interface
Connector, 2 x 25 Header
Memory Size
512K Flash, 1MB SRAM
Antenna Connector
SMA
Operating Temperature
-20°C ~ 85°C
Package / Case
Module
Lead Free Status / RoHS Status
Lead free / RoHS Compliant
Applications
-
Sensitivity
-
Data Rate - Maximum
-
Other names
316-1147


2.2.3 Step 3 — Attach Module to Prototyping Board
Turn the RCM4400W module so that the mounting holes line up with the corresponding
holes on the Prototyping Board. Insert the metal standoffs as shown in Figure 4, secure
them from the bottom using the 4-40 × 3/16 screws and washers, then insert the module’s
header J1 on the bottom side into socket RCM1 on the Prototyping Board.
Press the module’s pins gently into the Prototyping Board socket—press down in the area
above the header pins. For additional integrity, you may secure the RCM4400W to the
standoffs from the top using the remaining three screws and washers.
12
NOTE: It is important that you line up the pins on header J1 of the module exactly with
socket RCM1 on the Prototyping Board. The header pins may become bent or damaged
if the pin alignment is offset, and the module will not work. Permanent electrical dam-
age to the module may also result if a misaligned module is powered up.
Figure 4. Install the Module on the Prototyping Board
RabbitCore RCM4400W
Related parts for 20-101-1221
Image
Part Number
Description
Manufacturer
Datasheet
Request
R

Part Number:
Description:
COMPUTER SGL-BRD BL2500 29.4MHZ
Manufacturer:
Rabbit Semiconductor
Datasheet:

Part Number:
Description:
COMPUTER SGL-BRD BL2500 29.4MHZ
Manufacturer:
Rabbit Semiconductor
Datasheet:

Part Number:
Description:
DISPLAY GRAPHIC 12KEY PROG OP670
Manufacturer:
Rabbit Semiconductor
Datasheet:
Part Number:
Description:
DISPLAY GRAPHIC 12KEY ETH OP6700
Manufacturer:
Rabbit Semiconductor
Datasheet:

Part Number:
Description:
COMPUTER SINGLE-BOARD BL2030
Manufacturer:
Rabbit Semiconductor
Part Number:
Description:
COMPUTER SGL-BOARD ETH BL2010
Manufacturer:
Rabbit Semiconductor

Part Number:
Description:
MODULE OP6810 W/O ETH/MEM EXPANS
Manufacturer:
Rabbit Semiconductor
Datasheet:
Part Number:
Description:
COMPUTER SINGLE-BOARD BL2020
Manufacturer:
Rabbit Semiconductor
Part Number:
Description:
COMPUTER BL2010 W/FRICTION LOCK
Manufacturer:
Rabbit Semiconductor
Part Number:
Description:
COMPUTER BL2020 W/FRICTION LOCK
Manufacturer:
Rabbit Semiconductor
Part Number:
Description:
COMPUTER SGL-BRD BL2500 44.2MHZ
Manufacturer:
Rabbit Semiconductor
Datasheet:
Part Number:
Description:
COMPUTER SGL-BOARD FULL BL2000
Manufacturer:
Rabbit Semiconductor

Part Number:
Description:
COMPUTER SINGLE-BOARD BL2110
Manufacturer:
Rabbit Semiconductor

Part Number:
Description:
COMPUTER SGL-BRD 29.4MHZ BL2610
Manufacturer:
Rabbit Semiconductor
Datasheet:
Part Number:
Description:
INTERFACE OP6800 512K FLASH&SRAM
Manufacturer:
Rabbit Semiconductor
Datasheet: