RM4000 Tektronix, RM4000 Datasheet - Page 11
RM4000
Manufacturer Part Number
RM4000
Description
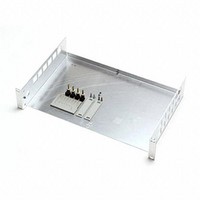
Benchtop Oscilloscopes Rackmount Kit for DPO4000/MSO4000
Manufacturer
Tektronix
Specifications of RM4000
Equipment Type
Rackmount Kit
Accessory Type
Rackmount
Lead Free Status / RoHS Status
Lead free / RoHS Compliant
For Use With
DPO4000 and MSO4000 Series Oscilloscopes


Step 9: Configure the UltraTrak
Step 10: Format the Array
Following are the steps needed to create an array and get your UltraTrak
running quickly. We’re using the automatic setup feature here, but you
may also set the array up manually if you wish. Refer to the User’s
Manual for details regarding the manual setup procedure.
Like any other type of fixed disk media in your system, a RAID array
must also be partitioned and formatted before use. Use the same method
of partitioning and formatting on an array as you would any other fixed
disk.
1. From the Idle mode display, press the SEL button on the front panel.
2. Press the
3. Enter the password at the prompt. (The default password is 0000.)
4. At Configure Array, press SEL.
5. Array Setup should be selected, press SEL.
6. With RAID Level selected, press SEL.
7. Press the
8. Press SEL to create the array or press EXIT to cancel.
9. If you elected to create the array then you should see the message
10. Switch off the UltraTrak’s power. Wait five seconds then switch the
button.
array. Press SEL to choose the selected RAID level.
“Array has been created.”
power back on.
Depending on the size of your array, RAID levels 3 and 5
may take a while to initialize.
and
button once to select Configuration, then press SEL
buttons to select the proper RAID level for your
11
Note
Quick Start Guide