MNZB-DKC-900 MeshNetics, MNZB-DKC-900 Datasheet - Page 26
MNZB-DKC-900
Manufacturer Part Number
MNZB-DKC-900
Description
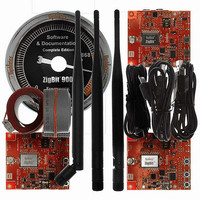
KIT DEV ZIGBIT 900 COMPLETE 1YR
Manufacturer
MeshNetics
Type
802.15.4/Zigbeer
Datasheet
1.MNZB-EVB-900-B0.pdf
(56 pages)
Specifications of MNZB-DKC-900
Frequency
868MHz, 915MHz
For Use With/related Products
MNZB-900-B0
Lead Free Status / RoHS Status
Lead free / RoHS Compliant
Other names
758-1009


© 2008 MeshNetics
3.5. Powering the Boards
3.6. Testing WSN Functionality Using SerialNet
The boards can be powered by a pair of AA-size batteries, via the USB port, once
connected for data transfer, or via AC/DC adaptor. The nominal voltage is 3 V. Using
AC/DC adaptor disconnects AA batteries automatically. Using USB port disconnects the
AC/DC adaptor.
In order to make accurate measurements of sensor parameters, battery power is
recommended. USB power is not stable enough, which can affect transmission of power
level or RF parameters.
IMPORTANT NOTES:
It is strongly recommended to check up the power supply voltage before programming the
boards by Serial Bootloader or by JTAG. Power drops happened during the programming
process could result in an inoperable state of the ZigBit 900 or its permanent damage.
Using the discharged batteries (when the voltage is below the specified limit) may cause
damage of flash memory or EEPROM as well. If that happened, programming by means
of Serial Bootloader would fail. In this case the only option becoming available would be
using of JTAG emulator (see Appendix B).
Using nickel-cadmium rechargeable batteries is allowed but with certain precautions.
Nominally, their cell potential is 1.2 V. Although a pair gives 2.4 V thus fitting the operating
voltage range (see Section 2.1), it is still lower than 3 V level, which a pair of the most
popular alkaline cells give. Hence, nickel-cadmium rechargeable batteries could not be a
proper alternative of the alkaline cells for all applications.
Program the boards with the SerialNet firmware (see Section 5).
Connect the board to PC (see Section 3.4).
Run standard Hyper Terminal utility which is a part of Windows 2000/XP:
Start/Programs/Accessories/Communications/HyperTerminal.
Select logical value for COM port provided by the system (see Section 3.4). COM port
parameters should be set to the values given in Table 11.
Table 11. COM port settings for hardware testing
Option
Data Rate
Data Bits
Parity
Stop Bits
Flow Control
Type the “AT” command and press Enter key.
The board responds to Hyper Terminal with “OK“.
Now, a user can play various networking scenarios by sending AT commands fully
described in [3].
Z I G B I T ™ 9 0 0 D E V E L O P M E N T K I T 1 . 3
Value
38 400 bps
8
None
1
None, unless data transmission between
the boards is planned; then, Hardware flow
control option should be selected
U S E R ’ S G U I D E
Page 26/56
Related parts for MNZB-DKC-900
Image
Part Number
Description
Manufacturer
Datasheet
Request
R

Part Number:
Description:
KIT DEV ZIGBIT 2.4GHZ COMPLETE
Manufacturer:
MeshNetics
Datasheet:


Part Number:
Description:
MOD 802.15.4/ZIGB 2.4GHZ RF PORT
Manufacturer:
MeshNetics
Datasheet:

Part Number:
Description:
BOARD EVAL FOR MNZB-900-B0 W/ANT
Manufacturer:
MeshNetics
Datasheet:

Part Number:
Description:
BOARD EVAL MNZB-A24-UFL W/RP-SMA
Manufacturer:
MeshNetics


Part Number:
Description:
BOARD DEV 802.15.4/ZIGB PCB ANT
Manufacturer:
MeshNetics
Datasheet:

Part Number:
Description:
BOARD DEV 802.15.4/ZIGB CHIP ANT
Manufacturer:
MeshNetics
Datasheet:

Part Number:
Description:
BOARD DEV 802.15.4/ZIGB SMA CONN
Manufacturer:
MeshNetics
Datasheet:
Part Number:
Description:
KIT DEV ZIGBIT 2.4GHZ LITE 45DAY
Manufacturer:
MeshNetics
Datasheet:

Part Number:
Description:
KIT DEV ZIGBIT 900 LITE 45DAYS
Manufacturer:
MeshNetics
Datasheet:


Part Number:
Description:
MOD 802.15.4/ZIGB 2.4GHZ CHIPANT
Manufacturer:
MeshNetics
Datasheet: