A6E-3101 Omron, A6E-3101 Datasheet - Page 5
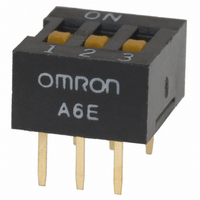
A6E-3101
Manufacturer Part Number
A6E-3101
Description
DIP Switch
Manufacturer
Omron
Series
A6E / A6ERr
Specifications of A6E-3101
Contact Configuration
SPCO
Contact Current Max
25mA
Switch Terminals
Through Hole
Circuit
SPST
Number Of Positions
3
Contact Rating @ Voltage
0.025A @ 24VDC
Actuator Type
Standard
Actuator Level
Flush
Mounting Type
Through Hole
Orientation
Top Actuated
Washable
No
Switch Type
DIP
Actuator
Lever, Flat
Terminal Pitch
2.54 mm
Termination Style
Solder Pin
Current Rating
25 mAmps
Operating Temperature Range
- 20 C to + 70 C
Voltage Rating Dc
24 Volts
Contact Rating
25 mAmps
Lead Free Status / RoHS Status
Lead free / RoHS Compliant
Lead Free Status / RoHS Status
Lead free / RoHS Compliant
Other names
A6E-3101
A6E3101
SW900
A6E3101
SW900


Precautions
Washing
1. Washable and Non-washable Models
The models for which washing are possible are shown in the fol-
lowing table.
2. Washing Procedure
Ultrasonic cleaning is not available for slide-type DIP Switches
with seal tape. These models may be wiped or dipped into wash-
ing agents for one minute maximum.
Slide-type DIP Switches with seal tape can be washed as long as
the seal tape is not removed or pasted before washing. Non-com-
pliance here will cause the quality of the seal to decline.
Washing equipment incorporating more than one washing bath
can be used to clean washable models, provided that the wash-
able models are cleaned for one minute maximum per bath and
the total cleaning time does not exceed three minutes.
Handling
1. Slide-type DIP Switch operation
Do not apply excessive operating force to the Switch. Otherwise
the Switch may be damaged or deformed, and the switch mecha-
nism may malfunction as a result. Apply an operating force not
exceeding 9.8 N. (Operate each pole separately.) Apply the oper-
ating load from the side of the striker. Do not apply a load from an
angle or from above the striker. Doing so may deform the Switch
contact.
Set slide-type DIP Switches with a tiny, rounded object, such as
the tip of a ball-point pen or a small screwdriver. Do not set the
DIP Switch using tweezers or any other sharp object that may
damage it. Do not set the DIP Switch using the point of a mechan-
ical pencil, or lead powder or fragments may fall into the Switch
and internal circuit board, causing the DIP Switch to malfunction
and reducing the dielectric strength of the circuit board.
Rotary DIP Switch Operation
6
Washable
Non-washable
Screwdriver
groove
Applicable
screwdriver: A
Applicable
screwdriver: B
Part names
Item
1.8 to 2.1
0.7 to 0.8
A6A, A6C, A6CV, A6D, A6DR, A6T (with seal tape),
A6S-H (with seal tape), A6H (with seal tape)
A6R, A6RV, A6T (standard/raised actuator), A6S-
H (standard/raised actuator), A6E, A6ER
Top/Side operation, flat type
A6R/A6RV
Incorrect
1.0
Depth: 1.0
2.9
Correct
3.5 to 3.8
0.4 to 0.5
Standard type, flat type
0.65
B
A
4
Depth: 0.9
Flat-blade screwdriver
3. Washing Agents
Apply alcohol-based solvents to clean washable models. Do not
apply water or any other agents to clean any washable models,
as such agents may degrade the materials or performance of the
Switch.
4. Washing Precautions
Do not impose any external force on washable models while
washing.
Do not clean washable models immediately after soldering. The
cleaning agent may be absorbed into the incomplete seal through
respiration as the Switch cools. Wait for at least three minutes
after soldering before cleaning.
Do not use washable Switches submerged in water or in locations
exposed to water.
Although raised-type and piano-type strikers can be operated by
fingertip, do not push too hard or too fast because this will deform
or damage the striker.
When setting or operating the A6H, use narrow-headed tweezers
or similar implement (without a sharp end), to enable smooth,
horizontal operation. Pushing the striker at an angle, or applying
excessive load from above may damage or deform the striker and
thereby prevent operation.
2. Rotary DIP Switch Operation
Set rotary-type DIP Switches with a flat-blade screwdriver that fits
into the screwdriver groove. Using a screwdriver of inappropriate
dimensions, or using a tool other than a flat-blade screwdriver
may cause damage to the groove that may make the Switch
impossible to operate.
Insert the flat-blade screwdriver vertically to operate the Switch.
The Switch may be damaged if the screwdriver is inserted at an
angle.
Do not use excessive force to operate the Switch, or it may dam-
age or deform the Switch.
3. Setting
Set the Switch to the correct position before use. An incorrectly
aligned position may result in incorrect signals.
Groove
A6A
4 dia.
A6A, A6C/A6CV, A6R/A6RV
Rotary DIP Switch
Shaft type, wheel type
0.7
Depth: 0.9
2.0 to 2.4
0.5 to 0.6
Top/Side operation type
A6C/A6CV
2.5
Precautions
Depth: 1.0
0.8
Related parts for A6E-3101
Image
Part Number
Description
Manufacturer
Datasheet
Request
R

Part Number:
Description:
DIP Switch
Manufacturer:
Omron
Datasheet:

Part Number:
Description:
DIP Switch
Manufacturer:
Omron
Datasheet:

Part Number:
Description:
DIP Switch
Manufacturer:
Omron
Datasheet:

Part Number:
Description:
DIP Switch
Manufacturer:
Omron
Datasheet:

Part Number:
Description:
DIP Switch
Manufacturer:
Omron
Datasheet:

Part Number:
Description:
DIP Switch
Manufacturer:
Omron
Datasheet:
Part Number:
Description:
DIP Switch
Manufacturer:
Omron
Datasheet:

Part Number:
Description:
G6S-2GLow Signal Relay
Manufacturer:
Omron Corporation
Datasheet:
Part Number:
Description:
Compact, Low-cost, SSR Switching 5 to 20 A
Manufacturer:
Omron Corporation
Datasheet:
Part Number:
Description:
Manufacturer:
Omron Corporation
Datasheet:
Part Number:
Description:
Manufacturer:
Omron Corporation
Datasheet: