P2662AG-1C1S EVERETT CHARLES TECH, P2662AG-1C1S Datasheet - Page 19
P2662AG-1C1S
Manufacturer Part Number
P2662AG-1C1S
Description
TEST SPRING PROBE, PCB
Manufacturer
EVERETT CHARLES TECH
Datasheet
1.A-A-S-R.pdf
(20 pages)
Specifications of P2662AG-1C1S
Connector Type
Test Point
Current Rating
3A
Spring Force Initial
1oz
Spring Force Working Travel
2.2oz
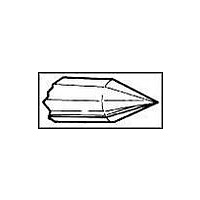
Tip / Nozzle Size
0.13
Body Material
Gold-Lined Nickel Silver
Tip / Nozzle Style
60° Point
Contact Material
Beryllium Copper
Rohs Compliant
Yes
Lead Free Status / RoHS Status
Lead free / RoHS Compliant


ARIT
Receptacle Insertion Tools
Model #
ARIT54
ARIT54
T80-0
T125-0
Adjustable Tool (ARIT) Instructions
1. Loosen set screws.
2. Rotate thimble to desired receptacle
3. Lock both set screws.
Specifications subject to change without notice.
Drawings not to scale.
Optional tip styles, spring pressures, and materials
available, contact factory for more information.
mounting height.
Mounting
Height
Flush–.125"
Flush–.220"
Flush
Flush
T style tools
Receptacle
Series
SR541
SR54
SR80
SR125
Maintenance Brushes
Model #
MB-1
MB-2
MB-3
MB-2
MB-1
Description
Brass bristle brush
(4-1/4" x 2-1/2")
4 row brass brush
(3-1/4" x 1-1/8")
Nylon brush (6-1/4")
MB-3
Receptacle
Installation
(Press fit type only)
The receptacle is inserted into
the drilled hole and tapped into
place using a plastic mallet
and a receptacle insertion tool.
Several “taps” (3-5) with the
mallet is recommended to
provide maximum receptacle
retention. Epoxy is not required.
The receptacle is held in place
by the press ring, which
collapses into the hole during
insertion, forming a tight fit.
While some insertion tools
are designed to mount the
receptacles flush with the
probe plate, the ARIT series
(Adjustable Tool) allows
various mounting heights as
required by the test fixture
manufacturer. The press ring
should be positioned for
maximum retention in probe
plates that are 3/8 inch thick
or more. If the probe plate is
too thin, the receptacle may
fall through during insertion.
In this case you can drill a
smaller hole and use the press
ring as a stop. However, you
will need to secure receptacle
with epoxy.
Once the receptacle is installed,
insert the probe until the top
of the probe barrel is flush
with the top of the receptacle.
The probe is held in place with
4 retention detents.
Tools
Dimensions in inches (millimeters).
17