92290 CHARLESWATER, 92290 Datasheet
92290
Manufacturer Part Number
92290
Description
IONIZER, BENCH TOP IONIZER, BENCH TOP
Manufacturer
CHARLESWATER
Datasheet
1.92290.pdf
(2 pages)
Specifications of 92290
Airflow
50 TO 100CFM
Colour
WHITE
Depth, External
80MM
Length / Height, External
240MM
Voltage, Input
240V AC
Width, External
150MM
Rohs Compliant
NA


Bench Top Ionizer
Installation, Operation and Maintenance
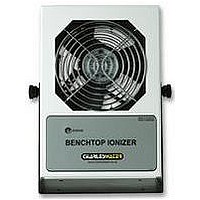
Figure 1. Charleswater Item 92290
The 92290 is a compact and
lightweight dual steady state DC auto-
balancing benchtop ionizer. The unit
is normally placed at one end of the
workbench or area to be neutralized.
It may also be wall mounted or
mounted on a shelf. The ionizer's
neutralization time will be best
approximately 30cm to 120cm directly
in front of the unit and will increase as
the distance from the unit increases.
Figure 2. Area of Optimum Charge
Neutralization
Installation
Remove the ionizer from the carton
and inspect for damage. Included with
the unit should be:
PPE-5081.E 02/05 Page 1 of 2
Phone: 00 44 (0) 1892-665313, Fax: 00 44 (0) 1892-668838 • E-mail: info@charleswater.co.uk, Internet: www.charleswater.co.uk
Unit 17. Millbrook Business Park, Sybron Way • Crowborough, East Sussex TN6 3JZ United Kingdom
TECHNICAL BULLETIN
1. Stand assembly with hardware
2. Four rubber feet
3. Emitter point cleaner
Power cords 93000 (Continental
Europe Schuko, 2 pin) and 93010
(UK/Ireland/Asia, 3 pin) are available
separately.
The input voltage should be set to your
specification prior to shipping. It can
be verified or reset by referring to the
Maintenance section of these
instructions.
Attach the stand to the unit by placing
the plastic spacers between the unit
and the stand and securing in place
using the knurled knobs. If desired,
attach rubber feet to each corner of the
bottom of the stand. Press feet firmly
in place.
Before installing the unit, verify that the
AC outlet is properly connected to
earth ground. The unit must have a
good earth ground to maintain proper
balance.
Install the unit in the desired location,
making sure that the airflow will not be
restricted. Be sure the ON/OFF
switch, located on the rear of the unit,
is in the "OFF" position. Plug the
power cord into the unit and then into
the appropriate AC power source.
This equipment has a grounding type
plug that has a third (grounding) pin.
This plug will only fit into a grounding
type power outlet. If the plug does not
fit into the outlet, contact qualified
personnel to install the proper outlet.
Do not alter the plug in any way.
Operation
Set the fan speed switch on the rear of
the unit to the LOW, MED, or HI
position. Higher airflow will result in
faster neutralization rates. Position the
unit so that the maximum airflow is
directed at the items or area to be
neutralized. Turn the unit ON.
When the unit is first turned on, it
conducts a self-test. The audible
alarm will sound and then the LED will
cycle through RED, YELLOW, and
then GREEN. The LED will remain
GREEN during normal operation.
Balance Adjustment
The 92290 is an auto-balancing unit.
However, tuning or manual adjustment
can be accomplished by inserting a
small screwdriver or trimmer
adjustment tool into the balance
adjustment hole located on the right
rear of the unit. To increase the output
in a positive direction, turn the
potentiometer in a clockwise direction.
Conversely, to increase the output in a
negative direction, turn the
potentiometer in a counter clockwise
direction.
Maintenance / Alarms
WARNING - RISK OF ELECTRIC
SHOCK - These servicing instructions
are for use by qualified personnel only.
To reduce the risk of electric shock, do
not perform any servicing of internal
parts unless you are qualified to do so.
The input voltage may be verified or
reset by removing the back case by
disengaging the 3 screws on back.
NOTE: The AC power cord MUST
always be disconnected before the unit
is disassembled.
Input voltage is selected with the two
internal jumpers as shown below:
Figure 3. 110 Volt Jumper Setting
© 2005 CHARLESWATER LTD.
Related parts for 92290
Image
Part Number
Description
Manufacturer
Datasheet
Request
R


Part Number:
Description:
USB A DUAL/HORIZONTALONTAL SOCKET
Manufacturer:
Keystone Electronics
Datasheet:

Part Number:
Description:
THERMOMETER, DUAL CHANNEL
Manufacturer:
TESTO
Datasheet:

Part Number:
Description:
Lamps CML Bulb
Manufacturer:
CHICAGO MINIATURE LIGHTING, LLC
Datasheet:

92290 Summary of contents
Page 1
... LED will cycle through RED, YELLOW, and then GREEN. The LED will remain GREEN during normal operation. Balance Adjustment The 92290 is an auto-balancing unit. However, tuning or manual adjustment can be accomplished by inserting a small screwdriver or trimmer adjustment tool into the balance adjustment hole located on the right rear of the unit ...
Page 2
... Replacement emitter electrodes can be ordered if necessary. Unit 17. Millbrook Business Park, Sybron Way • Crowborough, East Sussex TN6 3JZ United Kingdom Phone (0) 1892-665313, Fax (0) 1892-668838 • E-mail: info@charleswater.co.uk, Internet: www.charleswater.co.uk PPE-5081.E Page Best practice would be to verify the balance of the unit with a charge plate monitor after cleaning ...