376A-1 ELKAY, 376A-1 Datasheet - Page 2
376A-1
Manufacturer Part Number
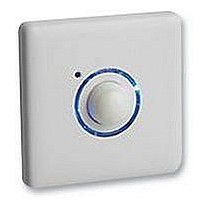
376A-1
Description
TIMER, PIR SENSOR, WALL, VARIABLE
Manufacturer
ELKAY
Datasheet
1.376A-1.pdf
(2 pages)
Specifications of 376A-1
Time Range
2min To 2h
Colour
White
Contact Current Max
16A
Current Rating
16A
Mounting Type
Surface Mount
No. Of Inputs
2
Supply Voltage
240V
For Use With
Lighting, Heating, Ventilation
Lead Free Status / RoHS Status
Lead free / RoHS Compliant


MOUNTING AND INSTALLATION CONTINUED
Step 3 To adjust lux level (i.e the ambient light level at which you would like your lights to be activated via the PIR timer)
please refer to the lux level rotary adjuster diagram. Rotate the lux level adjustment clockwise to decrease the level of light
required to turn the lights on and anticlockwise to increase the level of light required to turn the lights on. See diagram 1 for
position of Lux level adjustment.
Step 4 Switch on battery (switch 4) – you will notice a red LED light on the front of the unit – which will be flashing rapidly.
Whilst this is in action, attach the unit with the screws to the wall, then clip on the front fascia plate. The red light will
change to a single flashing light every 2.5 seconds approx. Re-apply the mains supply. The light, or chosen appliance, will
now start. Press and hold the button for a maximum of 2.5 seconds. The flashing red LED will go off. The blue locator ring
will light up around the PIR button. Your light or appliance, will now be switched off. Please refer to operation section.
INSTALLATION NOTES
N.B If the mains power has not been applied and the PIR lens is pressed the blue locator ring will flash once. The unit will
then revert to the rapid flashing mode and the sequence must be repeated.
N.B From the rapid flashing mode, if the installation sequence is not progressed, the unit will revert to sleep mode after a
period of 10 minutes. To re-activate the unit press and hold the PIR lens for approximately 5 seconds.
N.B After installation the PIR will require approximately 5 minutes to initialise.
OUTDOOR INSTALLATION
Please note only products in the Elkay energy outdoor range are suitable for use outdoors. Elkay energy outdoor can only
be used in conjunction with the surface mount box supplied.
Take the surface mount box and remove knock out section. If required and to ensure IP66 waterproof rating, please use a
suitable M20 cable gland. Mount the surface mount box on a secure surface using the mounting pack supplied. Place screw
cover seals over the mounting screws.
Turn off mains supply before proceeding with installation - Install as per previous PIR instalation instructions - Mount
unit onto surface mount box using the fixing screws at all four corners - Place screw hole seals over left and right screw
cavities - Clip on front fascia plate - Re-instate mains supply.
OPERATION
1. In standard operation, the PIR will now sense body heat when passing through the detection zone. Each time the PIR is
triggered the red LED will light and reset the timer back to the start of the timing period. The unit will then wait 20 seconds
approximately before allowing the PIR unit to sense and re-trigger the timing period again.
2. If no one is present in the room or the detection zone is not passed through, during its set time period the timer will time
out, turning off the lights or appliance and the blue locator ring will light up.
3. The PIR unit will only trigger the lights or appliance if the ambient light level is below that set on the lux level adjustment.
4. When the ambient light level is light enough so the lights would not normally come on with PIR use, the override switch
can be used turn on the lights for the set period time. This can be used in times where additonal light is required in a room.
To operate press the PIR lens, the red indicator LED will light to show it has been pressed and the timing will begin, in the
last minute of timing the red LED will flash.
5. When the ambient light level is dark enough that the PIR is in normal operation, the override switch can be used to
disable the PIR and the lights turned off indefinitely or until the override switch is pressed. This can be done by pressing the
PIR lens, the red LED will flash rapidly to indicate the PIR has been disabled and can be re-enabled simply by pressing the
lens again. N.B The PIR lens will require approximately 1 minute to initialise.
OPERATION NOTES
If the Elkay PIR timer does not receive power for a period of over seven days, please turn battery off, using switch 4.
In the case of power failure, your Elkay PIR timer will attempt to automatically re-start, which will cause the blue locator
ring to flash. The unit will attempt to locate the power source for a total of five minutes. Each recovery attempt will
increase by a minute each time. This will be repeated 25 times before the unit will power down to sleep mode. During this
time, pressing and holding the PIR sensor for approximately 10 seconds will initiate a further recovery attempt.
IMPORTANT NOTICE
All wiring should be carried out by a competent person or a qualified Electrician in accordance with the current IEE Wiring
Regulations. If unit is faulty please return to place of purchase.
TECHNICAL HELPLINE
For further help, or information on this and the other products in the Elkay range visit www.elkay.co.uk or call 01675 468222.
Elkay Electrical, Coleshill, Birmingham, England.
Tel: +44 (0) 1675 468222 www.elkay.co.uk
Patent Pending Inst. Ref. No PIR201 Rev. No.: 04/07