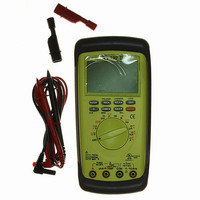
192 TPI (Test Products Int), 192 Datasheet - Page 19
192
Manufacturer Part Number
192
Description
DMM AUTO-RANGE W/INDUCTANCE
Manufacturer
TPI (Test Products Int)
Series
190r
Type
Digital (DMM)r
Specifications of 192
Includes
Battery, Test Leads
Style
Handheld
Display Digits
4.75
Display Type
LCD, Bar Graph
Display Count
50000
Function
Voltage, Current, Resistance, Capacitance, Inductance, Frequency
Functions, Extra
Continuity, Diode Test
Features
Auto Off, Backlight, Hold, Min/Max, RS-232 Port, Sleep
Ranging
Auto/Manual
Response
True RMS
Lead Free Status / RoHS Status
Vendor undefined / Vendor undefined
Other names
192TPI
192TPI
290-1423
TPI 192
TPI192
192TPI
290-1423
TPI 192
TPI192
Available stocks
Company
Part Number
Manufacturer
Quantity
Price
Company:

Part Number:
192-009-113-161
Manufacturer:
NorComp Inc.
Quantity:
457
Company:
Part Number:
192-009-113-171
Manufacturer:
NorComp Inc.
Quantity:
457
Company:
Part Number:
192-009-113-181
Manufacturer:
NorComp Inc.
Quantity:
457
Company:
Part Number:
192-009-113-531
Manufacturer:
NorComp Inc.
Quantity:
457
Company:
Part Number:
192-009-113-561
Manufacturer:
NorComp Inc.
Quantity:
457


35
E. ACCESSORIES
Standard Accessories
9 Volt Alkaline Battery
Fuse 0.5A
Fuse 10A
Test lead
Rubber boot
Optional Accessories
Accessories
Demonstration Software
Deluxe Test lead set
IEC 1010 Deluxe test lead kit
Temperature Adaptor
Current Adaptor 10/60A
Current Adaptor 40/400A
Current Adaptor 400/1000A
Carrying case
Fuse 0.44A(Only194)
Fuse 11A(Only194)
Part NO.
Part NO.
A301
A254
A256
A296
F. MAINTENANCE
1.
2.
3.
a. Disconnect and remove all test leads from live circuit
b. Remove the meter from protective boot.
c. Remove the three screws from battery cover of back
d. Remove old batteries and replace with new batteries.
e. Reassemble instrument in reverse order from above.
a. Disconnect and remove all test leads from live circuit
b. Remove the meter from protective boot.
c. Remove the three screws from battery cover of back
d. Remove old fuse(s) and replace it with new fuse(s).
e. Reassemble instrument in reverse order from above.
f. Fuse must be changed by replacement in service center.
Cleaning your Meter
Use a mild detergent and a slightly damp cloth to clean the
surfaces of the meter.
Fuse Replacement:
are fuse protected. Use only Fast blow, 600V fuses with
correct current ratings. Failure to do so will void all
Warranties. If either do not function, replace as Following:
Battery Replacement:
the 9 volt battery needs replacement. Battery replaced as
following:
and from the meter.
and from the meter.
Both the A and mA/uA input jacks
The meter will display AT when
36