A16-24DSR Omron, A16-24DSR Datasheet - Page 11
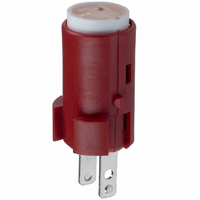
A16-24DSR
Manufacturer Part Number
A16-24DSR
Description
24V RED LED
Manufacturer
Omron
Type
Pushbutton Switchr
Specifications of A16-24DSR
Color
Red
Lead Free Status / RoHS Status
Lead free / RoHS Compliant
For Use With
Z1311 - SWITCH PB RND MOM DPDT ILLUM YLWZ1310 - SWITCH PB RND MOM DPDT ILLUM WHTZ1309 - SWITCH PB RND MOM DPDT ILLUM REDZ1308 - SWITCH PB RND MOM DPDT ILLUM GRNZ1307 - SWITCH PB RECT MOM DPDT ILLUMZ1306 - SWITCH PB RECT MOM DPDT ILLUMZ1305 - SWITCH PB RECT MOM DPDT ILLUMZ1304 - SWITCH PB RECT MOM DPDT ILLUMZ1303 - SWITCH PB SQ MOM DPDT ILLUM YLLWZ1302 - SWITCH PB SQ MOM DPDT ILLUM WHTZ1301 - SWITCH PB SQ MOM DPDT ILLUM REDZ1300 - SWITCH PB SQ MOM DPDT ILLUM GRN
Lead Free Status / Rohs Status
Lead free / RoHS Compliant
Other names
A16-24DR
A16-24DR
A1624DSR
Z1584
A16-24DR
A1624DSR
Z1584


Dimensions
Terminal Arrangement
Accessories, Replacements, and Tools
The accessories, replacements, and tools are also used with the A16 Pushbutton Switch. Refer to the A16 datasheet.
Safety Precautions
Refer to Safety Precautions for All Pushbutton Switches and Safety Precautions for the A16.
Mounting
Wiring
• When mounting the Case onto the Socket Unit, ensure that the
• When using stranded wire, gather the ends of the strands together
• When wiring, insert the wire until it comes into contact with
• After wiring, ensure that continuous pressure is not applied to the
• Refer to internal connections diagrams and confirm the terminal
orientation is correct. Perform mounting with the dimple on the
Case and the TOP mark on the Socket Unit facing in the same
direction.
before wiring.
something. After wiring is completed, pull on the wires to confirm
that they are connected securely.
terminals.
numbers before performing wiring.
The L+ is not shown on the Socket Unit.
Case
Solder Terminals
(BOTTOM VIEW)
Precautions for Correct Use
L +
L -
dimple
Socket Unit
TOP mark
+
+
-
Screw-less Clamp
Black
Red
Side with TOP indicated
Screw-less Clamps
Mounting Procedure
1. Strip a length of 10 mm off the end of the wire (allowable range:
2. Bunch wire strands together and straighten them.
3. Insert the wire into the insertion hole while pressing the release
4. Let go of the release button to lock the wire into place.
5. After locking, pull on the wire gently to confirm that it is securely
Removing Procedure
1. Remove wires by pulling them while pressing the release button.
Note: When reusing wires that have already been locked, cut off the end of the
(BOTTOM VIEW)
10±1 mm).
button at the side of the hole. (Using a precision screwdriver is
recommended.)
locked.
wire and strip the wire again before using.
(All units are in millimeters unless otherwise indicated.)
+
+
-
Models with voltage-reduction lighting have a
circuit to reduce voltage built in.
Voltage-reduction Lighting
Side with TOP indicated
(BOTTOM VIEW)
-
+
+
M16
11
Related parts for A16-24DSR
Image
Part Number
Description
Manufacturer
Datasheet
Request
R

Part Number:
Description:
SWITCH PB ILLUM RCT MOM DPDT GRN
Manufacturer:
Omron
Datasheet:
Part Number:
Description:
SWITCH PB ILLUM RND ALT SPDT WHT
Manufacturer:
Omron
Datasheet:
Part Number:
Description:
SWITCH PB ILLUM SQR MOM SPDT BLU
Manufacturer:
Omron
Datasheet:
Part Number:
Description:
SWITCH PB ILLUM SQR MOM SPDT WHT
Manufacturer:
Omron
Datasheet:
Part Number:
Description:
SWITCH PB ILLUM SQR MOM SPDT YEL
Manufacturer:
Omron
Datasheet:
Part Number:
Description:
SWITCH PB ILLUM RCT MOM SPDT BLU
Manufacturer:
Omron
Datasheet:
Part Number:
Description:
SWITCH PB ILLUM RCT MOM SPDT GRN
Manufacturer:
Omron
Datasheet:
Part Number:
Description:
SWITCH PB ILLUM RCT MOM SPDT RED
Manufacturer:
Omron
Datasheet:
Part Number:
Description:
SWITCH PB ILLUM RCT MOM SPDT WHT
Manufacturer:
Omron
Datasheet:
Part Number:
Description:
SWITCH PB ILLUM RND MOM SPDT BLU
Manufacturer:
Omron
Datasheet:

Part Number:
Description:
SWITCH PB ILLUM RND MOM SPDT GRN
Manufacturer:
Omron
Datasheet:

Part Number:
Description:
SWITCH PB ILLUM RND MOM SPDT RED
Manufacturer:
Omron
Datasheet:
Part Number:
Description:
SWITCH PB ILLUM RND MOM SPDT WHT
Manufacturer:
Omron
Datasheet:
Part Number:
Description:
SWITCH PB ILLUM RND MOM SPDT YEL
Manufacturer:
Omron
Datasheet:
Part Number:
Description:
SWITCH PB ILLUM RND ALT DPDT WHT
Manufacturer:
Omron
Datasheet: