35004 Master Appliance Co, 35004 Datasheet - Page 30
35004
Manufacturer Part Number
35004
Description
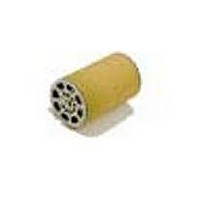
Replacement Heating Element
Manufacturer
Master Appliance Co
Datasheet
1.HG-751B.pdf
(36 pages)
Specifications of 35004
Supply Voltage Vac
120V
Features
120 V Replacement Heating Element
For Use With
Proheat Heat Guns
Lead Free Status / RoHS Status
na


12 items and 75 pieces
20 items and 115 pieces
10600 Assortment Proseal Connector Kit
10723 - Proseal Connector Kit with Tool Slot
10719 - Proseal Connector Kit with UT-100Si & Crimper
10054 - Proseal Butt Splice Connector Minipak
3 items & 45 pieces
I
I
I
I
I
I
I
Description
18-20 AWG, Ring Terminal, Red, #10
14-16 AWG, Ring Terminal, Blue, #8
14-16 AWG, Ring Terminal, Blue, #10
14-16 AWG, Ring Terminal, Blue, 1/4” Stud
14-16 AWG, Ring Terminal, Blue, 3/8” Stud
10-12 AWG, Ring Terminal, Yellow, #10 Stud
10-12 AWG, Ring Terminal, Yellow, 3/8” Stud
18-20 AWG, Butt Connector, Red
14-16 AWG, Butt Connector, Blue
10-12 AWG, Butt Connector, Yellow
14-16 AWG, Slip-On Connector, Blue, .250 Female
14-16 AWG, Slip-On Connector, Blue, .250 Male
Description
18-20 AWG, Ring Terminal, #6 Stud, Red
18-22 AWG, Ring Terminal, #10 Stud, Red
14-16 AWG, Ring Terminal, #8 Stud, Blue
14-16 AWG, Ring Terminal, #10 Stud, Blue
14-16 AWG, Ring Terminal, 1/4” Stud, Blue
14-16 AWG, Ring Terminal, 3/8” Stud. Blue
10-12 AWG, Ring Terminal, #8 Stud, Yellow
10-12 AWG, Ring Terminal, #10 Stud, Yellow
10-12 AWG, Ring Terminal, 1/4” Stud, Yellow
10-12 AWG, Ring Terminal, 3/8” Stud, Yellow
18-20 AWG, Spade Terminal, #10, Red
14-16 AWG, Spade Terminal, #10, Blue
10-12 AWG, Spade Terminal, #10, Yellow
18-22 AWG, Butt Connector, Red
14-16 AWG, Butt Connector, Blue
10-12 AWG, Butt Connector, Yellow
18-20 AWG, Female Coupler, 1/4 Tab, Red
14-16 AWG, Female Coupler, 1/4 Tab, Blue
18-20 AWG, Male Coupler, 1/4” Tab, Red
14-16 AWG, Male Coupler, 1/4” Tab, Blue
Description
18-20 AWG, Butt Connector, Red
14-16 AWG, Butt Connector, Blue
10-12 AWG, Butt Connector, Yellow
Qty
Qty
Qty
10
10
10
10
10
10
20
20
5
5
5
5
5
5
5
5
5
5
5
5
5
5
5
5
5
5
5
5
5
5
5
5
5
5
5
1. Strip wires 1/4" and insert into crimp barrel
of connector.
2. Crimp the wires in crimp barrel.
3. Apply heat until tubing recovers and adhesive
melts and flows.