H7ET-N Omron, H7ET-N Datasheet - Page 11
H7ET-N
Manufacturer Part Number
H7ET-N
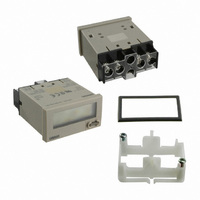
Description
TIME COUNTER LCD NO-VOLT IN BG
Manufacturer
Omron
Series
H7ETr
Specifications of H7ET-N
Operating Mode
Accumulative
Output Type
None
Voltage - Supply
None Required (Battery Included)
Termination Style
Screw Terminal
Display Type
LCD Non-Backlit
Number Of Digits/alpha
7
No. Of Digits / Alpha
7
Digit Height
8.6mm
Operating Temperature Range
-10°C To +55°C
Svhc
No SVHC (15-Dec-2010)
External Depth
48.5mm
External Length / Height
24mm
External Width
48mm
Operating Temperature Max
55°C
Lead Free Status / RoHS Status
Lead free / RoHS Compliant
Input Type
-
Count Rate
-
Lead Free Status / Rohs Status
Lead free / RoHS Compliant
Other names
H7ET-N
H7ETN
H7ETNQ
Z3003
H7ETN
H7ETNQ
Z3003
Available stocks
Company
Part Number
Manufacturer
Quantity
Price
Company:

Part Number:
H7ET-N
Manufacturer:
Omron Electronics Inc-IA Div
Quantity:
135
Company:
Part Number:
H7ET-NFV1-B
Manufacturer:
Omron Electronics Inc-IA Div
Quantity:
135
Company:
Part Number:
H7ET-NV1
Manufacturer:
Omron Electronics Inc-IA Div
Quantity:
135


J UNIT LABEL FOR TIME COUNTER AND
A unit label has been packed with the Counter. Use in
accordance with the application.
J BATTERY REPLACEMENT
Remove the wiring when replacing the Battery. Do not come in
contact with any item to which high voltage is being applied.
Doing so may result in electric shock.
Before changing the Battery, be sure that you are not carrying
any static electric charge.
Procedure for replacing the Battery (refer to the diagrams below):
When the internal Battery nears expiration, the display may
flicker.
H7ET
1. Using the tool, pry open the lift-tab on the case. (1)
2. Pull the body out of its outer case. (2)
3. Lift the Battery up by the edge and remove it. (3)
4. Wipe the back of the new Battery before inserting it.
5. Ensure that the + and - - terminals are correctly oriented.
6. After replacing the Battery, re-insert the body into its case. (4)
7. Press the Reset Key before use (not necessary for
TACHOMETER
(5)
When removing the Battery, do not come in contact with the
display area or any internal parts.
Check that the case is securely held in by the lift-tab.
H7ET-N,-NV,-NV1). (5)
(1)
(1)
(4)
Tool
(3)
(2)
11
J EN/IEC STANDARDS
The counter input, reset input, and backlight power supply
terminals of the no-voltage input or PNP/NPN universal DC
voltage input models (H7Ej-N,-N1, H7Ej-NV(-H),-NV1(-H)) are
not isolated.
A SELV power supply conforming to Appendix H of IEC61010-1
should be used for the counter input, reset input and backlight
power supply terminals. A SELV power supply is a power supply
for which the input and output have double or reinforced
insulation, and for which the output voltage is 30 Vrems with 42.4
V peak or 60 VDC max. (Only the H7Ej-NVj-H has a
backlight.)
The terminals for counter input and reset input for AC/DC
multi-voltage input models have basic insulation.
Connect the reset input terminals to a device that does not have
exposed current-carrying parts and has basic insulation for
240 VAC.
H7ET