H7CX-A11 AC100-240 Omron, H7CX-A11 AC100-240 Datasheet - Page 30
H7CX-A11 AC100-240
Manufacturer Part Number
H7CX-A11 AC100-240
Description
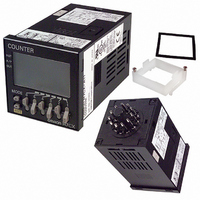
COUNTER DIGITAL SPDT 100-240VAC
Manufacturer
Omron
Series
H7CXr
Datasheet
1.H7CX-AS_AC100-240.pdf
(63 pages)
Specifications of H7CX-A11 AC100-240
Count Rate
30Hz or 5kHz Selectable
Number Of Digits/alpha
6
Input Type
Voltage, Switch Closure, Transistor Switch
Output Type
Switch Closure
Voltage - Supply
100 V ~ 240 V
Display Type
LCD Programmable Color
Lead Free Status / RoHS Status
Lead free / RoHS Compliant
Other names
H7CX-A11-AC100-240
H7CXA11AC100240
Z1662
H7CXA11AC100240
Z1662


■ Operating Procedures (Tachometer Function)
Switching from Counter to Tachometer
Settings for Basic Operations
Note: 1. Be sure to set pin 1 of the DIP switch to ON. If it is set to OFF, the DIP switch settings will not be enabled.
The H7CX is factory-set to the 2-stage
counter (1-stage counter for H7CX-AU@
models) configuration. To switch to the
tachometer configuration, use the
procedure shown on the right. For details,
refer to page 36.
1
2
3
4
5
6
7
8
Settings for basic functions can be performed with just the DIP switch.
Easy Confirmation of Switch Settings Using Indicators
Advanced-Function Settings
After making DIP switch settings for basic operations, advanced-functions (see note) can be added using the operation keys.
For details, refer to page 31.
Note: Advanced functions consist of decimal point position, prescale value, auto-zero time, startup time, display color, output
The ON/OFF status of the DIP switch pins can be
confirmed using the front display. For details, refer to page 36.
2. Changes to DIP switch settings are enabled when the power is turned ON.
DIP switch set-
tings enable/
disable
Counting speed 30 Hz
Tachometer out-
put mode
Average pro-
cessing
Not used
NPN/PNP input
mode
allocation, and key protect level.
Item
Disabled
Refer to the table on the right.
Refer to the table on the right.
---
NPN
OFF
Note: All of the pins are factory-set to OFF.
OFF
ON
Enabled
10 kHz
---
PNP
1
Be sure to set pin 1 to ON.
Switch to 2cnt to taco (tachometer operation) using the
ON
2
Configuration selection mode
3
4
5
6
Note: The
7
8
MODE
+
MODE
1
OFF
ON
OFF
ON
OFF
ON
OFF
ON
key must be pressed before the
Hold down for
1 s min. (See note.)
Pin 3
Pin 5
OFF
OFF
ON
ON
OFF
OFF
ON
ON
Pin 4
Pin 6
key.
Power ON
Run mode
Area
Upper limit
Lower limit
Upper and lower limit
OFF (no average processing)
2 times
4 times
8 times
Tachometer output mode
Average processing
1
key.
H7CX-A
30