VR001 Mide Technology Corporation, VR001 Datasheet - Page 5

VR001
Manufacturer Part Number
VR001
Description
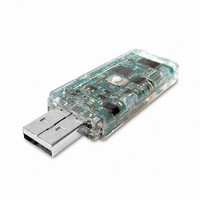
VIBRATION DATA LOGGER
Manufacturer
Mide Technology Corporation
Series
Slam Stick™, Volture™r
Specifications of VR001
Featured Product
Slam Stick⢠Vibration Recorder
Accessory Type
Vibration Characterization Device
Lead Free Status / Rohs Status
Lead free by exemption / RoHS compliant by exemption
For Use With/related Products
Volture™ Vibration Energy Harvesters
For Use With
V25W - PIEZOELECTRIC ENERGY HARVESTERV20W - PIEZOELECTRIC ENERGY HARVESTERV21BL - PIEZOELECTRIC ENERGY HARVESTERV21B - PIEZOELECTRIC ENERGY HARVESTERV22BL - PIEZOELECTRIC ENERGY HARVESTERV22B - PIEZOELECTRIC ENERGY HARVESTER
OPERATION
‘Full’ leaves the accelerometer in active mode and the
Flash memory powered, and uses the same sample
rate as the actual recording. This mode consumes
more power (~300uA @ 3200Hz), but will trigger
even on brief G-level exceedances. In addition, this
mode will record the 32 pre-trigger samples leading up
to the trigger event. This is the recommended mode of
operation for recording impacts and other transient
events.
Note that in either mode, a button press is still required
to arm the G-level trigger between recordings. The G-
level trigger will arm approximately 1 second after
pressing the button (plus any user-set time delays) to
prevent nuisance triggering due to the button recoil. To
minimize nuisance triggers, avoid setting a trigger level
at or near the noise floor (0.1 ~ 0.2g). For DC
triggering, the contribution of gravity (up to 1G +/- any
offset error), if any, must be added to this value.
To Erase data the device
DO NOT DELETE FILES FROM THE Slam Stick™!!! To
erase data (the configuration file will not be erased),
hold down the white button while unplugging the USB
connection. Keep the white button pressed down until
the orange LED starts flashing. At this point you can
remove pressure from the button. The device is done
erasing when the flashing LED stops. This will clear any
previous recordings from the device so it will be ready
for more testing.
To Install on Your Vibration Structure
Attach the Slam Stick™ to the vibration source using
any means that will ensure a high quality vibration
energy transfer with minimal damping. Ensure that the
mounting method also allows for easy removal of the
Slam Stick™ after the test. Ensure that the user still
has access to the operating button after installation, or
‘Full’ sample rate (up to 3200Hz)
REVISION N0. 001
REVISION DATE: 08-24-2010
delay is long enough to permit installation. Ensure that
the axes orientation of the Slam Stick™ is suitable for
the desired measurement (see figure below). It is
suggested to take a picture of the device for later
confirmation of mounting position. Suggested
mounting options include bee’s wax, thin double sided
tape, duct tape and/or mechanical brackets. If
mechanical brackets are used be careful not to over
load the plastic enclosure.
enclosure is only dust proof and should not be
submerged or subjected to any direct fluid spray.
To Record
To begin the vibration measurement press and release
the white button on the Slam Stick™. An amber LED
near the rear end of the device will indicate the
recording progress. If a pre-recording delay has been
set, the LED will flash briefly, about every 2 seconds,
during the delay period. During active recording, the
LED will blink rapidly, then stop when the recording
completes.
During recording, the button can also be pressed
during the delay period (if any) to skip the delay and
begin recording, or during the active recording period
to terminate the recording early.
www.mide.com
Please note that the
5


