CMA3000-D01 DEMO VTI Technologies, CMA3000-D01 DEMO Datasheet - Page 10
CMA3000-D01 DEMO
Manufacturer Part Number
CMA3000-D01 DEMO
Description
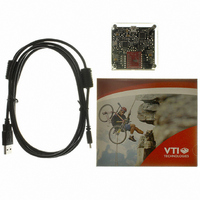
KIT DEMO ACCELEROMTR CMA3000-D01
Manufacturer
VTI Technologies
Datasheet
1.CMA3000-D01_DEMO.pdf
(21 pages)
Specifications of CMA3000-D01 DEMO
Mfg Application Notes
CMA3000 Assembly Instructions C-Code Examples for CMA3000 Accelerometer Sub-1 uA Current Consumption with CMA3000
Sensor Type
Accelerometer, 3 Axis
Sensing Range
±2g, 8g
Interface
I²C, SPI
Sensitivity
56, 14 count/g
Voltage - Supply
5 VDC, USB Powered
Embedded
No
Utilized Ic / Part
CMA3000-D01
Lead Free Status / RoHS Status
Lead free / RoHS Compliant
Other names
551-1066


4.1 Resetting GUI and µC
4.2 Uninstalling the GUI and USB driver
5
VTI Technologies Oy
www.vti.fi
Advanced data logging
CMA3000 DEMO KIT GUI software can be reinitialised by selecting the “Reset demo” display from
pull down menu, see Figure 11.
MCU can be reset by exiting from the GUI and then pressing the reset button (Figure 1) on USB
interface board.
The GUI software and the USB driver (FTDI Serial Converter Driver) can be removed from
Windows Control Panel Add/Remove Programs. Please notice that removing the FTDI Serial
Converter Driver (USB driver) may affect on functionality of some other programs (such as other
demo kits provided by VTI Technologies).
Acceleration data can be saved from GUI software by pressing the “Save to file” button (Figure 2).
Data can be logged also by using the Windows HyperTerminal software and macro language that
is used to control the MCU of the CMA3000 DEMO KIT.
Please notice that GUI software and Windows HyperTerminal software can not be open at the
same time. Follow the steps below to start the data logging:
Macro language is used to control the CMA3000 DEMO KIT. It can be also used to configure the
CMA3000 sensor. For more detailed information of macro language, please refer to “SCA3000
DEMO KIT macro language description 8259200”.
1. Connect CMA3000 DEMO KIT with USB cable to PC
2. Open GUI software to see the correct COM port number (SETUP display, see Figure 10).
3. Close the GUI software.
4. Open Windows HyperTerminal software from CD-ROM:
5. Press demo reset button (see Figure 1). CMA3000 DEMO KIT sends an info text to
6. After the info text appears on HyperTerminal, send the wanted macro text file, such as
7. The text file is a macro that runs in an endless loop. The macro sends 3-axis acceleration
8. The data can be stored by capturing the data in to file:
9. Data capturing can be stopped from:
Windows Device Manager can be also used to find out the COM port number.
HyperTerminal (see Figure 12). If the HyperTerminal software is unable to connect the
CMA3000 DEMO KIT or the info text does not appear,
until info text appears to HyperTerminal screen (see Figure 12).
“CMA3000_data_logger.txt” from CD-ROM (“Transfer” pull down menu → “Send Text
File…” → browse for
CMA3000_data_logger_macro.txt)
data in hex format to HyperTerminal (see Figure 13). Example of data format:
0x3c,0x01,0x01,Z-Y-X
where “0x” indicates for hex format, and “Z-Y-X” the axis order. The Z-axis hex output is
3C, which is ‘0011 1100’ in binary format.
“Transfer” pull down menu → “Capture Text…” → save captured data into wanted file and
folder.
“Transfer” pull down menu → “Capture Text…” → “Stop”
−
−
-
-
-
-
“CMA3000_demo_HyperTerminal_connection.ht”, or
see detailed serial communication settings in Table 2.
Press disconnect
change the COM port number to correct from port properties
press connect
press reset button on CMA3000 DEMO KIT.
Doc.Nr. 8288400.02
,
,
SCA3000 DEMO KIT
,
User Manual
Rev.0.2
10/21
Related parts for CMA3000-D01 DEMO
Image
Part Number
Description
Manufacturer
Datasheet
Request
R

Part Number:
Description:
BOARD PWB ACCEL 3-AXIS SPI/I2C
Manufacturer:
VTI Technologies
Datasheet:

Part Number:
Description:
BOARD PWB ACCEL 3AXIS ANALG OUT
Manufacturer:
VTI Technologies
Datasheet:

Part Number:
Description:
ACCELEROMETER 3-AXIS SPI/I2C SMD
Manufacturer:
VTI Technologies

Part Number:
Description:
ACCELEROMETER 3-AXIS ANALOG OUT
Manufacturer:
VTI Technologies
Datasheet:

Part Number:
Description:
Cma3000-d0x Series 3-axis Accelerometer
Manufacturer:
VTI Hamlin
Datasheet:
Part Number:
Description:
Cma3000-a0x Series 3-axis Accelerometer
Manufacturer:
VTI Hamlin
Datasheet:
Part Number:
Description:
Cma3000 Series 3-axis Accelerometer
Manufacturer:
VTI Hamlin
Datasheet:

Part Number:
Description:
ACCELEROMETER SGL 1.7G DIL8 SMD
Manufacturer:
VTI Technologies
Datasheet:
Part Number:
Description:
VTI Automotive Digital Accelerometer Platform
Manufacturer:
VTI [VTI technologies]
Datasheet:

Part Number:
Description:
EVAL BOARD ACCELEROMETER Y-AXIS
Manufacturer:
VTI Technologies
Datasheet:

Part Number:
Description:
EVAL BOARD INCLINOMETER Y-AXIS
Manufacturer:
VTI Technologies
Datasheet:

Part Number:
Description:
DEMO KIT WITH SCC1300-D04
Manufacturer:
VTI Technologies
Datasheet:

Part Number:
Description:
KIT DEMO ACCELEROMTR SCA3060-D01
Manufacturer:
VTI Technologies
Datasheet:

Part Number:
Description:
EVAL BOARD ACCELEROMETER Z-AXIS
Manufacturer:
VTI Technologies
Datasheet:

Part Number:
Description:
EVAL BOARD ACCELEROMETER XY-AXIS
Manufacturer:
VTI Technologies
Datasheet: