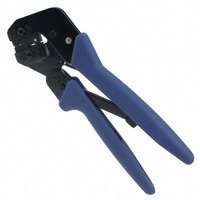
318450-1 Tyco Electronics, 318450-1 Datasheet - Page 4

318450-1
Manufacturer Part Number
318450-1
Description
PROCRIMP HT & DIE BNC TNC
Manufacturer
Tyco Electronics
Type
Hand Tool Assemblyr
Specifications of 318450-1
Crimp Tool
Hand Crimper III
Product
Crimping, Stripping & Cutting Tools & Drills
For Use With
SDE Dies
Lead Free Status / RoHS Status
Not applicable / Not applicable
Lead Free Status / RoHS Status
na, Not applicable / Not applicable
If the crimping chambers conform to the gage
inspection, the dies are considered dimensionally
Suggested Plug Gage for Center Contact
Crimping Chamber
Suggested Plug Gage for Ferrule
Crimping Chamber
2. Align the GO element with the crimping
chamber. Push the element straight into the
crimping chamber without using force. The GO
element must pass completely through the
crimping chamber.
3. Align the NO–GO element and try to insert it
straight into the same crimping chamber. The
NO–GO element may start entry, but must not
pass completely through.
4. Repeat Steps 2 and 3 for each crimping
chamber listed in Figure 5.
i
Insert the gage element for the insulation ferrule
section into the back of the crimping chamber.
The GO element for this section will not pass
completely through the crimping chamber.
Figure 5
correct, and should be lubricated with a THIN coat of
any good SAE 20 motor oil. If not, the dies must be
replaced before returning the hand tool and die
assembly to service (see Section 8, DIE
REPLACEMENT).
For additional information regarding the use of a plug
gage, refer to Instruction Sheet 408–7424.
The frame assembly ratchet mechanism features an
adjustment wheel with numbered settings. If the dies
do not bottom, adjust the ratchet as follows:
Ensure that the tool and dies are clean by wiping
them with a clean, soft cloth. Remove any debris with
a clean, soft brush. Do not use objects that could
damage the tool. When not in use, keep handles
closed to prevent objects from becoming lodged in
the crimping dies, and store in a clean, dry area.
For tool repair service, please contact a Tyco
Electronics Representative at 1–800–526–5136.
1. Remove the lockscrew from the ratchet
adjustment wheel.
2. With a screwdriver, adjust the ratchet wheel
from the opposite side of the frame.
3. Observe the ratchet adjustment wheel. If the
dies do not bottom, rotate the adjustment wheel
COUNTERCLOCKWISE to a higher–numbered
setting.
4. Replace the lockscrew.
Figure 6


