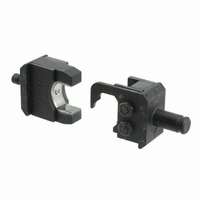
47823 Tyco Electronics, 47823 Datasheet - Page 3

47823
Manufacturer Part Number
47823
Description
DIE TERMINYL 69051 2AWG
Manufacturer
Tyco Electronics
Datasheet
1.47820.pdf
(8 pages)
Specifications of 47823
Lead Free Status / RoHS Status
Not applicable / Not applicable
4.2. Crimping Splices Without Step-Down Adapter
Rev
Crimping Terminals
Crimping Dies 47820 through 47825, 47915, and 47918
CAUTION
DANGER
1. Strip wires to the dimensions listed in Figure 3.
Do not nick or cut the wire strands.
2. Select the proper color–coded splice for the wire
size. The wire size stamped on the splice and on
the crimping die must match the wire size selected.
3. Insert the stripped wire into the wire barrel of the
end of the splice to be crimped until the wire
bottoms against the wire stop within the splice.
4. Remove crimping head latch pin, and open
yoke.
5. Place the splice in the stationary die. Grasp the
end of the splice to be crimped and point the
opposite end toward the top of the head yoke at
approximately a 30 _ angle. Rotate the end of the
splice to be crimped into the die. Position the edge
of the window indent against the locator. Refer to
Figure 5.
6. Holding the splice in place, close the yoke and
insert the latch pin.
7. Holding wire in place, activate tool or power unit
to complete first wire barrel crimp.
8. When crimp is completed, remove the latch pin,
open the yoke and remove the splice.
Bottom of Terminal
Tongue Facing
Stationary Die
H
!
Avoid personal injury. When operating tool or
power unit, exercise caution while holding splice
or wire near the crimping area.
Be sure that the latch pin is fully inserted,
otherwise damage to the dies and tool or head
will occur when the tool is activated.
Figure 4
Edge of Wire
Barrel Resting
Against Locator
Tyco Electronics Corporation
4.3. Crimping Splices With Step-Down Adapter
Crimping Splices With or Without Step-Down Adapter
DANGER
End of Splice
Pointed Toward
Top of Yoke at
Approximately
30
NOTE
9. To crimp the other half of splice, reposition
uncrimped end of splice in the stationary die and
follow the same procedure used to crimp the first
half of splice.
10. Inspect the crimp according to Section 5.
1. Strip wires to the dimensions listed in Figure 3.
Do not nick or cut the wire strands.
2. Select the proper splice, adapter, and crimping
die for the wire size. See Figure 6. Note that the
end of the splice containing the adapter has a
different color code. Use the crimping die for the
larger wire size to crimp both ends of the splice.
For example, use Crimping Die 47820 (for wire
size 8 AWG) to crimp both ends of the splice with
step–down adapter for stepping down from wire
size 8 to 16–14 AWG.
Top of
Yoke
_
i
Angle
If splice sticks in die after crimping, apply a
rocking action to the splice to remove it from the
die. Wipe light oil on dies to reduce sticking, or
use spray dry lubricant.
Avoid personal injury. When operating tool or
power unit, exercise caution while holding splice
or wire near the crimping area.
Figure 5
Rotate End of Splice
to be Crimped into
Stationary Die
Edge of
Window Indent
Resting Against
Locator
408-1729
3
of 8


