58336-1 Tyco Electronics, 58336-1 Datasheet - Page 5
58336-1
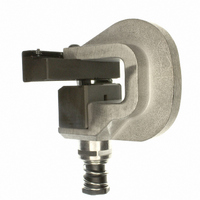
Manufacturer Part Number
58336-1
Description
HEAD (IDC) MODU MTE W/O TL
Manufacturer
Tyco Electronics
Series
AMPMODU® MTEr
Type
Amp Tool Kitr
Specifications of 58336-1
Connector Type
Rectangular
Crimp Handle
A2031-ND, 58075-1-ND, 58338-1-ND, 931800-1-ND
Crimp Or Cable Size
22-30 AWG
Product
Tool Component
For Use With
58075-1 - TOOL HANDLE PNEUMATIC W/O HEAD931800-1 - ELEC PWR UNIT W/O F/TRK OR HD58338-1 - PWR BENCH ASSEMBLY W/O HEADS
Lead Free Status / RoHS Status
Not applicable / Not applicable
Lead Free Status / RoHS Status
na, Not applicable / Not applicable
Other names
58336-1
A28718
A28718


5. INSPECTION
Figure 7 illustrates properly and improperly terminated
contacts. Each view gives a brief description of the
termination.
Inspect each termination as follows:
Rev C
WARNING: Use care, carrier strip may have sharp edges.
11. Inspect each termination according to the
procedures given in Section 5, TERMINATION.
12. If all terminations are acceptable, grasp each
wire and gently push forward to insert the contacts
completely into the housing assembly. Refer to
Figure 6. Pull back lightly on the wire to ensure that
the locking lance is engaged.
1. Make sure that the wire is located in the contact
slot as shown in Figure 7.
2. Make sure that the wire extends beyond the
front contact slot (minimum dimension is given in
Figure 7).
3. Make sure that the contact wire channel is not
deformed. If damage is apparent, replace the
Locking Lance Seated
Against Housing Window
Locking
Lance
Window
Figure 6
Carrier Strip
Preload Window
90
6. TOOL CERTIFICATION
The procedures that follow have been established to
ensure the quality and reliability of the terminating
tools. A brief check should be made daily, and a more
detailed inspection should be scheduled by your
Quality Control Group.
6.1. User Maintenance
Each user should be made aware of, and responsible
for the following:
6.2. Quality Control Maintenance
Regular inspections should be performed by your
Quality Control personnel, and a record of quality
control inspections should remain with the personnel
responsible for the tool. We recommend one
inspection a month; however, operator training and
skill, amount of use, ambient working conditions, and
your company’s standards are all factors to consider
when establishing inspection frequency.
These inspections should be performed in the
following sequence:
NOTE
contact(s) per Instruction Sheet 408--6919,
packaged with the connector.
4. Make sure the insulation barrel is closed to
secure the insulation of the wire, and that the
preload forward stop is formed over to allow
contact insertion.
1. Remove dust, moisture, and other contaminants
using a clean brush or a soft, lint--free cloth. Do not
use objects that could damage the tool.
2. Make sure all components are in place and are
properly secured. If not, return the tool to your
supervisor.
3. Squeeze and release the trigger or cam handle
to be sure the mechanism inside the body moves
freely and does not bind.
1. Remove any accumulated film with a suitable
cleaning agent that will not affect paint or
polycarbonate plastic.
2. Make sure all components are in place and are
tightly secured.
3. Make a few test terminations and inspect the
termination as instructed in Section 5,
INSPECTION.
The insulation barrel does not have to be
wrapped tightly around the insulation. The
purpose of the insulation barrel is to prevent the
wire from being lifted from the wire channel.
408- 9359
5 of 7