E3XNA41F2M Omron, E3XNA41F2M Datasheet - Page 15
E3XNA41F2M
Manufacturer Part Number
E3XNA41F2M
Description
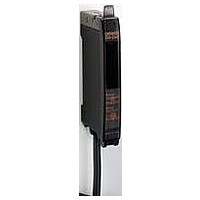
Photoelectric Sensor
Manufacturer
Omron
Type
High Speed Fiber Optic Sensorr
Datasheet
1.E3XNA11F2M.pdf
(28 pages)
Specifications of E3XNA41F2M
Sensor Output
PNP
Sensor Input
Fiber Optic
Output Type
PNP LO/DO
Supply Voltage Max
24V
Switch Terminals
Cable
Supply Voltage Min
12V
Fiber Optic Sensor Type
High Speed Fiber Optic Sensor
Rohs Compliant
Yes
Lead Free Status / RoHS Status
Lead free / RoHS Compliant


E3X-NA
Connection
Do not pull or press the Fiber Units. The Fiber Units have a with-
stand force of 9.8 N or 29.4 N maximum (pay utmost attention
because the fibers are thin).
Do not bend the edge of the Fiber Units (excluding the E32-T@R
and E32-D@R).
Do not apply excess force on the Fiber Units.
The Fiber Head could be broken by excessive vibration.Use the
following method to prevent fiber head breakage:
Bending Radius
E39-F11 Sleeve Bender
The bending radius of the stainless steel tube should be as large
as possible. The smaller the bending radius becomes, the shorter
the sensing distance will be.
Insert the tip of the stainless steel tube to the Sleeve Bender and
bend the stainless steel tube slowly along the curve of the Sleeve
Bender (refer to the figure).
R 7.5 mm
Correct
Correct
R 12.5 mm
Amplifier Unit
1.2-mm
dia. max.
1.3-mm dia. min.
Fiber Unit
A one-turn loop can
absorb vibrations.
Nylon wireholder
20 mm min.
Stainless
steel tube
20 mm min.
Fiber Unit
90° max.
R 10 mm
Fiber tip position mark
R 5 mm
Tape
Incorrect
Incorrect
10 mm
Do not bend here.
10 mm
I
Mounting Connectors
1. Insert the Master or Slave Connector into the Amplifier Unit
2. Join Amplifier Units together as required after all the Master
3. Attach the stickers (provided as accessories) to the sides of
Note:
Removing Connectors
1. Slide the slave Amplifier Unit for which the Connector is to be
2. After the Amplifier Unit has been separated, press down on
Mounting Amplifier Units with
Connectors
until it clicks into place.
and Slave Connectors have been inserted.
Master and Slave Connectors that are not connected to other
Connectors.
removed away from the rest of the group.
the lever on the Connector and remove it. (Do not attempt to
remove Connectors without separating them from other
Amplifier Units first.)
Attach the stickers to the sides with grooves.
Sticker
Press down
Insert
Sticker
Remove
Lever
E3X-NA
15
Related parts for E3XNA41F2M
Image
Part Number
Description
Manufacturer
Datasheet
Request
R

Part Number:
Description:
PNP GEN PURPOSE FO AMP
Manufacturer:
Omron
Datasheet:

Part Number:
Description:
G6S-2GLow Signal Relay
Manufacturer:
Omron Corporation
Datasheet:
Part Number:
Description:
Compact, Low-cost, SSR Switching 5 to 20 A
Manufacturer:
Omron Corporation
Datasheet:
Part Number:
Description:
Manufacturer:
Omron Corporation
Datasheet:
Part Number:
Description:
Manufacturer:
Omron Corporation
Datasheet:
Part Number:
Description:
Manufacturer:
Omron Corporation
Datasheet:
Part Number:
Description:
Manufacturer:
Omron Corporation
Datasheet:
Part Number:
Description:
Manufacturer:
Omron Corporation
Datasheet:
Part Number:
Description:
Manufacturer:
Omron Corporation
Datasheet: