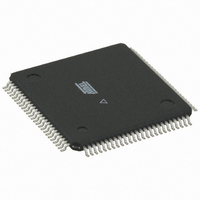
ATMEGA128RZBV-8CU Atmel, ATMEGA128RZBV-8CU Datasheet - Page 16

ATMEGA128RZBV-8CU
Manufacturer Part Number
ATMEGA128RZBV-8CU
Description
BUNDLE ATMEGA1280/AT86RF100-TQFP
Manufacturer
Atmel
Series
ATMEGAr
Specifications of ATMEGA128RZBV-8CU
Frequency
2.4GHz
Data Rate - Maximum
2Mbps
Modulation Or Protocol
802.15.4 Zigbee
Applications
General Purpose
Power - Output
3dBm
Sensitivity
-101dBm
Voltage - Supply
1.8 V ~ 3.6 V
Data Interface
PCB, Surface Mount
Memory Size
128kB Flash, 4kB EEPROM, 8kB RAM
Antenna Connector
PCB, Surface Mount
Package / Case
100-TFBGA
Wireless Frequency
2.4 GHz
Interface Type
JTAG, SPI
Output Power
3 dBm
For Use With
770-1007 - ISP 4PORT ATMEL AVR MCU SPI/JTAG770-1005 - ISP 4PORT FOR ATMEL AVR MCU JTAG770-1004 - ISP 4PORT FOR ATMEL AVR MCU SPIATAVRISP2 - PROGRAMMER AVR IN SYSTEMATJTAGICE2 - AVR ON-CHIP D-BUG SYSTEMATSTK501 - ADAPTER KIT FOR 64PIN AVR MCUATSTK500 - PROGRAMMER AVR STARTER KIT
Lead Free Status / RoHS Status
Lead free / RoHS Compliant
Operating Temperature
-
Current - Transmitting
-
Current - Receiving
-
Lead Free Status / Rohs Status
Lead free / RoHS Compliant
For Use With/related Products
ATmega128
6.2.2 Running the Chat Client
16
AVR414
The Java Runtime Environment (JRE) is a software bundle (JVM and libraries) that
allows your PC to run Java based applications. Following the steps is required to
ensure that the correct Java virtual machine is installed:
1. Go to Start Menu->Control Panel. Open the file named "Java". In the window that
2. A new dialog appears that lists the available JRE versions and their path.
3. Download
Step B: Install Serial Port Library.
The serial port library is installed by copying the files found in the "lib\pc" folder into
the following Java system folders:
1.
2. Copy the "comm.jar" file to the "...\Java\jre1.5.x\lib\ext" folder.
3. Copy the "javax.comm.properties" file to the "...\Java\jre1.5.x\lib" folder.
Step C: Connect STK501/RZ502 to your PC.
Connect a serial cable to the connector marked “RS232 SPARE #2” on the STK501
top module to a COM port on the PC as shown in Figure 6-2.
Figure 6-2 STK501 with RS232 cable connected.
This subsection assumes that all the steps listed in subsection 5.1, 5.2 and 6.2.1
were completed successfully. The chat client is started by double clicking the file
opens, select the tab named "Java" and click on the "View..." button within the
"Java-Applet-Runtime-Settings" box.
(http://java.com/en/download/index.jsp) if no Java Runtime Environment was
found, or if the installed version is below version 1.5.x.
Copy the "win32comm.dll" file to the "...\Java\jre1.5.x\bin" folder.
and
install
the
current
JRE
from
Sun's
Java
8051A-AVR-11/06
Homepage


