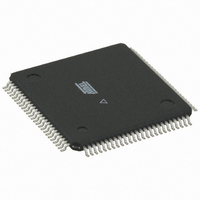
ATMEGA128RZBV-8CU Atmel, ATMEGA128RZBV-8CU Datasheet - Page 17

ATMEGA128RZBV-8CU
Manufacturer Part Number
ATMEGA128RZBV-8CU
Description
BUNDLE ATMEGA1280/AT86RF100-TQFP
Manufacturer
Atmel
Series
ATMEGAr
Specifications of ATMEGA128RZBV-8CU
Frequency
2.4GHz
Data Rate - Maximum
2Mbps
Modulation Or Protocol
802.15.4 Zigbee
Applications
General Purpose
Power - Output
3dBm
Sensitivity
-101dBm
Voltage - Supply
1.8 V ~ 3.6 V
Data Interface
PCB, Surface Mount
Memory Size
128kB Flash, 4kB EEPROM, 8kB RAM
Antenna Connector
PCB, Surface Mount
Package / Case
100-TFBGA
Wireless Frequency
2.4 GHz
Interface Type
JTAG, SPI
Output Power
3 dBm
For Use With
770-1007 - ISP 4PORT ATMEL AVR MCU SPI/JTAG770-1005 - ISP 4PORT FOR ATMEL AVR MCU JTAG770-1004 - ISP 4PORT FOR ATMEL AVR MCU SPIATAVRISP2 - PROGRAMMER AVR IN SYSTEMATJTAGICE2 - AVR ON-CHIP D-BUG SYSTEMATSTK501 - ADAPTER KIT FOR 64PIN AVR MCUATSTK500 - PROGRAMMER AVR STARTER KIT
Lead Free Status / RoHS Status
Lead free / RoHS Compliant
Operating Temperature
-
Current - Transmitting
-
Current - Receiving
-
Lead Free Status / Rohs Status
Lead free / RoHS Compliant
For Use With/related Products
ATmega128
8051A-AVR-11/06
named “AVR414.jar” in the “bin” folder. A screen like that depicted in Figure 6-3
should now be visible. Now proceed with one of the following steps:
1. Step A: Start the Coordinator: Starts a new network. Peer becomes coordinator.
2. Step B: Start the End-device: Associate to an existing network. Peer becomes
Figure 6-3 Chat Client Start Screen
Step A: Start the Coordinator
3. From the screen shown in Figure 6-3, press the “Connect” button.
4. The “COM Settings” dialog box will now appear. From the drop down list, select the
5. Then in the “Device Options” dialog select the channel and PANID to start the
6. If the channel and PANID entered was valid, a new tab will be added to the chat
7. Proceed with Step B to add an end-device to the network.
end-device.
serial port where the STK501 board is connected. Press “OK”.
network on. Check the “Coordinator” option as seen in Figure 6-4. Press “OK”.
client containing a text area with the text: “Network not started yet”. This is just an
notification that an end-device must associate before it is possible to chat.
AVR414
17


