E3XCN22 Omron, E3XCN22 Datasheet - Page 17
E3XCN22
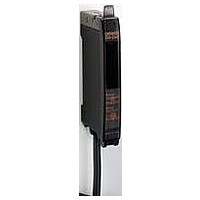
Manufacturer Part Number
E3XCN22
Description
Sensor Connector
Manufacturer
Omron
Datasheet
1.E3XCN21.pdf
(22 pages)
Specifications of E3XCN22
Accessory Type
Amplifier Cable
For Use With
Digital Fiber Amplifier
Lead Free Status / RoHS Status
Lead free / RoHS Compliant


Amplifier Unit Connectors
Installation
Connector installation
1. Insert the Master or Slave Connector into the amplifier unit
2. Link amplifier units to each other after the master and slave
3. Apply the supplied seal to the non-connecting surface of the
Note: Apply seal to the grooved side.
Removing Connectors
1. Slide the slave amplifier unit (s) on which the connector
2. After the amplifier unit (s) has been separated, press down
E3X-DA-N
until it clicks into place.
Connectors have been inserted.
master/slave connector.
must be removed from the rest of the group.
the lever on the connector and remove it. (Do not attempt
to remove connectors without separating them from other
amplifier units first.)
Sticker
Insert
Press down
Sticker
Remove
Lever
Mounting End Plate (PFP-M)
Depending on the installation, an amplifier unit may move dur-
ing operation. In this case, use an end plate.
Before installing an end plate, remove the clip from the master
amplifier unit using a nipper or similar tool.
The sensor bottom is also equipped with a clip removing
mechanism.
1. Insert the clip to be removed into the slit underneath the clip
2. Remove the clip by rotating the amplifier unit.
When fitting the Mobile Console, set the end plate in the guide
as shown in the following figure.
Tensile stress for connectors (including cables)
E3X-CN11, E3X-CN21, E3X-CN22: 30 N max.
E3X-CN12: 12N max.
on another amplifier unit.
Rotate
Clip
End Plate
A-435
Related parts for E3XCN22
Image
Part Number
Description
Manufacturer
Datasheet
Request
R

Part Number:
Description:
G6S-2GLow Signal Relay
Manufacturer:
Omron Corporation
Datasheet:
Part Number:
Description:
Compact, Low-cost, SSR Switching 5 to 20 A
Manufacturer:
Omron Corporation
Datasheet:
Part Number:
Description:
Manufacturer:
Omron Corporation
Datasheet:
Part Number:
Description:
Manufacturer:
Omron Corporation
Datasheet:
Part Number:
Description:
Manufacturer:
Omron Corporation
Datasheet:
Part Number:
Description:
Manufacturer:
Omron Corporation
Datasheet:
Part Number:
Description:
Manufacturer:
Omron Corporation
Datasheet:
Part Number:
Description:
Manufacturer:
Omron Corporation
Datasheet: