45LM58D BANNER ENGINEERING, 45LM58D Datasheet - Page 5
45LM58D
Manufacturer Part Number
45LM58D
Description
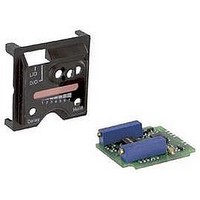
Timing Logic Module
Manufacturer
BANNER ENGINEERING
Datasheet
1.45LM58D.pdf
(6 pages)
Specifications of 45LM58D
Time Range
0.01s To 0.15s, 0.1s To 1.5s, 1s To 15s
Application
For timing logic functions
Function
Module, Logic
Logic Type
On⁄Off Delay
Technology
Photoelectric
Timing Adjustment
0.01 to 15 Sec.
Operating Temperature
–40°C to 70°C
Lead Free Status / Rohs Status
RoHS Exempt Product


Figure 5. Insert a small screwdriver into
Remove all power to the sensor (and
to the load) whenever the transparent
top cover will be raised and the black
inside cover will be removed.
Failure to remove power while these
covers are removed could result in injury.
NOTE: It is not necessary to remove
Banner Engineering Corp.
www.bannerengineering.com • Tel: 763.544.3164
power simply to adjust the
Sensitivity or Timing controls,
as long as the black inside cover
remains in place.
the slot and lift the black cover to
remove.
CAUTION . . .
Electrical Shock Hazard
An electrical shock hazard
exists inside the sensor
whenever power is applied.
•
Minneapolis, MN U.S.A.
To remove or install any of the 45LM modules (done through the top of the sensor),
perform the following steps:
1) Remove all power from the sensor and load.
2) Loosen the top cover hold-down screw and raise the transparent cover
3) Insert a small screwdriver into one of the slots at the front of the black inner
4) Insert a small screwdriver into one of the slots at the side of the module to be
5) Press the new module into place (Figure 7).
6) Replace the black cover, then the transparent hinged cover, and tighten the
7) Reapply power as desired.
NOTE: If only installing a new module (and not removing an old one), skip step 4.
Figure 6. Using the small screwdriver in
(it is hinged).
cover, lift and remove (Figure 5).
removed and pry it up until you can grasp it with your fingers and remove
(Figure 6).
hold-down screw.
the module slot if necessary
to nudge the module loose, lift
the module up and out.
Removing and Installing the Plug-In Modules
Figure 7. Slide the new module into place,
45LM Series Modules
pressing until it fits snugly.
P/N 63416 rev. A
5
Related parts for 45LM58D
Image
Part Number
Description
Manufacturer
Datasheet
Request
R

Part Number:
Description:
Photoelectric Sensor
Manufacturer:
BANNER ENGINEERING
Datasheet:

Part Number:
Description:
Photoelectric Sensor
Manufacturer:
BANNER ENGINEERING
Datasheet:

Part Number:
Description:
LEDIR70XD4-XM-81039 MAX INTENS STROBE ONLY NO BANNER MARKS
Manufacturer:
BANNER ENGINEERING
Part Number:
Description:
M18SP6DL-72225 LABELED MOELLER NO BANNER MARKINGS BULK PACK
Manufacturer:
BANNER ENGINEERING
Part Number:
Description:
M18SP6DLQ-72226 LABLED MOELLER NO BANNER MARKINGS BULK PACK
Manufacturer:
BANNER ENGINEERING
Part Number:
Description:
M18SP6L-72223 LABELED MOELLER NO BANNER MARKINGS BULK PACK
Manufacturer:
BANNER ENGINEERING
Part Number:
Description:
M18SP6LQ-72224 LABELED MOELLER NO BANNER MARKINGS BULK PACK
Manufacturer:
BANNER ENGINEERING
Part Number:
Description:
Photoelectric Sensor
Manufacturer:
BANNER ENGINEERING
Datasheet:

Part Number:
Description:
Programmable Indicator Light
Manufacturer:
BANNER ENGINEERING
Datasheet:
Part Number:
Description:
INDICATOR LED PANEL 50MM GRN/RED/YEL 30V
Manufacturer:
BANNER ENGINEERING
Datasheet:
Part Number:
Description:
Programmable Indicator Light
Manufacturer:
BANNER ENGINEERING
Datasheet: