A7B-C Omron, A7B-C Datasheet - Page 25
A7B-C
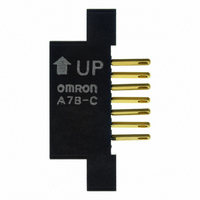
Manufacturer Part Number
A7B-C
Description
CONNECTOR
Manufacturer
Omron
Type
Connectorr
Series
A7BS, A7BLr
Specifications of A7B-C
Accessory Type
Connector
Illumination
Not Illuminated
Height
20.5 mm
Length
37 mm
Mounting Style
Snap On
Termination Style
Solder
Width
7.8 mm
Body Orientation
Straight
Gender
PL
Pitch (mm)
2.54mm
Number Of Contact Rows
2
Lead Free Status / RoHS Status
Lead free / RoHS Compliant
For Use With/related Products
SW266 ~ SW269
For Use With
SW266 - SWITCH THUMBWHEEL BLACK BCDSW267 - SWITCH THUMBWHEEL BLACK BCDSW268 - SWITCH THUMBWHEEL EXT BRD BCDSW269 - SWITCH THUMBWHEEL EXT BRD +,-DIS
Lead Free Status / Rohs Status
Lead free / RoHS Compliant
Other names
A7BC
SW270
SW270


A7j
For Stoppers other than those for the A7BS-20-S, refer to pages 5 to
11 of the Selection Guide as well as the ordering information on
page 15. All manufactured Switches have their ranges factory-set
before shipment.
Soldering
Note the following points when soldering printed circuit boards:
Automatic Soldering
After coating with flux foam 1, dip into a soldering tank 2. Thereafter,
do not dip to clean. There is no danger of flux penetration in pro-
cesses 1 and 2, but penetration will occur with dip cleaning, causing
contact and rotational defects. Clean the flux as shown in Figure 1,
tilting the Switch 45° or more and using a brush to apply the solvent
only to the back of the board. It may also be cleaned by dipping only
the back of the board into solvent and then using a brush to clean.
Dip Soldering
Dip into flux solvent 1, and then into a soldering tank 2. The dipping
time in process 1 is a maximum of 2 seconds. As shown in Figure 2,
avoid flooding the top surface of the printed circuit board with flux.
Using a brush to apply flux further reduces the danger of flux pe-
netration. As shown in Figure 2, a brush should be used while tilting
the board 45° or more. Flush flux as described above under Auto-
matic Soldering.
Using a Soldering Iron
Use a 30-W soldering iron at a temperature of 350°C for a maximum
of 3 seconds, and flush as described above.
36
5. Confirm that the (–) push-button can no longer be pushed
after reaching the lower limit of (“0”). This completes the
setting.
Figure 1
Figure 2
Top surface of board
Back of board
45° or
more
Wipe away flux
with a brush.
A7j
Related parts for A7B-C
Image
Part Number
Description
Manufacturer
Datasheet
Request
R

Part Number:
Description:
Endcap, Ship 1 LFT And 1 RGT
Manufacturer:
Omron
Datasheet:


Part Number:
Description:
Endcap, Ship 1 LFT And 1 RGT
Manufacturer:
Omron
Datasheet:
Part Number:
Description:
SPACER W/DECIMAL POINT
Manufacturer:
Omron
Datasheet:

Part Number:
Description:
G6S-2GLow Signal Relay
Manufacturer:
Omron Corporation
Datasheet:
Part Number:
Description:
Compact, Low-cost, SSR Switching 5 to 20 A
Manufacturer:
Omron Corporation
Datasheet:
Part Number:
Description:
Manufacturer:
Omron Corporation
Datasheet:
Part Number:
Description:
Manufacturer:
Omron Corporation
Datasheet: