D4B-1171N Omron, D4B-1171N Datasheet - Page 15
D4B-1171N
Manufacturer Part Number
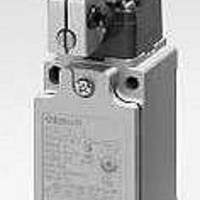
D4B-1171N
Description
LSW,PG13.5,SNAP,TOP PLNGR
Manufacturer
Omron
Series
D4B-Nr
Specifications of D4B-1171N
Contact Form
NO / NC
Contact Rating
2 Amps
Actuator
Plunger, Top Roller
Operating Force
18.63 N
Termination Style
Screw
Actuator Style
Top Roller Plunger
Operating Force Max
18.63N
Contact Voltage Ac Max
400V
Contact Voltage Dc Max
250V
Contact Current Ac Max
10A
Contact Current Dc Max
10A
Circuit
DPST (1-NO, 1-NC)
Switch Function
On-Mom, Off-Mom
Contact Rating @ Voltage
10A @ 120VAC
Actuator Type
Roller Plunger
Mounting Type
Chassis Mount
Lead Free Status / RoHS Status
Lead free / RoHS Compliant
Lead Free Status / RoHS Status
Lead free / RoHS Compliant


D4B-N
J CORRECT USE
Operating Environment
The D4B-jN is for indoor use. The D4B-jN may malfunction if
the D4B-jN is used outdoors. Be sure to use a model with a
lever-type actuator for outdoor use instead.
Do not use the D4B-jN in the following places:
•
•
•
•
Mounting
Use four M5 screws with washers to mount the standard model. Be
sure to apply the proper torque to tighten each screw. The D4B-jN
can be mounted more securely by using the four screws plus two
5
height of 4.8 mm as shown below.
Mounting Dimensions (M5)
Changes in Actuator Mounting Position
To change the angle of the lever, loosen the Allen-head bolts on the
side of the lever.
The operating position indicator plate has protruding parts which
engage with the lever, thus allowing changes to the lever position
by 90°.
The back of the operating position indicator plate has no
protruding parts. The lever can be set at any angle by attaching
the operating position indicator plate to the Switch so that this
side will face the lever. In this case, however, the D4B-jN will
not be approved by SUVA or BIA. Make sure that the lever
engages with the operating position indicator plate securely so
that the lever will not slip.
Changes in Head Mounting Position
By removing the screws on the four corners of the head, the
head can be reset in any of four directions. Make sure that no
foreign materials will penetrate through the head.
Standard Model
--0.05
Places with radical temperature changes.
Places with excessive humidity that may cause condensa-
tion.
Places with excessive vibration.
Places where metal dust, oil, or chemical may be sprayed to
the D4B-jN.
/
30
--0.15
-mm protruding parts, each of which has a maximum
60
59.3±0.1
3-Conduit Model
27±0.1
Protruding portions
5
30
40
42
- -0.05
- -0.15
dia. holes, max. 5 height
16
Wiring
Do not connect the bare lead wires directly to the terminals but
be sure to connect each of them by using an insulation tube and
M3.5 round solderless terminals and tighten each terminal screw
within the specified torque range.
The proper lead wire is 20 to 14 AWG (0.5 to 2.5 mm
Make sure that all solderless terminals come into contact with the
casing or cover as shown below, or the cover may not be
mounted properly or the D4B-jN may malfunction.
dz dia.:
D dia.:
B:
L:
F:
I:
Crimp-style terminal
Crimp-style
terminal
Case
3.7
4.5
7.0
20.2
7.7
9.0 (mm)
Correct
Correct
Correct
Incorrect
Crimp-style terminal
Terminal screw
Terminal screw
D dia.
Cover
Case
Crimp-style terminal
Incorrect
Incorrect
dz dia.
Terminal screw
Cover
Crimp-style terminal
2
) in size.
Related parts for D4B-1171N
Image
Part Number
Description
Manufacturer
Datasheet
Request
R

Part Number:
Description:
Safety Limit Switch
Manufacturer:
Omron
Datasheet:

Part Number:
Description:
SWITCHES
Manufacturer:
Omron
Datasheet:

Part Number:
Description:
D4B-N BODY ONLY,1NC/1NO,SNAP
Manufacturer:
Omron
Datasheet:
Part Number:
Description:
LIMIT SWITCH
Manufacturer:
Omron
Datasheet:
Part Number:
Description:
LIMIT SWITCH
Manufacturer:
Omron
Datasheet:
Part Number:
Description:
LIMIT SWITCH
Manufacturer:
Omron
Datasheet:
Part Number:
Description:
LIMIT SWITCH
Manufacturer:
Omron
Datasheet:
Part Number:
Description:
LIMIT SWITCH ADJ ROLL LEVER
Manufacturer:
Omron
Datasheet: