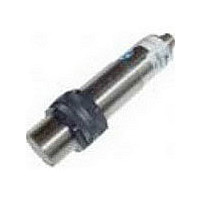
942-A4N-2D-1C1-130E Honeywell, 942-A4N-2D-1C1-130E Datasheet - Page 2

942-A4N-2D-1C1-130E
Manufacturer Part Number
942-A4N-2D-1C1-130E
Description
Proximity Sensors FIBER OPTIC PRODUCTS
Manufacturer
Honeywell
Type
Ultrasonic Sensorr
Datasheet
1.942-A4N-2D-1C1-130E.pdf
(6 pages)
Specifications of 942-A4N-2D-1C1-130E
Proximity Sensor Type
Ultrasonic
Proximity Sensor Sensing Distance
3000mm
Proximity Sensor Sensing Distance Range
>=1200mm
Proximity Sensor Switching Mode
NO/NC
Mounting
Panel
Operating Temp Range
-40C to 85C
Operating Temperature Classification
Commercial
Operating Supply Voltage (typ)
24V
Operating Supply Voltage (max)
30V
Pin Count
8
Output Type
PNP
Maximum Operating Temperature
+ 70 C
Supply Voltage
19 V to 30 V
Mounting Style
Panel
Sensing Distance
3000 mm
Minimum Operating Temperature
- 15 C
Features
NO / NC
Lead Free Status / RoHS Status
Compliant
Control input
If a measurement is only to take place in a
certain instant, the sensor transmit and
receive can be suppressed by a LOW (0V) at
the control input (HOLD - pin 6). The outputs
are latched and show the last distance
mesured. It is necessary to connect the hold
/sync input to the 0 V during programming
Mutual interference.
If two or more sensors are perturbated by
acoustic coupling, synchronisation is
recommended by connecting the hold/sync
inputs.
RS-232 RxD
When the sensor is not in programming mode,
it is recommended to connect the RxD line
(pin 7) to the 0 V (GND) to avoid any
possibility of electromagnetic interference.
Programming the sensor
The parameters of the sensor can be modified
with the software working on PC (Windows 95
minimum)
1. Install the program UDSprog from the
2. Connect the sensor to a free serial COM
3. Launch UDSprog. After the first use, the
4. Insert or Check the type of sensor
2 Honeywell • Control Products
942 Series
floppy or the network, in any directory
port of the PC. (only 3 wires necessary :
RxD, TxD, GND)
program will ask if the type of sensor has
changed :
(window "sensor") and the port COM. Test
Address, Search address and Change
address are not necessary in RS-232
communication
Hold/synchronisiereingang
Durch Verbinden von HLD/SYNC mit GND
stellt der Sensor den Sendebetrieb ein und
speichert den letzten Meßwert.
Synchronisation
Die Geräte der Serie 942 lassen sich
synchronisieren, indem die HLD/SYNC-
Klemmen miteinander verbunden werden.
Hierbei werden die Sendebefehle aller
synchronisierten Geräte zur gleichen Zeit
ausgelöst. Diese Funktion ermöglicht den
Betrieb von mehreren Sensoren sehr dicht
beieinander ohne gegenseitige Beeinflussung.
RS-232 RxD
Ein offenes Kabel, das mit dem RxD Eingang
verbunden ist, kann elektromagnetische
Störungen einfangen. Es wird deshalb
empfohlen den RxD Eingang (Pin 7) mit 0 V
(GND) zu verbinden, wenn der Sensor nicht
programmiert wird.
Programmierung des Sensors
Die Parameter des Sensors können mittels
PC Software (Windows 95 minimum)
eingestellt werden.
4. Eingabe des Sensortyps (Fenster
1. Installation des Programms UDSprog von
2. Anschluß des Sensors mit einem freien
3. Start UDSprog. Nach dem ersten
“Sensor”) und des COM Ports. Test
Adresse, Suche Adresse und Ändere
Adresse können in der RS-232
Kommunikation ignoriert werden.
Diskette oder Netzwerk in ein beliebiges
Directory.
seriellen COM Port. (nur 3 Anschlüsse
notwendig: RxD,TxD und GND)
Anwenden fragt das Programm ob ein
anderer Sensor verwendet wird:
Entrée de contrôle
Si une mesure doit être faite seulement à un
certain moment, l’émission et la réception du
capteur peuvent être interrompues en mettant
l’entrée de contrôle (HOLD - broche 6) à la
masse (0 V). Les sorties sont mémorisées et
montrent la dernière distance mesurées. Il est
nécessaire de connecter l'entrée de contrôle à la
masse pendant la programmation.
Interférences mutuelles.
Si plusieurs capteurs sont perturbés par
couplage acoustique, il est recommandé de les
synchroniser en connectant leurs entrées de
contrôle.
RS-232 RxD
Si le capteur n'est pas en cours de
programmation, il est recommandé de
connecter la borne 7 (RxD) à la masse afin
de prévenir toutes interférences
électromagnétiques.
Programmation du capteur
Les paramètres de fonctionnement du capteur
sont modifiable par l'utilisateur, à l'aide d'un
logiciel tournant sur PC et Windows (95 et
suivants).
1.
2.
3.
4.
Installer le programme UDSPROG à
partir de la disquette ou du réseau vers le
répertoire de votre choix
Connecter le capteur à un port COM libre
du PC. Seuls trois fils sont nécessaires
(RxD, TxD et GND)
Lancer le programme UDSprog. Après la
première utilisation, il faut indiquer au
programme si le type de capteur a
changé :
Bien indiquer le type de capteur (fenêtre
"sensor") et le port COM utilisé. Test
Adress, Search address et Change
address peuvent être ignorés en
communication RS-232
PK 104098-10


