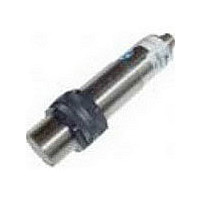
942-A4N-2D-1C1-130E Honeywell, 942-A4N-2D-1C1-130E Datasheet - Page 3

942-A4N-2D-1C1-130E
Manufacturer Part Number
942-A4N-2D-1C1-130E
Description
Proximity Sensors FIBER OPTIC PRODUCTS
Manufacturer
Honeywell
Type
Ultrasonic Sensorr
Datasheet
1.942-A4N-2D-1C1-130E.pdf
(6 pages)
Specifications of 942-A4N-2D-1C1-130E
Proximity Sensor Type
Ultrasonic
Proximity Sensor Sensing Distance
3000mm
Proximity Sensor Sensing Distance Range
>=1200mm
Proximity Sensor Switching Mode
NO/NC
Mounting
Panel
Operating Temp Range
-40C to 85C
Operating Temperature Classification
Commercial
Operating Supply Voltage (typ)
24V
Operating Supply Voltage (max)
30V
Pin Count
8
Output Type
PNP
Maximum Operating Temperature
+ 70 C
Supply Voltage
19 V to 30 V
Mounting Style
Panel
Sensing Distance
3000 mm
Minimum Operating Temperature
- 15 C
Features
NO / NC
Lead Free Status / RoHS Status
Compliant
942 Series
5. Click "save". Note : do not forget to ground the
6. If the communication does not work :
Note: the communication parameters are 9600, n,
8, 2 but they are automatically setup by the
software.
7. The program reads the parameters from the
The following parameters can be modified :
Analog output : offset, range, slope
Switching outputs : NO/NC,
window/switchpoints, distance and hysteresis.
Click on "Start" to activate the sensor and see
the measured values.
Attention, these parameters are still in the
PC software, they are not yet in the
sensor's memory
8. When the desired values are chosen, do
9. Advanced options
control input (HOLD – pin 6)
- check the serial communication
- check the COM port settings
- if another sensor of the same kind
reset the factory settings and
serial communication by clicking
- some rare brands of PC have
port ; try another PC
sensor's memory
not forget to click on "start
programming". These parameters will be
transferred in the sensor's non-volatile
memory
Some internal parameters are accessible
with the menu "configuration" "advanced
options". Most of them are factory
settings and should be modified only
by experienced users
(availability and number)
"initialise sensor".
incompatible voltage levels on their COM
wiring
works,
the
5. “Save” anklicken. Achtung: der Kontroll-
6. Falls die Kommunikation nicht zustande
Hinweis: die serielle Schnittstelle ist fest auf das
Datenformat 9600, N, 8 , 2eingestellt.
7. Das Programm liest die Parameter aus dem
Folgende Parameter können eingestellt
werden:
Analogausgang : Offset, Bereich, Steigung
Schaltausgänge: NO/NC, Grenzschalter/
Bereichsüberwachung, Entfernung und
Hysterese
Anklicken von “Start” aktiviert den Sensor,
Messwerte werden angezeigt.
Achtung, diese Parameter sind in der PC-
Software und noch nicht im Speicher des
Sensors
8. Wenn die gewünschten Werte eingestellt
9. Weitere Einstellungen
Eingang (Hold – Pin 6) darf auf Masse (GND)
gelegt werden.
kommt:
- seriellen Anschluß überprüfen
- COM Port einstellungen überprüfen
- wenn ein anderer Sensor gleichen
funktioniert, einen Reset
die
- einige wenige PC haben einen
COM Port; mit einem
versuchen.
Speicher des Sensors
sind, diese mit „Start programming“ in
das EEPROM des Sensors schreiben.
Nicht vergessen!!
Zu einigen internen Parametern hat man
Zugang über das Menue “Einstellungen“
„Weitere Einstellungen“.
Meist sind dies Fabrikinstellungen und
sollten nur von erfahrenen Benutzern
verändert werden
sensor“ anklicken.
inkompatiblen Spannungspegel an
Fabrikeinstellung laden: „Initialize
durchführen und
anderen PC
ihrem
Typs
5. Terminer en cliquant "Save". Attention, l'entrée
6. Si la communication avec le capteur échoue :
Note : le mode de communication série est
9600,n,8,2 mais ces paramètres sont
automatiquement gérés par le logiciel
7. Le programme lit les paramètres actuellement
Les paramètres suivants peuvent être
modifiés :
Sortie Analogique : offset, étendue, pente
Sorties à seuil : NO/NC, fenêtres/seuils,
valeur et hystérésis.
En cliquant sur "Start", le capteur est activé et
les valeurs mesurées sont affichées à l'écran.
Attention, ces paramètres sont dans le
logiciel pc, ils ne sont pas encore dans la
mémoire du capteur.
8.
9.
de contrôle (HOLD - pin 6) doit être connectée
à la masse.
- vérifier les connections de la ligne série
- vérifier la configuration du port COM (série).
- si un autre capteur du même type
- certains types de PC rares ont des
en mémoire dans le capteur
Après programmation, ne pas oublier de
cliquer sur "Start programming." Les
valeurs choisies sont alors inscrites dans
la mémoire permanente du capteur.
Options avancées
Dans le menu "configuration" "advanced
options", des paramètres de
fonctionnement interne du capteur sont
modifiables. La plupart sont réservés
aux réglages d'usines ou aux
utilisateurs expérimentés
fonctionne sur ce port, ré-initialiser la
mémoire du capteur et la communication
série avec la touche "initialise sensor".
niveaux électriques incompatibles sur leur
port série : essayer une autre marque
Honeywell • Control Products 3
PK 104098-10


