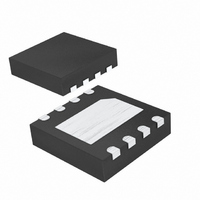
MAX5527GTA+T Maxim Integrated Products, MAX5527GTA+T Datasheet - Page 9

MAX5527GTA+T
Manufacturer Part Number
MAX5527GTA+T
Description
IC POT DGTL 1TIME PROGR 8-TDFN
Manufacturer
Maxim Integrated Products
Datasheet
1.MAX5527GUA.pdf
(12 pages)
Specifications of MAX5527GTA+T
Taps
64
Resistance (ohms)
100K
Number Of Circuits
1
Temperature Coefficient
35 ppm/°C Typical
Memory Type
Non-Volatile
Interface
Up/Down
Voltage - Supply
2.7 V ~ 5.25 V
Operating Temperature
-40°C ~ 105°C
Mounting Type
Surface Mount
Package / Case
8-TDFN Exposed Pad
Resistance In Ohms
100K
Lead Free Status / RoHS Status
Lead free / RoHS Compliant
Figure 5. One-Time Program Mode, Serial-Interface Timing Diagram
Table 1. One-Time Programming Options
Change the wiper’s power-up position using the PV
one-time programming sequence after power-up (see
Figure 5). After setting the wiper to the desired power-
up position, perform the following six-step sequence:
1)
2)
3)
4a)
4b)
5)
6)
Factory Default
(Unprogrammed)
Programmed by
Six CS Pulses
Programmed by
Seven CS Pulses
U/D
PV
CS
+11V
0V
One-Time Programmable, Linear-Taper Digital
Set U/D and CS high.
Connect an external voltage source at PV in the
range of +11V to +11.55V.
Pull CS low.
Pulse CS high for six cycles, consisting of CS
starting low and going high for at least t
then low for at least t
power-up position. The wiper remains adjustable.
Pulse CS high for seven cycles, consisting of CS
starting low and going high for at least t
low for at least t
position and lock the wiper in that same position.
The seventh CS pulse is labeled the optional lock-
out bit in Figure 5.
Connect PV to GND or release the voltage source,
leaving PV floating.
Pull CS high.
MODE
_______________________________________________________________________________________
t
Programmed position
Programmed position
PC
POWER-ON RESET
WIPER POSITION
CL
, to change the wiper power-up
Tap 31
CL
t
CH
, to change the wiper
ADJUSTABLE
CH
6 PULSES RECORD WIPER POSITION
t
WIPER
CL
Yes
Yes
No
and then
CH,
and
Pulse CS high for six cycles to change the wiper power-
up position. The wiper position returns to this pro-
grammed position on power-up, but remains adjustable.
Pulse CS high for seven cycles to lock the MAX5527/
MAX5528/MAX5529 to a specific wiper position with no
further adjustments allowed. This effectively converts
the potentiometer to a fixed resistor-divider. The sev-
enth pulse locks the wiper position and disables the
up/down interface. Once locked, connect U/D and CS
high, low, or leave them floating without increasing the
supply current (see Table 1).
If six clock pulses are used, the interface is enabled
and the device can be put into program mode again.
However, the part uses one-time programmable (OTP)
memory and should be programmed only once. If the
part is programmed more than once, all applied values
are ORed together. Thus, if 010101 is programmed the
first time and 101010 is programmed the second time,
the result will be 111111.
The external PV power supply must source at least 5mA
and have a good transient response. Decouple the PV
power supply with a 22µF capacitor to GND. Ensure that
no more than 250µH of inductance and/or 40Ω of para-
sitic resistance exists between the capacitor and the
device (see Figure 6).
Figure 6. PV Power-Supply Decoupling
11V
22µF
Potentiometers
L
< 250µH
PARASITIC
TRACE PARASITICS
R
OPTIONAL 7TH
LOCKOUT BIT
PARASITIC
< 40Ω
t
CP
PV
t
PH
MAX5527
MAX5528
MAX5529
9


