ATF1508RE-7AU100 Atmel, ATF1508RE-7AU100 Datasheet - Page 32
ATF1508RE-7AU100
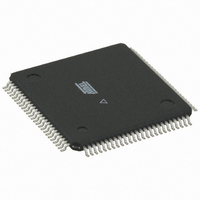
Manufacturer Part Number
ATF1508RE-7AU100
Description
IC CPLD EE 128MC 5NS 100-TQFP
Manufacturer
Atmel
Series
ATF1508REr
Specifications of ATF1508RE-7AU100
Programmable Type
In System Programmable (min 10K program/erase cycles)
Delay Time Tpd(1) Max
7.5ns
Voltage Supply - Internal
3 V ~ 3.6 V
Number Of Macrocells
128
Number Of I /o
80
Operating Temperature
-40°C ~ 85°C
Mounting Type
Surface Mount
Package / Case
100-TQFP, 100-VQFP
Features
Programmable
Voltage
1.8V, 2.5V, 3.3V
Memory Type
EEPROM
Lead Free Status / RoHS Status
Lead free / RoHS Compliant
Number Of Logic Elements/cells
-
Available stocks
Company
Part Number
Manufacturer
Quantity
Price


5.1
5.1.1
Atmel ATF15xx Family: ISP Devices User Guide
In-System
Programming
Procedure
Setting Up the
Atmel-ISP Board
Before you can use the Atmel-ISP software, you will need to make sure that none of the
ISP devices on your circuit board is using the JTAG port pins for logic I/O functions.
Atmel recommends that you erase all devices before inserting them on your circuit
board.
Note:
If you are using the Atmel-ISP software with your circuit board, skip the next section and
proceed to “Setting Up Your Target System”.
After completing the instructions in this section, skip the “Setting Up Your Target Sys-
tem” section and proceed to “Running the Atmel-ISP Software”.
1. Insert an erased Atmel ISP device into the Atmel-ISP board socket. If you are not
2. Plug an Atmel AC/DC adapter into the 9V DC power connector (J8) on the ISP
3. Plug the 10-pin female connector on the Atmel-ISP cable to the 10-pin male
4. Power-up the Atmel-ISP board by flipping switch SW3 on the ISP board towards
5. Connect the 25-pin connector on the Atmel-ISP cable to the PC’s parallel port.
sure if a device is erased, erase it on an external device programmer before
inserting it into the ISP board. If you are programming a non-84-pin PLCC
device, you must insert the appropriate daughter board into Socket 2 of the ISP
board and then insert the ISP device into the socket on the daughter board.
board. You can also use a 9V battery to power the ISP board.
header (J5) on the ISP board. Ensure that the 10-pin connector is oriented
correctly.
the power connector. When power is turned on, the ISP board power-on LED
(D3) will be illuminated.
Atmel ships all ISP devices in a bulk-erased state, which enables the JTAG
interface by default. Therefore, all Atmel devices are initially shipped ISP-ready
and are ready to be programmed with the Atmel-ISP software.
Getting Started
Section 5
Rev. 1936A-07/01
5-1
Related parts for ATF1508RE-7AU100
Image
Part Number
Description
Manufacturer
Datasheet
Request
R

Part Number:
Description:
IC CPLD 128MC 3.3V ISP 100TQFP
Manufacturer:
Atmel
Datasheet:

Part Number:
Description:
High- Performance Cpld
Manufacturer:
ATMEL Corporation
Datasheet:

Part Number:
Description:
DEV KIT FOR AVR/AVR32
Manufacturer:
Atmel
Datasheet:
Part Number:
Description:
INTERVAL AND WIPE/WASH WIPER CONTROL IC WITH DELAY
Manufacturer:
ATMEL Corporation
Datasheet:
Part Number:
Description:
Low-Voltage Voice-Switched IC for Hands-Free Operation
Manufacturer:
ATMEL Corporation
Datasheet:
Part Number:
Description:
MONOLITHIC INTEGRATED FEATUREPHONE CIRCUIT
Manufacturer:
ATMEL Corporation
Datasheet:
Part Number:
Description:
AM-FM Receiver IC U4255BM-M
Manufacturer:
ATMEL Corporation
Datasheet:
Part Number:
Description:
Monolithic Integrated Feature Phone Circuit
Manufacturer:
ATMEL Corporation
Datasheet:
Part Number:
Description:
Multistandard Video-IF and Quasi Parallel Sound Processing
Manufacturer:
ATMEL Corporation
Datasheet:
Part Number:
Description:
High-performance EE PLD
Manufacturer:
ATMEL Corporation
Datasheet:
Part Number:
Description:
8-bit Flash Microcontroller
Manufacturer:
ATMEL Corporation
Datasheet:
Part Number:
Description:
2-Wire Serial EEPROM
Manufacturer:
ATMEL Corporation
Datasheet: