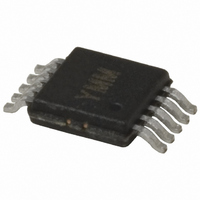
SY88722VKC Micrel Inc, SY88722VKC Datasheet - Page 3

SY88722VKC
Manufacturer Part Number
SY88722VKC
Description
IC LASR DRVR 622MBPS 5.5V 10MSOP
Manufacturer
Micrel Inc
Type
Laser Diode Driver (Fiber Optic)r
Specifications of SY88722VKC
Number Of Channels
1
Data Rate
622Mbps
Voltage - Supply
3 V ~ 3.6 V, 4.5 V ~ 5.5 V
Current - Supply
25mA
Current - Modulation
30mA
Operating Temperature
-40°C ~ 85°C
Package / Case
10-TFSOP, 10-MSOP (0.118", 3.00mm Width)
Mounting Type
Surface Mount
Operating Supply Voltage (typ)
3.3/5V
Operating Temperature (min)
0C
Mounting
Surface Mount
Operating Temperature Classification
Commercial
Lead Free Status / RoHS Status
Contains lead / RoHS non-compliant
Micrel, Inc.
SY88722V evaluation board per Figure 2. Ensure proper
ESD precautionary measures are taken before handling
sensitive electronic equipment, including the SY88722V
evaluation board itself.
M9999-102405
hbwhelp@micrel.com or (408) 955-1690
SETUP FOR MEASUREMENTS
This section explains how to connect and setup the
1. Set E3620A to output 3.3V and then turn off
2. Configure Agilent BERT stack:
E3620A. Connect E3620A’s positive lead to GND
post and negative lead to VEE post. Note that the
board uses a negative supply; ensure that the
power supply polarity is correct.
a) Set the 83752A Synthesized Sweeper to
b) From the 70004A’s Pattern menu, choose the
c) From the 70004A’s Trigger menu:
d) From the 70004A’s Data menu, select:
viii. Crossing = 0
vii. Polarity = NORMAL
622MHz.
PRBS 2
iv. Tracking = ON
vi. Data Output = ON
iii. Hi-Level = 0V
ii. Choose CLK/8 for divider
ii. Amplitude = 800mV (1600mV
v. Attenuation = 0dB
i. Choose clock as trigger output
i. External Termination = DC termination 0V
31
–1 pattern.
pp
)
3
3. Connect 70843V’s trigger output to 86100A’s
4. Short J1; open J2 on SY88722V evaluation board.
5. Connect DIN and /DIN on SY88722V evaluation
6. Connect OUT and /OUT on SY88722V evaluation
7. Turn on E3620A. Typical power supply current
8. Configure 86100A oscilloscope:
trigger input.
board to 70843V’s data outputs.
board to 86100A’s inputs.
should be ~48mA, including the SY88722V’s
current and current through the on-board 50
equivalent termination network at 3.3V supply
voltage. Excessive current usually means the
power supply leads have been connected back-
wards. Be careful of this!
a) Verify a trigger signal is present by checking
b) Press Eye/Mask Mode on front panel.
c) Choose NRZ Eye Measurements from on-
d) Choose RMS Jitter, Rise Time, Fall Time and
that the Trigger Source button is lit.
screen display.
Eye Amplitude measurements from on-screen
selection list.
ii. Adjust trigger level if necessary.
i. Depress this button to choose external
source if necessary.
SY88722V Evaluation Board


