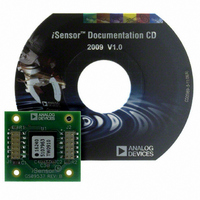
ADIS16240/PCBZ Analog Devices Inc, ADIS16240/PCBZ Datasheet

ADIS16240/PCBZ
Specifications of ADIS16240/PCBZ
Related parts for ADIS16240/PCBZ
ADIS16240/PCBZ Summary of contents
Page 1
The World Leader in High-Performance Signal Processing Solutions The World Leader in High Performance Signal Processing Solutions iSensor ADIS16240 Evaluation Tool Overview Mark Looney ® Application Engineer iSensor September 7, 2009 ® ...
Page 2
... The Simple Solution for Sensor Integration Evaluation Tool Overview Evaluation/Interface Board (ADIS16240/PCBZ) for simpler 1. connection to an existing processor/system PCB. These boards provide a simple connector translation that enables user to bypass BGA soldering. The 2mm pitch connectors are easy to interface with 1mm ribbon cable or solder to ...
Page 3
... The Simple Solution for Sensor Integration Hooking up to the ADIS16240/PCBZ 1.050 a 2 × 0.925 × 0.673 i Sensor C1 2 × 0.000 0.150 1 +5V or Reset 3 SS (Slave select Ground 9 Ground 11 +3. × Ø0.087 M2×0.4 Master Processor Connection J1 2 SCLK (Serial clock) ...
Page 4
The Simple Solution for Sensor Integration ADIS16240 Demonstration Software Installation The ADIS16240 demonstration software can be found at www.analog.com/isensor-evaluation 1. Click on “Evaluation Software Downloads” 2. Click on 240ES.zip and save temporary directory 3. Open ...
Page 5
The Simple Solution for Sensor Integration ADIS16240 Demonstration Software Installation Installation Steps (continued) 4. Click OK on next screen 5. Click here to start installation 5 ...
Page 6
The Simple Solution for Sensor Integration ADIS16240 Demonstration Software Installation Installation Steps (continued) 6. Click Continue 7. If this message comes up, click on “No” 8. Click OK 6 ...
Page 7
The Simple Solution for Sensor Integration ADIS16240 Demonstration Software Installation Installation Steps (continued) 9. Open the newly created directory and double-click onto “giveio.exe” 10. Click “Install,” then “ IAgree” 7 ...
Page 8
The Simple Solution for Sensor Integration ADIS16240 Demonstration Software Installation Installation Steps (continued) 11. Click “yes” 12. Giveio Driver complete 8 ...
Page 9
The Simple Solution for Sensor Integration ADIS16240 Installation on ADISUSBZ Installation Steps (continued) 13. Install 240/PCBZ on ADISUSBZ 14. Plug in USB cable 9 1. Secure 240/PCBZ w/ 2mm screws 2. Connect ribbon cable 3. Verify JP1 set ...
Page 10
The Simple Solution for Sensor Integration ADIS16240 Demonstration Software Installation Installation Steps (continued) 15. USB Driver screen will pop-up Click “Next” to start this process 16. Then click on “Continue Anyway” 10 This process will repeat for a ...
Page 11
The Simple Solution for Sensor Integration ADIS16240 Demonstration Software Screen Click on “Interface” and select USB, then OK when the pop-up window shows the USB device is connected. 2. Click to ...
Page 12
The Simple Solution for Sensor Integration ADIS16240 Demonstration Software Installation 12 1. Set number of captures vs. capture length and pre-capture length. Remember to click on the update button! 2. Set trigger source. Suggest both triggers. Remember to ...
Page 13
The Simple Solution for Sensor Integration ADIS16240 Demonstration Software Installation 13 Click on Run and start tapping ADISUSBZ on the desk, then click stop, then “Show Buffer” Note that the event counter is increasing with each time the ...
Page 14
The Simple Solution for Sensor Integration ADIS16240 Demonstration Software Installation 1. Place the mouse pointer over different spikes to see the Event header in the upper right hand corner change. 2. Slider bar in lower left hand corner ...
Page 15
CONTACTS: MARKETING: Bob Scannell, 1-336-605-4031 APPLICATIONS ENGINEER: Mark Looney, 1-336-605-4139 MORE INFORMATION: www.analog.com/isensor New Brochure: iSensor Motion Sensor Products BR067755-2.5-4/08(A) CD’s with Product Info and Eval SW 15 ...


