DEMOACKIT Freescale Semiconductor, DEMOACKIT Datasheet - Page 2
DEMOACKIT
Manufacturer Part Number
DEMOACKIT
Description
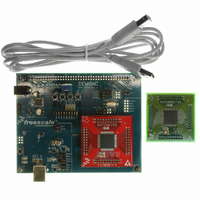
KIT DEMO KIT FOR DC9S08A
Manufacturer
Freescale Semiconductor
Series
Flexis™r
Type
MCUr
Specifications of DEMOACKIT
Contents
Board, 2 Daughter Cards, Cable
Processor To Be Evaluated
MCF51AC
Data Bus Width
32 bit
Interface Type
USB
Silicon Manufacturer
Freescale
Core Architecture
Coldfire, HCS08
Core Sub-architecture
Coldfire V1, HCS08
Silicon Core Number
MCF51, MC9S08
Silicon Family Name
Flexis - MCF51AC, Flexis - S08AC
Rohs Compliant
Yes
Tool Type
Demonstration Board
Cpu Core
HCS08
For Use With/related Products
MC9S08AC128, MCF51AC256
For Use With
DEMOACEX - BOARD EXPANSION FOR DEMO KIT
Lead Free Status / RoHS Status
Lead free / RoHS Compliant
Available stocks
Company
Part Number
Manufacturer
Quantity
Price
Company:

Part Number:
DEMOACKIT
Manufacturer:
Freescale Semiconductor
Quantity:
135


DEMOAC Labs
These labs will show you how to
get the most out of your DEMOAC
board toolkit. The DEMOAC
board comes in several versions
depending on the target AC family
MCU:
• DEMOS08AC16KIT
• DEMOS08AC60KIT
• DEMOS08AC128KIT
• DEMO51AC256KIT
• DEMOACKIT which includes both the
This lab document applies to
DEMOACKIT.
Start each lab with the board powered
ON. Make sure to use only one utility at a
time, as they share the same USB source.
Familiarize yourself with these buttons:
DEMOACKIT—Lab Tutorial
MC9S08AC128 and MCF51AC256
Start/Continue (F5) button
MCU Change Wizard button
Debug button
Learn How to Use the DEMOAC
Board Toolkit Utilities
This lab will show you how to use one of several
graphical utilities in the DEMOAC Board Toolkit
included with your board. Instructions to download
these utilities to your computer are provided in Step 2
of the Quick Start Guide (DEMOACQSG.pdf).
We will use the CodeWarrior IDE to program a
new software example into the AC256 and use the
DEMOAC Logic Analyzer utility. This PC-based utility
graphs the IN0 and IN1 signals on the board. For
convenience, if both DATA1 and DATA2 jumpers are
installed, IN0 graphs PTF2 activity and IN1 graphs
PTF3 activity. To graph other microcontroller signals,
use wire jumpers from the USB side of DATA1 and
DATA2 to the respective signals on the board’s MCU
PORT.
1. Open CodeWarrior for Microcontrollers. From
2. Click on “Load Example Project” from CodeWarrior
3. From example projects menu, open tree
4. Create a new project name (ex. Lab1), set desired
5. Ensure the 80-Pin LQFP 32-bit ColdFire
6. Turn board power switch to ON.
7.
8. From Connection Manager menu, select
9. From Loader menu, click on “OK” to allow the debugger to
10.
DEMOACKIT
LAB
Windows start menu you can locate it using
the “Programs>Freescale CodeWarrior>CW for
Microcontroller V6.1>CodeWarrior IDE.exe” path.
startup dialog. If the startup dialog is not shown, it may
be opened from the CodeWarrior menu by clicking “File”
and then “Startup Dialog…”.
to select “ColdFire V1>Evaluation Board
Examples>DEMOAC>DEMO51AC256_Logic_Analyzer”
location and click “Create Project”. This will open the
project for the logic analyzer application for the 32-bit
microcontroller.
microcontroller daughter card is installed on the DEMOAC
board.
“USB1:DEMOAC(PEnnnnnnn)” port and click on
“Connect (Reset).”
mass erase the microcontroller’s on-chip flash memory
and program it with the new application.
1
Compile and program the logic analyzer
application by clicking on “Debug” button.
Click on “Start/Continue (F5)” button in debugger
to run application.
®
V1 AC256
11. Open the DEMOAC Board Logic Analyzer utility from
12. In the utility, click on the “Connect to Embedded Multilink
13. Rotate the potentiometer RV1 clockwise and counter-
14. Click on “Close Port” button when finished.
For more information on the DEMOAC Board Toolkit
read the board user manual (DEMOAC_UM.pdf)
on www.freescale.com/flexis or on the DVD
under Documentation > Development System
Documentation > DEMOAC User Manual of the DVD
menu. For new and upgraded utilities to the DEMOAC
Board Toolkit, visit http://www.pemicro.com/
Migrate Quickly from 32-bit
to 8-bit Using the Quick Start
Application
This lab will show you how to quickly migrate any
application using the Flexis™ AC microcontrollers.
The Flexis brand delivers pin to pin compatibility,
one development tool, and the same peripherals
between 8-bit and 32-bit devices. It demonstrates an
downward migration from 32-bit to 8-bit, although
upward migration is just as simple. Continuing with
the Quick Start Application that is pre-loaded in
the microcontroller’s on-chip flash memory you will
now use the CodeWarrior
LAB
Windows start menu: Programs>P&E Embedded
Multilink Toolkit>Utilities>Logic Analyzer Utility.
Analyzer and Graph Pins” button to begin graphing IN0
and IN1. These signals will be continually graphed at a
sampling rate of 10Khz.
clockwise. This will change the duty cycle of the variable
pulse-width modulation signals output on the PTF2 and
PTF3 pins. The PTF2 waveform is shown on analyzer
channel IN0.
2
®
MCU Change Wizard to
retarget and rebuild your project from the 32-bit AC256
microcontroller to the 8-bit AC128 microcontroller.
Setup demo:
1. Open CodeWarrior for Microcontrollers. From
2. Click on “Load Example Project” from CodeWarrior
3. From example projects menu, open tree to select
4. Create a new project name (ex. Lab2), set desired
5.
6. From Wizard, change microcontroller selection from
7. Click “Finish.” In the background, CodeWarrior will
8. Click on “Close Port” on Logic Analyzer utility if open.
9. Turn board power switch to OFF.
10. Replace the 80-Pin LQFP 32-bit ColdFire® V1 AC256
11. Turn board power switch to ON.
Windows start menu you can locate it using
the “Programs>Freescale CodeWarrior>CW for
Microcontroller V6.1>CodeWarrior IDE.exe” path.
startup dialog. If the startup dialog is not shown, it may
be opened from the CodeWarrior menu by clicking “File”
and then “Startup Dialog…”.
“ColdFire V1>Evaluation Board Examples>DEMOAC>
DEMO51AC256_Logic_Analyzer”
location and click “Create Project”. This will open the
project for the logic analyzer application for the 32-bit
microcontroller.
32-bit “MCF51AC256” to 8-bit “MC9S08AC128” in the
“Flexis>AC Family” tree as show in image below. Make
sure ‘P&E Multilink/Cyclone Pro’ is selected as the default
connection.
transform your project to the 8-bit microcontroller with
no software changes needed. A “Project Messages”
window may appear letting you know that changes have
been made to the project.
microcontroller with an 80-Pin LQFP 8-bit S08 AC128
microcontroller in the daughter card.
Click on the “MCU Change Wizard” button to
switch project to 8-bit microcontroller.
12.
13. From Connection Manager menu, select “DEMOAC on
14. From Loader Warning menu, click on “OK” to allow the
15.
16. Repeat Quick Start Guide Step 4 instructions to observe
Measure Performance
Improvement Between 8-bit and
32-bit with the Accelerometer
Application
This lab will highlight the performance differences
between the 8-bit and 32-bit AC microcontrollers and
show how these microcontrollers can easily interface
with a sensor. This lab will also detail how to use
another one of several software utilities included
with your board to help you in your development.
Instructions to download these utilities to your
computer were provided in Step 2 of the Quick
Start Guide.
The Accelerometer Application reads the X, Y, and
Z axes of the 3-axis accelerometer on the DEMOAC
board using the microcontroller’s A/D converter. It
outputs a processed version of the accelerometer data
on the microcontroller’s serial communication interface.
This processed data is a rolling average of the raw
accelerometer data,or a filtered version of the raw
accelerometer data, depending on the selected mode.
LAB
application by clicking on “Debug” button.
USB1 (Name=Pennnnnnn)” port and click on “Connect
(Reset).”
debugger to mass erase the microcontroller’s on-chip
flash memory and program it with the new application.
the 8-bit AC128 device run the same application as the
32-bit AC256 device.
3
Click on “Start/Continue (F5)” button in debugger
to run application.
Compile and program the 8-bit AC128
microcontroller with transformed logic analyzer
Related parts for DEMOACKIT
Image
Part Number
Description
Manufacturer
Datasheet
Request
R

Part Number:
Description:
DEM FOR STM8L15X LOW PWR MODES
Manufacturer:
STMicroelectronics
Datasheet:

Part Number:
Description:
Manufacturer:
Freescale Semiconductor, Inc
Datasheet:
Part Number:
Description:
Manufacturer:
Freescale Semiconductor, Inc
Datasheet:
Part Number:
Description:
Manufacturer:
Freescale Semiconductor, Inc
Datasheet:
Part Number:
Description:
Manufacturer:
Freescale Semiconductor, Inc
Datasheet:
Part Number:
Description:
Manufacturer:
Freescale Semiconductor, Inc
Datasheet:
Part Number:
Description:
Manufacturer:
Freescale Semiconductor, Inc
Datasheet:
Part Number:
Description:
Manufacturer:
Freescale Semiconductor, Inc
Datasheet:
Part Number:
Description:
Manufacturer:
Freescale Semiconductor, Inc
Datasheet:
Part Number:
Description:
Manufacturer:
Freescale Semiconductor, Inc
Datasheet:
Part Number:
Description:
Manufacturer:
Freescale Semiconductor, Inc
Datasheet:
Part Number:
Description:
Manufacturer:
Freescale Semiconductor, Inc
Datasheet:
Part Number:
Description:
Manufacturer:
Freescale Semiconductor, Inc
Datasheet:
Part Number:
Description:
Manufacturer:
Freescale Semiconductor, Inc
Datasheet:
Part Number:
Description:
Manufacturer:
Freescale Semiconductor, Inc
Datasheet: