XCARD XC-1A XMOS, XCARD XC-1A Datasheet - Page 5
XCARD XC-1A
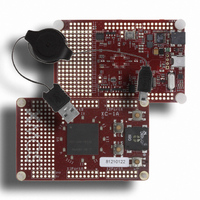
Manufacturer Part Number
XCARD XC-1A
Description
BOARD DEV KIT XS1-G4
Manufacturer
XMOS
Series
XCite™r
Type
MCUr
Specifications of XCARD XC-1A
Design Resources
XC-1A Schematic
Contents
Board, Cable
For Use With/related Products
XS1-G4
Lead Free Status / RoHS Status
Lead free / RoHS Compliant


XC-1A Quick Start Guide (1.0)
4 Linux Users
You are now ready to follow the XC-1A tutorial which explains how to write XC
1. Connect the XC-1A to your system
2. Download and configure the tools
3. Start the tools
programs for your XC-1A board. Download the tutorial from
http://www.xmos.com/published/xc1atut.
The 64-bit tools require the 32-bit compatibility-layer libraries to work correctly.
For further information on installing these libraries on RedHat distributions,
browse to the following URL:
The XC-1A card starts up and flashes the LEDs around the XMOS chip on the
Connect the board to your development system using the USB cable provided.
Log into a shell with root permissions.
Open the file
the USB USB file system:
Unmount the USB file system with the following command:
Remount the USB file system with the following command:
card. The XC-1A card has four demonstrations which you can launch using
the push buttons—see Section 5.
Download the tools archive from the following URL:
Uncompress the archive to an installation directory using the command:
Configure the XMOS Tools environment. Change to the installation directory
and type:
To start the integrated development environment, type the command:
To use the command-line tools, call the required tool directly.
http://www.redhat.com/support
none /proc/bus/usb usbfs defaults,devmode=0666 0 0
umount /proc/bus/usb
mount /proc/bus/usb
http://www.xmos.com/downloads
tar -xzf archive .tgz -C /home/user
source SetEnv
xde
/etc/fstab in an editor and add the following lines to access
www.xmos.com
5/7
Related parts for XCARD XC-1A
Image
Part Number
Description
Manufacturer
Datasheet
Request
R

Part Number:
Description:
BOARD DEV KIT XS1-G4 ETHERNET
Manufacturer:
XMOS
Datasheet:

Part Number:
Description:
DEV KIT EVENT-DRIVEN PROC XS1-L1
Manufacturer:
XMOS
Datasheet:

Part Number:
Description:
BOARD KIT XS1-G4 LED CTRL TILE
Manufacturer:
XMOS
Datasheet:

Part Number:
Description:
ADAPTER USB DEBUGGER JTAG XSYS2
Manufacturer:
XMOS
Datasheet:

Part Number:
Description:
BOARD DEV KIT XS1-G4
Manufacturer:
XMOS
Datasheet:

Part Number:
Description:
IC MPU 32BIT SINGLE CORE 64LQFP
Manufacturer:
XMOS
Datasheet:

Part Number:
Description:
IC MPU 32BIT SINGLE CORE 64LQFP
Manufacturer:
XMOS
Datasheet:
Part Number:
Description:
IC MPU 32BIT SINGLE CORE 64LQFP
Manufacturer:
XMOS
Datasheet:

Part Number:
Description:
IC MPU 32BIT SINGLE CORE 64LQFP
Manufacturer:
XMOS
Datasheet:
Part Number:
Description:
IC MPU 32BIT SINGLE CORE 64LQFP
Manufacturer:
XMOS
Datasheet:

Part Number:
Description:
IC MPU 32BIT SINGLE CORE 128TQFP
Manufacturer:
XMOS
Datasheet:
Part Number:
Description:
IC MPU 32BIT SINGLE CORE 64LQFP
Manufacturer:
XMOS
Datasheet:
Part Number:
Description:
IC MPU 32BIT SINGLE CORE 128TQFP
Manufacturer:
XMOS
Datasheet:
Part Number:
Description:
IC MPU 32BIT SINGLE CORE 128TQFP
Manufacturer:
XMOS
Datasheet:

Part Number:
Description:
IC MPU 32BIT DUAL CORE 124QFN
Manufacturer:
XMOS
Datasheet: