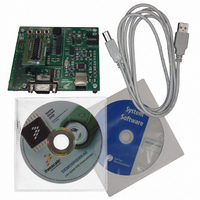
DEMO9RS08KA8 Freescale Semiconductor, DEMO9RS08KA8 Datasheet - Page 19

DEMO9RS08KA8
Manufacturer Part Number
DEMO9RS08KA8
Description
BOARD DEMO FOR MC9RS08KA8
Manufacturer
Freescale Semiconductor
Series
RS08r
Type
MCUr
Specifications of DEMO9RS08KA8
Contents
Board, Adapter, Cable, CD, Documentation
Silicon Manufacturer
Freescale
Core Architecture
RS08
Core Sub-architecture
RS08
Silicon Core Number
MC9RS08
Silicon Family Name
RS08KA
Kit Contents
Board
Rohs Compliant
Yes
For Use With/related Products
MC9RS08KA8
Lead Free Status / RoHS Status
Lead free / RoHS Compliant
6 Application Tutorial
6.1 Overview
This section will provide a step-by-step guide on how to launch your first project and get
started with the CodeWarrior for HCS08 user interface.
6.2 Step-by-Step Tutorial
The sample application is the same as the one described in the “Standalone Mode” section
above.
1.
2.
3.
4.
5.
Congratulations! You have successfully completed this tutorial! You can continue to
experiment with the CodeWarrior user interface and discover by yourself its potentialities. For
an in-depth guide of all of the user interface features, select “Help > CodeWarrior Help” from
CodeWarrior Development Studio’s main menu.
6.
7.
8.
9.
10.
11.
Ensure that the Demonstration Board is connected to the PC (via the USB cable) and
that the board is powered on.
Make sure that all of the Demonstration Board jumpers are set to their factory position
(see chapter “7.1 Jumpers” for details).
Start CodeWarrior by selecting it in the Windows Start menu.
From the CodeWarrior main menu, choose “File > Open” and choose the
“DEMO9RS08KA8\C\Demo\Demo.mcp” file. This is the board example you copied
from the SofTec Microsystems “System Software” CD-ROM.
Click “Open”. The Project window will open.
The C code of this example is contained in the “main.c” file. Double click on it to open
it.
From the main menu, choose “Project > Debug”. This will compile the source code,
generate an executable file and download it to the demo board.
A new debugger environment will open. From the main menu, choose “Run >
Start/Continue”. The program will be executed in real-time.
From the main menu, choose “Run > Halt”. The program execution will stop. The next
instruction to be executed is highlighted in the Source window.
From the main menu, choose “Run > Single Step”. The instruction highlighted in the
Source window will be executed, and the program execution will be stopped immediately
after.
From the main menu, choose “Run > Start/Continue”. The application will restart from
where it was previously stopped.
Page 17


