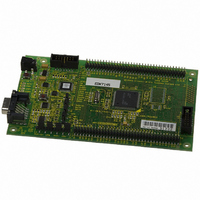
EDK7145 Renesas Electronics America, EDK7145 Datasheet - Page 3

EDK7145
Manufacturer Part Number
EDK7145
Description
DEV EVALUATION KIT SH7145
Manufacturer
Renesas Electronics America
Type
MCUr
Datasheets
1.EDK7145.pdf
(19 pages)
2.EDK7145.pdf
(4 pages)
3.EDK7145.pdf
(5 pages)
4.EDK7145.pdf
(22 pages)
Specifications of EDK7145
Contents
2G (Second-generation) Evaluation Board, HEW debugger support, Cable and CD-ROM
Lead Free Status / RoHS Status
Contains lead / RoHS non-compliant
For Use With/related Products
SH7145
Lead Free Status / RoHS Status
Not Compliant, Contains lead / RoHS non-compliant
EDK7145 Qu
EDK7145 Qu
EDK7145 Qu
EDK7145 Quickstart Guide
Hitachi Micro Systems
3
1) Ensure that the EDK is connected to COM1, and power is applied.
2) Change to the debug session by choosing “SessionSH2_hmon” from the drop down session menu.
3) If prompted to save session, click “No”.
4) If the magic wand is greyed out in the FLASH control bar, FDT is configured. Go to step 7.
5) If the FLASH control bar is greyed out in this mode, with only the magic wand visible, then the FDT settings for the
6) Choose “Save Session”, from the “File” menu.
7) Click on the “HMON FLASH Download Settings” button.
8) Click on the “Boot” radio button,
9) Choose “Save Session”, from the “File” menu.
10) From the “Build” drop down menu, select “Debug”, then “Connect”.
11) Right click on the “.abs” file in the “Download Module” section, and
12) When the “Please ensure that the device is in Boot mode”, (right),
13) Following completion of programming a dialogue will pop-up
14) Choose “Disconnect” from the “Debug” menu.
Programming the Board
board need to be set up. The FDT configuration wizard will appear. Follow steps below to setup FDT.
FDT is now configured for use with the EDK.
choose “Download Module”.
dialogue prompts you, push the BOOT mode button on the EDK, and
click “OK” in the dialogue.
prompting you to reset the EDK. Press the RESET button on the
EDK. The BOOT Mode LED will go OFF, and Click “OK” on the
dialogue.
a.
b.
c.
d.
e.
f.
g.
h.
a.
b.
Click on the wand to start the wizard. (It may start automatically)
Select your device from the drop down menu.
Click on the Kernels for your EDK. These are denoted by a
.EDK after the version.
Click the “Next” button.
Select COM1 to connect to your EDK, and click “Next”.
The CPU Crystal Frequency of the EDK should be preset to
the default value, click “Next” to accept the settings.
Click “Next” again to accept the default settings of Boot
Mode and Direct Connection.
Click “Finish” to accept the default settings of Automatic
Protection and Standard Messaging.
from the list matching your EDK, and click “OK”.
If presented with the “Configure Serial Driver” menu
(right), click on “Cancel”. There is no monitor on the board
for HEW to connect to. Choose “Yes” to proceed with the
minimal connection. This will allow you to download the file
in boot mode to the device.
If prompted for the “Target Configuration”, select the file
ickstart Guide
ickstart Guide
ickstart Guide
and click “OK”.
.
Hitachi Micro Systems
D004136_11_v01
3


