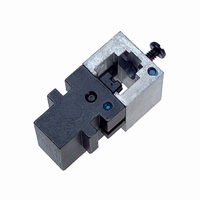
853400-8 Tyco Electronics, 853400-8 Datasheet - Page 3

853400-8
Manufacturer Part Number
853400-8
Description
DIE, 6 POS MOD PLUG IS9611
Manufacturer
Tyco Electronics
Type
Dier
Datasheets
1.1673606-1.pdf
(8 pages)
2.2-231652-0.pdf
(7 pages)
3.853400-1.pdf
(2 pages)
4.853400-1.pdf
(6 pages)
Specifications of 853400-8
Connector Type
Modular Connector, 6 pos
Crimp Handle
A9931-ND (2-231652-0)
Rohs Compliant
NA
Product
Punches & Dies
Lead Free Status / RoHS Status
Not applicable / Not applicable
Crimp Or Cable Size
-
Lead Free Status / Rohs Status
Lead free / RoHS Compliant
Other names
231651-2
313879-2
853400-2
A9905
313879-2
853400-2
A9905
3. CABLE PREPARATION
Refer to Figure 2 and select the appropriate 6--wire or
8--wire jacketed cable for the modular plug connector
being used. Then cut and strip the cable as follows:
3.1. Unshielded Flat Oval Cable
3.2. Shielded Flat Oval and Jacketed Round Cable
Prepare the cable according to Application
Specification 114--6016.
4. TERMINATION PROCEDURE
Before proceeding, double--check to be sure that the
cable and plug are compatible, and that cable polarity
is correctly maintained for your specific application.
Refer to Figure 4 and proceed as follows:
Rev D
CAUTION
CAUTION
1. Refer to Figure 3 and insert cable squarely into
CUT slot in tool cable cutter. Squeeze handles until
ratchet releases.
2. Insert trimmed cable into STRIP slot in tool flat
oval cable stripper until cable butts against die
cable stop.
3. Close handles to last ratchet stop, but DO NOT
release them. Pull cable straight out of tool. Then
release tool handles.
NOTE
4. Check cable strip length as shown in Figure 2.
NOTE
1. Hold plug as shown (locking tab facing UP).
Insert cable into plug until fully bottomed.
2. Open tool handles. Insert plug assembly fully
into die cavity. Make sure that the plug bottoms
into place.
3. Squeeze handles until ratchet releases. Depress
locking tab (if applicable) and remove terminated
modular plug cable assembly.
i
i
!
!
DO NOT squeeze handles together while pulling
cable out. Rather, with handles closed (and not
released0 grip head of tool in one hand and cable
in other; then pull cable straight out of tool.
DO NOT cut or remove insulation from individual
conductors. This may result in shorted or open
terminations within the finished modular plug
cable assembly.
All views of terminating procedures show
6- - position offset modular plugs. Procedures are
identical, and corresponding views would be
similar for 8- - position plugs.
Failure to fully seat the plug assembly in the
cavity will cause indenter to misalign with plug
strain- - relief cavities, which may result in die set
damage.
Tyco Electronics Corporation
Step 1
Step 2
Step 3
Step 4
STRIP Slot
Cutting and Stripping Unshielded Flat Oval Cable
Unshielded
Flat Oval
Cable
CUT Slot
Handles
Closed
Die Cable
Stop
Figure 3
Cable Strip Length
Refer to Figure 2
Note: Not to Scale
3 of 6


