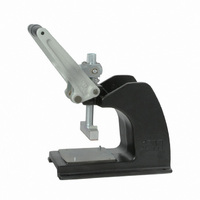
3640 3M, 3640 Datasheet - Page 2

3640
Manufacturer Part Number
3640
Description
STANDARD BENCH PRESS
Manufacturer
3M
Type
Pressr
Datasheet
1.3640.pdf
(5 pages)
Specifications of 3640
Description/function
Hand press assembly
Lead Free Status / RoHS Status
Not applicable / Not applicable
For Use With
PAK 50E and 50
Other names
0-00-54007-31556-8
00054007315568
3640
3M9426
5400731556
54007315568
80-6100-7882-8
80610078828
00054007315568
3640
3M9426
5400731556
54007315568
80-6100-7882-8
80610078828
Available stocks
Company
Part Number
Manufacturer
Quantity
Price
Part Number:
36401C
Manufacturer:
MURATA/村田
Quantity:
20 000
Part Number:
36401E0N2BTD
Manufacturer:
TETYCO
Quantity:
20 000
Part Number:
36401E0N4BGTD
Manufacturer:
TETYCO
Quantity:
20 000
Part Number:
36401E12NJSTD
Manufacturer:
TETYCO
Quantity:
20 000
Part Number:
36401E1N0BTD
Manufacturer:
TETYCO
Quantity:
20 000
Assembly Press Setup
1. The 3M
2. Place the shut height gauge on the base of the
3. Place the 3M
Note: The 3640 in the picture is shown with the
separately purchased 3M
adds stabilization to the press. It’s use is optional.
The 3335 Heavy Duty press is also applicable, but
not shown.
Locator Plate Setup
1. The 3M
2. Place the cable stops into the holes in the locator
3. Using a piece of cable, adjust the cable guide so
4. The locator plate can now be positioned on the
78-8133-3511-0-A
shipped with the locator plate. The setting height
is inscribed on the side of the gauge. The setting
of 18 1/2 is for the 3M
setting of 19 is for the 3M
press and bring down the shaft of the press onto
the surface of the shut height gauge lightly.
Adjust the shaft length by turning the adjusting
knob on the top of the shaft (3640) or the
adjusting collar on the lower portion of the shaft
of the press (3335) so that the press handle comes
completely down with only a small amount of
pressure from the press shaft on the shut height
gauge. On the 3335 only, tighten the locking
collar. The shut height distance is now set.
press shaft and lock it in place by sliding the
holding clamp on the platen into the groove on
the press shaft. Your assembly press is now
setup.
terminated to the end of two cables. It may not
be daisy-chained.
plate.
that the cable will be positioned in the center of
the locator plate when the edge of the cable is
against the guide. The small ridges on the surface
of the locator plate will help to hold the cable
straight and in position for termination.
press base under the platen. Some operators
prefer to place the locator plate into the press
after they have prepped the cable and connector
for termination. If you prefer this method, be
sure that the cable and connector do not move
when you place the locator plate into place on the
press.
™
™
3436-1J Shut Height Gauge was
PAK 50 Connector may only be
™
3442-126 Platen on the end of the
™
™
3771 Base Plate which
3640 Press and the
™
3335 Press.
2
Shut
height
gage
3436-1J
3771 Base Plate
Cable guide
Assembly Press Setup
Locator Plate Setup
Cable Placement
Cable Stop
Base Cover


