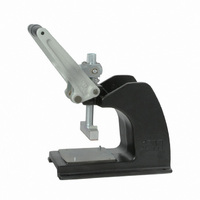
3640 3M, 3640 Datasheet - Page 4

3640
Manufacturer Part Number
3640
Description
STANDARD BENCH PRESS
Manufacturer
3M
Type
Pressr
Datasheet
1.3640.pdf
(5 pages)
Specifications of 3640
Description/function
Hand press assembly
Lead Free Status / RoHS Status
Not applicable / Not applicable
For Use With
PAK 50E and 50
Other names
0-00-54007-31556-8
00054007315568
3640
3M9426
5400731556
54007315568
80-6100-7882-8
80610078828
00054007315568
3640
3M9426
5400731556
54007315568
80-6100-7882-8
80610078828
Available stocks
Company
Part Number
Manufacturer
Quantity
Price
Part Number:
36401C
Manufacturer:
MURATA/村田
Quantity:
20 000
Part Number:
36401E0N2BTD
Manufacturer:
TETYCO
Quantity:
20 000
Part Number:
36401E0N4BGTD
Manufacturer:
TETYCO
Quantity:
20 000
Part Number:
36401E12NJSTD
Manufacturer:
TETYCO
Quantity:
20 000
Part Number:
36401E1N0BTD
Manufacturer:
TETYCO
Quantity:
20 000
5. Place the second piece of cable between the
6. Maintain pressure on the cables with your hand to
7. Make sure that the tips of the ejector latch on the
8. Place the connector body on top of the cable
9. If you did the assembly on the table top, place the
10. To complete the assembly, push the assembly
11. Lift the press handle and remove the terminated
12. Inspect the finished assembly to assure that the
78-8133-3511-0-A
latches of Cover 1, into the ridges of Cover 2
with its end against the cable stop ridge of Cover
2.
keep the cables in position.
connector are pushed in toward the center of the
connector.
engaging the protruding cover latches with the
appropriate slots on the connector body. The
connector may be pressed down by hand for an
initial placement.
locator plate and cables and connector together
onto the base of the assembly press. Take care
that the cables do not move and that the
connector does not slip out of the groove on the
locator plate.
press handle down until the press handle stops
against the press frame. This will press the
connector onto the cable permanently.
connector and cables from the locator plate.
cover latches are latched fully. If the cover
latches are not completely latched, a minor shut
height adjustment may be required.
Caution: Do not over terminate!
4
Hand pressure
Connector Assembly Steps 9, 10, 11, 12
Hand Pressure
Connector Assembly Steps 7, 8
Connector Assembly Steps 5, 6
Apply the
Connector
Place cable up
against no. 2
cover
top cable is
offset_pitch
bottom cable
aligned
Press
handle
down
Push in
Latch Tips
3442-126
Platen


