EVAL-PIXIE Flexipanel, EVAL-PIXIE Datasheet - Page 9
EVAL-PIXIE
Manufacturer Part Number
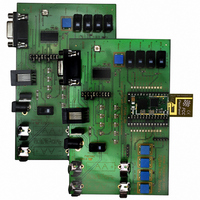
EVAL-PIXIE
Description
KIT EVALUATION PIXIE
Manufacturer
Flexipanel
Series
Pixie™r
Type
802.15.4/Zigbeer
Specifications of EVAL-PIXIE
Frequency
2.4GHz
Interface Type
RS-232
For Use With/related Products
Pixie ZigBee Modules
Lead Free Status / RoHS Status
Lead free / RoHS Compliant
Other names
658-1012
PIXIE-EVAL
ZEVR3
PIXIE-EVAL
ZEVR3


19. Press the Bind button once on the coordinator so
20. Power up the Router. The LED will flash the
21. Press the Bind button once on the Router so it
22. Power up the second Fast End Device. The LED
23. You now have a network with the following
24. Press the bind button on one of the End Devices
25. You have bound pushbutton EP1 on first end
Page 9
lights, you may release the button. The LED will
flash the letter L in Morse code
finds the network, it will
(
N (
it will allow another device to join.
letter L in Morse code
network, it will
It has successfully joined. If the letter N (
flashes, reset the board and try again.
will allow another device to join.
will flash the letter L in Morse code
it finds the network, it will
Y (
letter N (
again
architecture:
twice and on the other End Device five times.
After a few seconds, both devices will flash the
letter Y in Morse code
bind was successful. (If one registers success
and the other doesn’t, try resetting both devices
and continuing.
version 1.0-3.5-2.0.)
device to EP4 on the second end device. Press
EP1 on the first end device and the LED EP4
should toggle on the second end device, routing
through the coordinator and the router.
–
•
–
– –
–
•
) flashes, reset the board and try again.
•
). It has successfully joined. If the letter
25-Jun-07
– –
). It has successfully joined. If the
–
•
) flashes, reset the board and try
flash the Morse letter Y (
This is an occasional bug in
Pixie Eval Kit DS482-11
(
(
•
flash the Morse letter Y
–
–
•
flash the Morse letter
– –
• •
)
. When it finds the
)
indicating that the
(
•
–
Coordinator
Router
End device
(
•
• •
–
)
. When it
• •
)
. When
–
•
– –
–
© FlexiPanel Ltd
).
•
)
26. Each unit has an input on EP1 and EP2, and an
Tutorial 4: Sniffer
Tutorial 4 illustrates the use of a sniffer. The network
will use the same coordinator and two end devices as
tutorial 3, but the router will be reprogrammed and
used as a sniffer.
Reprogramming the Router
To reprogram the router as a sniffer:
1.
2.
3.
4.
5.
Starting the sniffer
6.
7.
8.
9.
output endpoint on EP4 and EP5. Try binding
further inputs and outputs. Remember, to bind
endpoint EPx, you will need to press the Bind
button (x+1) times.
On your Windows PC, start up MPLAB and
connect the ICD2 In-Circuit Debugger.
Remove the jumper pins A1-B1, A2-B2, A3-B3
from the router board.
programming connector from ICD2 to the RJ11
socket marked IDC2 on the board. Power up the
board.
Choose File > Import in the MPLAB menu. Open
the file PXMF.hex which is in the PixieMAC
Development Kit. This is the firmware for the
Sniffer.
Choose Programmer > Program to reprogram
the Pixie. After a few moments you should get
the message “…Programming Succeeded”.
Turn off the power to the board, replace jumper
pins A1-B1, A2-B2, A3-B3. Reprogramming of
this board is complete.
Turn off the End Devices.
Coordinator with the Bind button pressed down
so that it establishes a new network.
Ensure a serial cable is connected to the Sniffer
board but that HyperTerminal is not connected to
the COM port.
Start the Sniffer application.
downloaded from www.flexipanel.com.
In the Port / Channel Select box, select the COM
port connected to the Sniffer. Press the Scan
button.
Verify that the status bar in the sniffer says
“Scanning” or “Sniffing”. This confirms that it is
communicating with the Eval Board.
Patents apply and/or pending
Connect the RJ11
www.FlexiPanel.com
Turn on the
This can be
Related parts for EVAL-PIXIE
Image
Part Number
Description
Manufacturer
Datasheet
Request
R

Part Number:
Description:
ENERCHIP CC EVAL KIT
Manufacturer:
Cymbet Corporation
Datasheet:

Part Number:
Description:
BOARD EVAL FOR AD976
Manufacturer:
Analog Devices Inc
Datasheet:

Part Number:
Description:
BOARD EVAL FOR ADXL345
Manufacturer:
Analog Devices Inc
Datasheet:

Part Number:
Description:
ENERCHIP CC SEH EVAL KIT
Manufacturer:
Cymbet Corporation
Datasheet:

Part Number:
Description:
ENERCHIP EP ENERGY HARVEST EVAL
Manufacturer:
Cymbet Corporation
Datasheet:

Part Number:
Description:
EVAL BOARD FOR TW6864-LB2-GR
Manufacturer:
Intersil
Datasheet:
Part Number:
Description:
EVAL BOARD FOR TW8816-LB3-GR
Manufacturer:
Intersil
Datasheet:
Part Number:
Description:
EVAL BOARD FOR TW8817-TA3-GRS
Manufacturer:
Intersil
Datasheet:

Part Number:
Description:
EVALUATION MODULE FOR ADUM4160
Manufacturer:
Analog Devices Inc
Datasheet:

Part Number:
Description:
BOARD EVALUATION ADCMP581BCP
Manufacturer:
Analog Devices Inc
Datasheet:
Part Number:
Description:
BOARD EVALUATION ADM1041
Manufacturer:
Analog Devices Inc
Datasheet:

Part Number:
Description:
EVAL BOARD FOR STM32F107VCT
Manufacturer:
STMicroelectronics
Datasheet:
Part Number:
Description:
BOARD EVAL FOR AD1954
Manufacturer:
Analog Devices Inc
Datasheet:
Part Number:
Description:
BOARD EVAL FOR AD1955
Manufacturer:
Analog Devices Inc
Datasheet:

Part Number:
Description:
BOARD EVAL FOR AD7655
Manufacturer:
Analog Devices Inc
Datasheet: