IAMA3535 Red Lion Controls, IAMA3535 Datasheet - Page 4
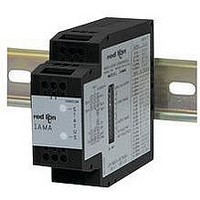
IAMA3535
Manufacturer Part Number
IAMA3535
Description
Isolation Amplifier
Manufacturer
Red Lion Controls
Specifications of IAMA3535
Supply Voltage Ac, Min
0V
Supply Voltage Dc, Min
11V
Width
3.12"
Signal Input Type
Selectable Current Or Voltage
Configuration Setup
DIP Switch
Iso-amp Mounting Type
DIN Rail
Supply Voltage Dc, Max
36V
Input Accuracy
± 0.1% Of FS
Signal Output Type
Selectable Current Or Voltage
Rohs Compliant
Yes
Lead Free Status / RoHS Status
Lead free / RoHS Compliant


POWER AND OUTPUT CONNECTIONS
Power
For best results, the Power should be relatively “clean” and within the specified
variation limits. Drawing power from heavily loaded circuits or from circuits
that also power loads that cycle on and off, should be avoided.
Current Output
DIP switch S2 should be set for the desired full scale output current. (20 mA =
ON; 1 mA = OFF).
Voltage Output
(V
Note: Although signals are present at voltage and current outputs at the same
GREEN
1.0 INPUT SET-UP USING FACTORY CONFIGURATION
S1
Primary power is connected to terminals 2 and 3 (labeled VDC- and VDC+).
Wiring for a current output is connected to terminals 1 (I
Wiring for a voltage output is connected to terminals 5 (V
OUT
time, only the selected range is in calibration at any one time.
Example: A 0 to 10 VDC output is selected. The voltage level present at the
V
LED
RED
OUT-
I
LED
I
OUT+
voltage output terminals is in calibration, but the signal appearing at
the current output terminals does not conform to any of the current
output ranges.
OUT-
ON
+
1V
I
).
IN
I A M
A
1 2
IAMA
10
S
T
A
T
U
S
4
7 8 9
1 2 3
OUTPUT
RANGE
3
5
12
6
4
MC2290D
S
T
A
T
U
S
5
O N
2 0 m
1 0
9
8
7
6
5
4
3
2
1
6
A /1
IN
O U
IN P
O U
100V
INPUT
COMM
m A
F IE
T F
~ -
V
U T
T P
L D
10V
O U
IE L
U T
R A
/F A
~ -
T P
D /F
OUT+
R A
N G
C T
U T
A C
N G
RANGE
7
E
.
INPUT
(AC)
T .
E
DC+
(AC)
DC-
8
9
10
OUTPUT
1
1
2
2
3
3
20mA
1mA
4
4
Step 1.3
Step 1.4
5
5
S1
S1
6
6
OUT
7
7
S2
8
8
-) and 4 (I
9 10
9 10
OUT
SCALING PROCEDURE
or current meter used in the scaling process.
scaling is attempted, the factory calibration values will be stored in place of the field values. This
will prohibit erroneous operation of the IAMA. The scaling procedure will have to be repeated.
of the mode/calibration DIP switches (S1-1 or S1-2). Therefore, the scaling can be aborted any time
before the full scale value is saved. This is accomplished by cycling power to the IAMA. The IAMA
will restore the factory or previous field scaling values at power up depending on the setting of the
DIP switches. See Mode Selection for more detailed instructions for selecting factory and field
modes at power up. See Table 2 and 3 for the input and output range DIP switch settings.
S2
S2
1
1
The accuracy of the IAMA is dependent on the accuracy of the calibration source and the voltage
If an out of range (see Table 1 for LED indications) or illegal (full scale less than minimum scale)
The final storage of the zero and full scale values to E
-) and 6
OUT
ON
ON
+
).
1.1 Remove power.
1.2 Connect signal wires to the correct input terminals based on the maximum
1.3 Set Input Range switches (S1 switches 6 through 10) to the desired Input Range
1.4 Set Input Field/Fact. switch (S1 switch 2) to the off position.
1.5 Apply power to the IAMA.
1.6 Input set-up complete. Go to Step 3.0 or Step 4.0.
4
signal input.
(See Table 3). (0 to 10 VDC range shown).
Solid illumination of Green LED if signal is within the minimum and maximum
Slow blinking of Red LED if signal decreases below minimum limit of selected input
Rapid blinking of Red LED if signal increases above maximum limit of selected
Terminal 7: max. signal input 1 VDC
Terminal 8: max. signal input 10 VDC
Terminal 9: max. signal input 100 VDC
Terminal 10: max. signal input 100 mA
Terminal 12: signal common
limits of the selected input range.
range.
input range.
INPUT CONNECTIONS
Current Input
connected to terminals 10 (I
12 (INPUT COMMON).
Voltage Input
connected to terminal 12 (INPUT
COMMON) and one of the three
available voltage terminals listed
below, depending on maximum
input voltage.
Wiring for a current input is
Wiring for a voltage input is
Terminal 7: 1 VDC max.
Terminal 8: 10 VDC max.
Terminal 9: 100 VDC max.
IN
) and
2
PROM is not done until the last transition
V
OUT-
I
I
OUT+
OUT-
1V
I
IN
IAMA
10
4
7 8 9
1 2 3
5
12
6
MC2290D
A
S
T
T
U
S
INPUT
COMM
100V
~ -
V
10V
~ -
OUT+
(AC)
DC+
(AC)
DC-
Related parts for IAMA3535
Image
Part Number
Description
Manufacturer
Datasheet
Request
R

Part Number:
Description:
Counter
Manufacturer:
Red Lion Controls
Datasheet:
Part Number:
Description:
Miniature Length Sensor
Manufacturer:
Red Lion Controls
Datasheet:
Part Number:
Description:
Model Lsc - Single Channel Output Length Sensor
Manufacturer:
Red Lion Controls
Datasheet: