33000 Parallax Inc, 33000 Datasheet - Page 10
33000
Manufacturer Part Number
33000
Description
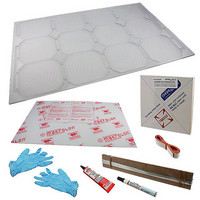
Power Management Modules & Development Tools 30W Solar Cell Kit
Manufacturer
Parallax Inc
Datasheet
1.33000.pdf
(20 pages)
Specifications of 33000
New! Us2012 Catalog Page
Solar Cells_Panels
Voltage - Output
*
Operating Temperature
*
Current Short Circuit (isc)
*
Package / Case
-
Lead Free Status / RoHS Status
Lead free / RoHS Compliant
Available stocks
Company
Part Number
Manufacturer
Quantity
Price
Company:

Part Number:
33000-0001
Manufacturer:
MOLEX
Quantity:
43 635
Company:
Part Number:
33000-0001
Manufacturer:
MOLEX
Quantity:
35 000
Company:
Part Number:
33000-0002
Manufacturer:
MOLEX
Quantity:
25 000
Company:
Part Number:
33000-0002
Manufacturer:
STARCONN
Quantity:
12 450
Company:
Part Number:
33000-0003
Manufacturer:
MOLEX
Quantity:
43 637
Part Number:
330000001
Manufacturer:
MOLEX
Quantity:
20 000
Part Number:
330000002
Manufacturer:
MOLEX
Quantity:
20 000


The tabbing wire MUST be soldered flat to the cell, with NO solder blobs or spikes anywhere
along the conductors. Blobs and spikes prevent the cell from being fully seated into the Base Panel,
not only preventing the Cover Panel from sealing tightly, but the cells can break during the gluing/seating
process much more easily. If you do get any spikes or blobs as you work, re-tin your iron with some
solder, add more flux to the contact area, and re-wipe across the connection to make everything smooth.
Note that a “break” is different than a “crack.” If at any point you break a cell, you’ll need to repair it
before proceeding (see page 19). However, if you happen to
don’t worry, just be extra careful with it and proceed with the process. Cracks do not appreciably
diminish the cell’s output power, so don’t stress over it.
Copyright © Parallax Inc.
Pre-tin your soldering iron with about
3/8” of solder. Gently wipe it across the
top of the tabbing wire in one smooth
motion (Figure 19). Be careful—don’t
push too hard on the cell. If the solder is
not melting to the cell, re-tin your
soldering iron and apply additional flux if
necessary. As you wipe the iron across
the cell, gently guide the wire to keep it
aligned with the cell’s conductor.
If you notice that the solder on your iron
is used up, stop and add a little more
solder to your iron tip and then continue
wiping the rest of the junction, slightly
overlapping the point where you stopped
so that no part of the wire is skipped. It
wouldn’t affect performance, but this
ensures that the wire is soldered as flat
to the cell as possible.
Solder another piece of tabbing wire to
the second conductive strip. You should
end up with something that resembles
Figure 20. You may need to add
additional solder to your iron tip as you
wipe across the cell. A proper solder
connection is made when you see the
pre-tinned solder (that’s already on the
flat wire) melting just slightly ahead of
your “wipe” across the cell.
Look closely at your solder connections
and make sure that they are as flat as
possible. If not, re-tin, add flux, and re-
wipe to smooth them out. Fixing
problems at this stage is much easier
than trying to fix them later.
Allow the cell to cool for about a minute before removing the tape. Slowly peel the tape off of the
cell, trying to not stress it in any way. When the cell is free, lift it by the two tabbing wires, and put
it in a safe place. Do not handle or flex the cell any more than you have to, until final assembly in
Section C below.
Repeat this tabbing wire procedure for eight more cells (for a total of nine).
30 Watt Solar Panel Kit (#33000)
crack
a cell but it’s still all in one piece,
Figure 19
Figure 20
v1.0 2/19/2010 Page 10 of 20
Related parts for 33000
Image
Part Number
Description
Manufacturer
Datasheet
Request
R


Part Number:
Description:
Microcontroller Modules & Accessories DISCONTINUED BY PARALLAX
Manufacturer:
Parallax Inc

Part Number:
Description:
BOOK UNDERSTANDING SIGNALS
Manufacturer:
Parallax Inc
Datasheet:


Part Number:
Description:
COMPETITION RING FOR SUMOBOT
Manufacturer:
Parallax Inc
Datasheet:


Part Number:
Description:
TEXT INFRARED REMOTE FOR BOE-BOT
Manufacturer:
Parallax Inc
Datasheet:
Part Number:
Description:
BOARD EXPERIMENT+LCD NX-1000
Manufacturer:
Parallax Inc
Datasheet:

Part Number:
Description:
CONTROLLER 16SERVO MOTOR CONTROL
Manufacturer:
Parallax Inc
Datasheet:

Part Number:
Description:
BASIC STAMP LOGIC ANALYZER
Manufacturer:
Parallax Inc
Datasheet:

Part Number:
Description:
IC MCU 2K FLASH 50MHZ SO-18
Manufacturer:
Parallax Inc
Datasheet: