FLUKE-287/FVF Fluke Electronics, FLUKE-287/FVF Datasheet - Page 23
FLUKE-287/FVF
Manufacturer Part Number
FLUKE-287/FVF
Description
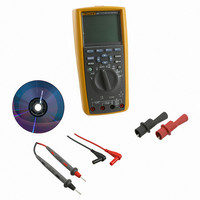
COMBO KIT DMM & ACCESSORY
Manufacturer
Fluke Electronics
Series
FlukeView® Forms, 28xr
Type
Digital (DMM)r
Specifications of FLUKE-287/FVF
Includes
Battery, Case, Clips, Software, Test Leads
Style
Handheld
Display Digits
4.5
Display Type
LCD, Bar Graph
Display Count
50000
Function
Voltage, Current, Resistance, Capacitance, Temperature, Frequency
Functions, Extra
Continuity, dB
Features
Backlight, Data Logging, Hold, Memory, Min/Max/Ave
Ranging
Auto/Manual
Response
True RMS
Lead Free Status / RoHS Status
Lead free / RoHS Compliant
Other names
287/FVF
3340186
614-1151
3340186
614-1151


recording mode, the time period is five minutes. For MIN MAX,
Peak and AutoHold modes, the time period is the same time the
Auto Off feature is set for. See the “Setting Backlight and Auto
Off Timeouts” section later in this manual. Battery saver mode
conserves battery power by shutting down circuits not necessary
for the selected function, including the display. However, the LED
surrounding the power button (O) will continue to flash to
indicate the Meter is still collecting data.
The Meter “wakes up” from battery-save mode under the
following conditions:
These condictions only awaken the Meter and does not change
the Meter’s function or mode of operation.
Controlling the Backlight
If viewing the display becomes difficult in low-light conditions,
press G to activate the LCD backlight. The backlight button
cycles the backlight through three states: low, high, and off. The
Meter displays a message if the battery level will not support the
backlight operation.
To conserve battery life, a user-adjustable timeout controls how
long the backlight stays on. The default timeout is 5 minutes. To
change the timeout, refer to “Setting Backlight and Auto Off
Timeouts” later in this manual.
A button is pressed
The rotary knob is moved
A lead is removed or inserted into a current input jack.
The Meter changes range
IR Communications begin
Selecting the Range
The Meter’s selected range is always displayed above the right-
hand end of the bar graph, as the range indicator. Pressing R
switches the Meter between manual and autoranging. It also
cycles through the Meter ranges when manual ranging is
enabled.
In autorange, the Meter selects the lowest range to display the
highest available precision (resolution) for the input signal. If
Manual range is already enabled, press and hold R for one
second to enter the autoranging mode.
If autorange is enabled, press R to enter manual ranging.
Each additional press of R sets the Meter to the next higher
range, unless it is already in the highest range, at which point the
range switches to the lowest range.
Understanding Function Menus
Each primary measurement function (rotary switch position) has
a number of optional sub-functions or modes accessed by
pressing the softkey labeled Menu (F1). A typical menu is shown
in Figure 5.
You cannot use R in conductance, diode test, LoZ,
Low Ohms, and temperature functions. These
functions all use a fixed range.
Note
Selecting the Range
13