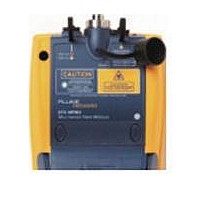
DTX-MFM2 FLUKE NETWORKS, DTX-MFM2 Datasheet - Page 32

DTX-MFM2
Manufacturer Part Number
DTX-MFM2
Description
DTX-MFM2 REPLACEMENT FOR DTX-MFM
Manufacturer
FLUKE NETWORKS
Datasheet
1.DTX-MFM2.pdf
(74 pages)
Specifications of DTX-MFM2
Multimode Fiber Module Set
ROHS COMPLIANT
DTX-MFM2/GFM2/SFM2 Fiber Modules
Users Manual
26
Autotest in Smart Remote Mode: Test the Fiber Link
11 Clean and inspect the connectors on the cabling to be
12 Turn the rotary switch to AUTOTEST. Verify that the
13 Press
14 If Open or Unknown appears, try the following:
If you disconnected the test reference cords from
the tester’s or smart remote’s output, you must
set the reference again to ensure valid
measurements.
tested; then connect to the link. The tester shows test
connections for the test method you selected. Figure 10
shows connections for the 1 Jumper method.
media type is set to Fiber Loss. Press
Media to change it if necessary.
• Verify that all connections are good.
P
on the tester or smart remote.
W
Caution
J
Change
15 If bi-directional testing is enabled, the tester prompts
16 To save the results, press
In the results for Smart Remote mode, Input Fiber and
Output Fiber refer to the fibers connected to the main
tester’s input and output ports. For a bi-directional test,
these are the fibers connected to the main tester’s input
and output ports at the end of the test.
• Verify that the tester at the other end is on. (The
• Try different connections at the patch panel.
• Try changing the polarity of the connections at one
• Use the visual fault locator to verify fiber continuity.
you to switch the fibers halfway through the test.
Switch the fibers at the patch panels or adapters (not
at the tester’s ports) at both ends of the cabling.
for the input fiber; then press
fiber ID for the output fiber; then press
tester cannot activate a sleeping or powered-down
tester at the far end through the fiber modules.)
end.
N
, select or create a fiber ID
N
. Select or create a
N
again.


