790163-1 TE Connectivity, 790163-1 Datasheet - Page 3
790163-1
Manufacturer Part Number
790163-1
Description
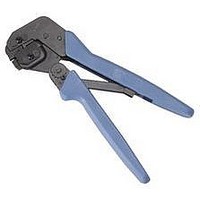
HAND TOOL ASSEMBLY AND DIE ASSEMBLY
Manufacturer
TE Connectivity
Type
Hand Toolr
Specifications of 790163-1
Rohs Compliant
NA
Lead Free Status / RoHS Status
RoHS Not Applicable


Rev
Insulation
Stuffer
3. While holding the assembly, carefully close the
tool handles until the ratchet releases, then allow
the handles to open FULLY.
4. Remove the modular plug from the tool, and
make sure that the crimp requirements are met
according to the applicable application specification
(refer to first paragraph of Section 4).
If necessary, adjust the tool ratchet according to
Paragraph 5.1 to obtain the proper crimp height.
i
i
Housing
Support
Wire Stuffer
Modular Plug
(Ref)
This tool terminates 3 areas of the modular plug.
For proper alignment, make sure to apply forward
pressure on the cable while closing the tool
handles.
Crimp Height Gage 904170-1 is available to be
used as a quick verification of acceptable crimp
height as shown in Figure 4. Refer to 408-4389
for instructions on using the gage.
Checking Crimp Height
Modular Plug Bottomed
in Crimping Chamber
Figure 3
Figure 4
Crimp Height
Gage (Ref)
Tyco Electronics Corporation
The tool ratchet mechanism features an adjustment
wheel with numbered settings. The adjustment wheel
controls the amount of handle pressure exerted on
the jaws during crimping. If the crimp is not
acceptable, adjust the ratchet as follows:
If the wire stuffer is not assembled onto the insulation
stuffer or if correct alignment of these two parts is
unsure, proceed with the following:
1. Remove the lockscrew from the ratchet
adjustment wheel.
2. With a screwdriver, adjust the ratchet wheel
from the front of the tool.
3. Observe the ratchet adjustment wheel. If a
tighter crimp is required, rotate the adjustment
wheel counterclockwise to a higher–numbered
setting. If a looser crimp is required, rotate the
adjustment wheel clockwise to a lower–numbered
setting.
4. Re–assemble the lockscrew.
5. Make a sample crimp. If the crimp is acceptable,
the adjustment setting is correct. If the crimp is
unacceptable, continue to adjust the ratchet, and
again measure a sample crimp. If a proper crimp
cannot be obtained, the tool or die assembly must
be replaced. Refer to Section 7.
1. Install the wire stuffer onto the insulation stuffer
using the 4–40 UNC
screw included with the die assembly. Refer to
Figure 2.
Ratchet
Adjustment
Wheel
Screwdriver
Lockscrew
Figure 5
(Figure 5)
.621 in. socket head cap
of 4